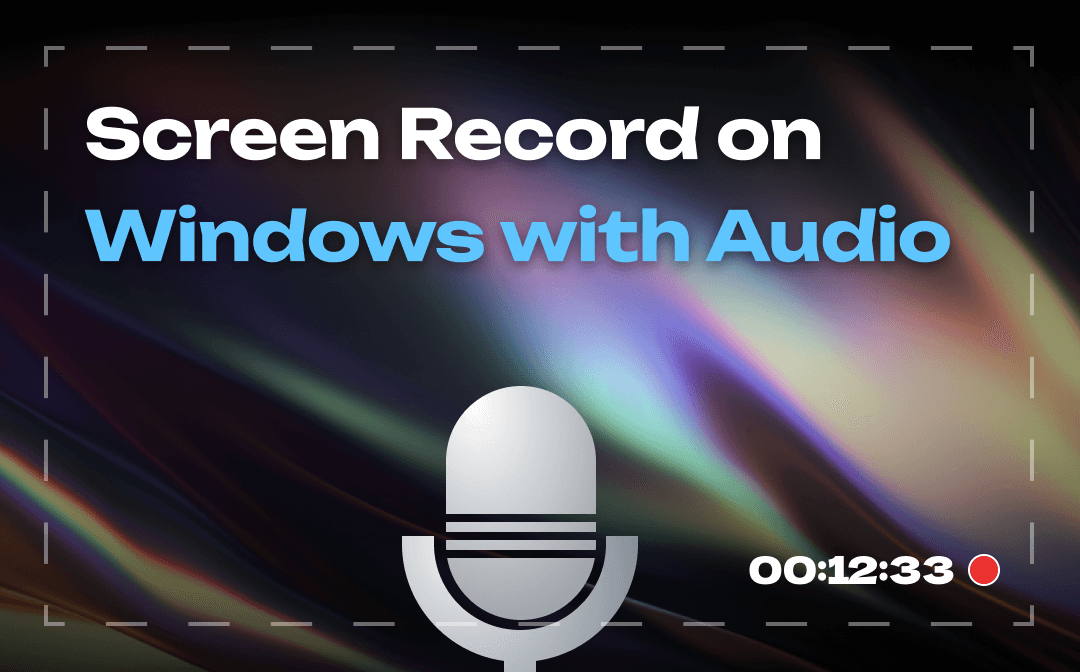
Do you want to keep game highlights but don’t know how? Did you watch a good video but have no way to download it? Or do you want to save an important online meeting to review later? Screen recording with audio is your best solution.
Today’s blog by AWZware will show you 4 effective apps to record screen and audio. Each one has its advantages and disadvantages. Read to learn more.
Screen Recording with Audio on Windows through Xbox Game Bar
People search the Internet for how to screen record on Windows 10 with audio. And most people are trying to find a simple way. Well, the Xbox Game Bar is a great tool.
Founded by Microsoft, the Xbox Game Bar is a customizable gaming overlay that is built into every Windows 10 system. It is mainly used for recording gameplay on PC, but it can also be used for screen recording with audio. Check out the next paragraph to learn how to record a screen with audio in just a few clicks.
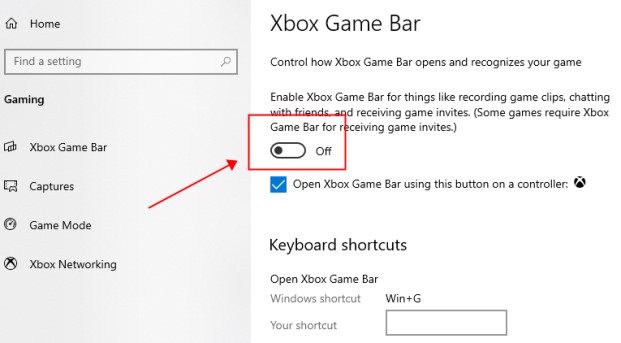
Before checking out the steps, you should turn the switch on in Settings >> Gaming >> Xbox Game Bar. Scroll down to learn keyboard shortcuts, or you can customize your shortcuts.
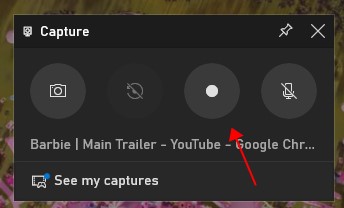
Step 1. Use shortcuts to open the game bar.
Press “Win+G” to launch the Xbox Game Bar. There will be several widgets with different functions displayed on your screen.
Step 2. Start screen recording with audio.
Navigate to the tab or any window you want to record. Click the button to screen record with audio. Or you can use the keyboard combination “Win+Alt+R” to begin. The recording will start as soon as you press the button.
Tips: Tap anywhere on the screen, and these widgets will disappear. A floating bar will appear, and you can now apply any action on your computer.
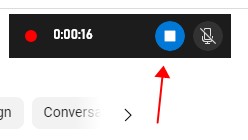
Step 3. Stop screen recording with audio.
Click on the blue button, and you can end the recording. The shortcut “Win+Alt+R” can stop it as well. Videos will be saved in the gallery, where you can preview them.
- There is no need to download Game Bar, you can use it directly.
- You can record screen and audio together in one click.
- It is a free Windows screen and audio recorder.
- You can only record videos for less than 30 minutes.
- You cannot edit videos.
- Any action to split the screen will pause the recording.
Screen Recording with Audio with AWZ Screen Recorder
Well, Game Bar is a little bit simple, isn’t it? It doesn’t allow you to edit while recording. What if you have something that needs to be pointed out? At this time, you need AWZ Screen Recorder. As a professional but easy-to-use tool, it has been liked by many users. Check out how to Screen record with audio using it.
Step 1.Download it from its official website and launch it.
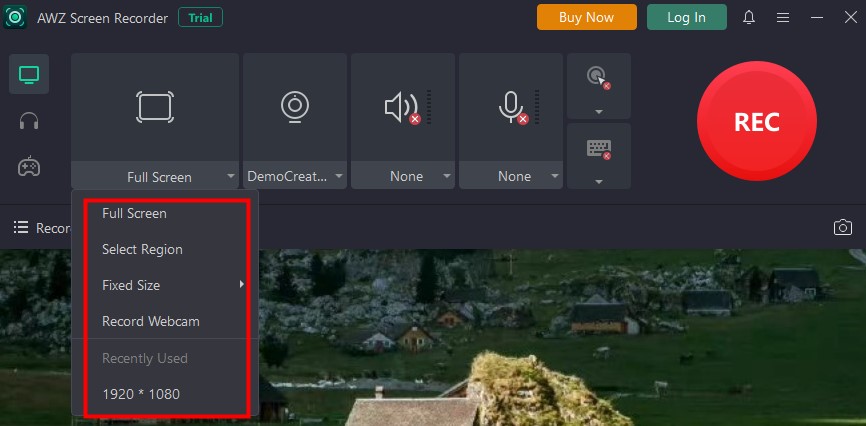
Step 2. Adjust capture options.
Choose to record the full screen and audio, or any part that you like.
Step 3. Record screen and audio now.
Tap on the “REC” button or press “F12”, and the recording will begin after a 3-second countdown.
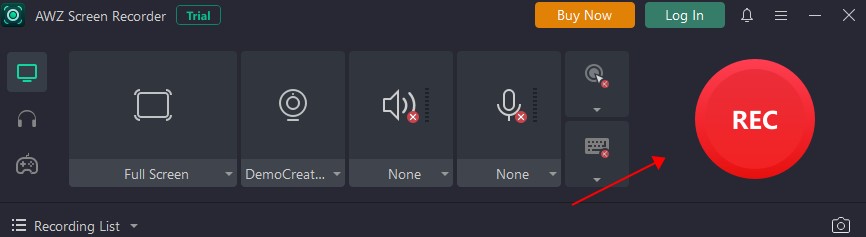
Step 4. End the recording by tapping the stop sign, or pressing “F12”.
- A handy tool. You can capture the screen with sound with just a tap.
- All-in-one. It integrates recording screens and taking screenshots together.
- Instant sharing. You can directly share your work on YouTube, Facebook, Instagram, and so on.
- It is a feature-rich app, you need time to explore.
- Recordings will be saved on your computer, if you record too much, it may take up a lot of your storage.
Screen Recording with Audio by ScreenRec
If you are trying to find an easy-to-use screen audio recorder, you shouldn’t miss ScreenRec. It is a light but very useful tool with simple steps. You can utilize this app without signing up or paying. Let’s see how to use it.
Step 1. Download and launch ScreenRec on your computer.
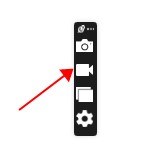
Step 2. Select the recording area. Tapping on the video player icon to start recording.
It will begin to record after a 3-second countdown.
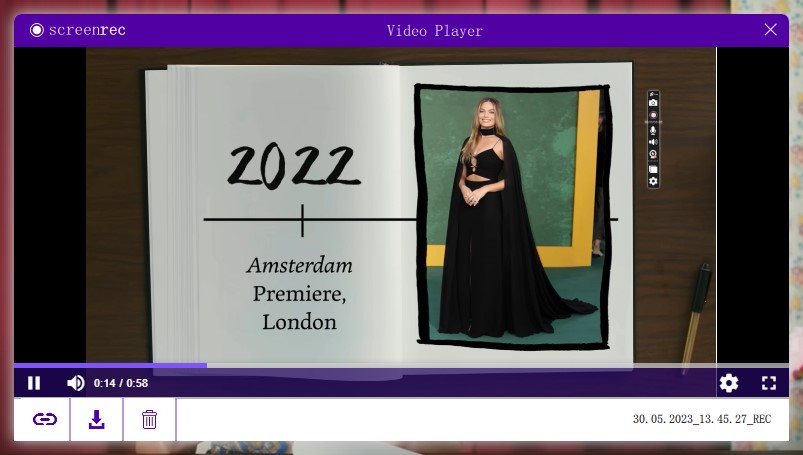
Step 3. Stop recording and save videos.
You can stop it by clicking the stop button below or tapping on the record button again. The videos will be saved in ScreenRec’s gallery. Download them if needed.
Step 4. Preview and share videos.
You can preview and rename videos. It generates a link that helps you share the video with friends.
- Free tool.
- Easy to use. You are able to record screen and audio in 3 actions: click, select, and click.
- Record any part of the screen.
- Splitting screens while recording is available.
- Sign-up is a must. You have to create an account to screen record with audio for more than 5 minutes. Creating a private link also requires that.
- You can only preview but not edit videos in the gallery.
- Saving videos as MP4, other formats are not available.
How to Record Screen with Audio Using DemoCreator
If you are looking for how to record screen and audio on Windows, DemoCreator is the last one you want to miss. It is a powerful screen audio recorder and video editor. It can record the screen along with the audio. The following part is going to show you how to use it.
Step 1. Install and open it on the computer.
Step 2. Tap on the “All-in-One Recorder” button and customize the recording settings.
According to different situations, it provides you with different recording sizes, such as full-screen, 3:4/9:16 for portraits, 16:9 for YouTube, and so on.
Step 3. Click the “REC” button or “F9” to start recording.
It will work after a countdown of 3 seconds.
Alt: Windows Screen Audio Recorder
Step 4. Stop recording by clicking the stop icon or pressing “F10”.
Step 5. Edit videos.
After recording, it will guide you to the editor. There are many features for you to explore.
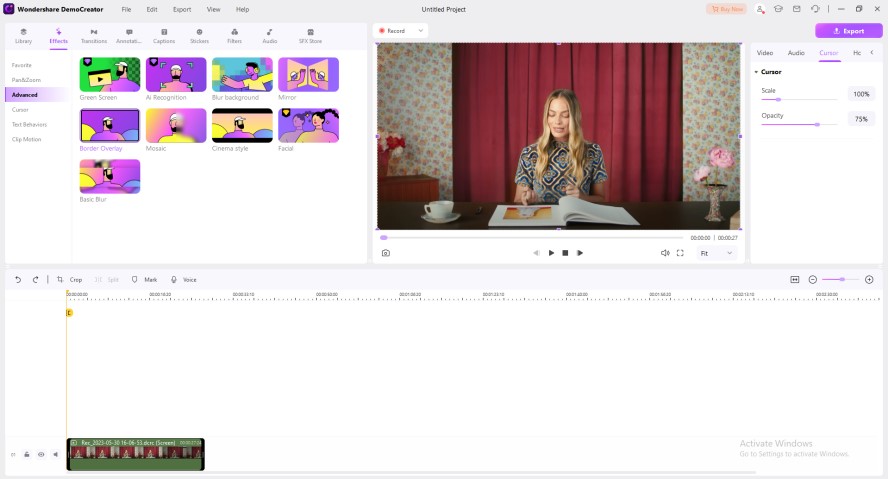
- Professional editor. You can put effects, transitions, and more on videos.
- Annotate while recording.
- Capture screen, sound, and webcam altogether.
- Export videos are only available to subscribers.
- In a free trial, you can only record videos for less than 15 minutes.
![How to Screen Record on Mac with Audio in 3 Ways [Simple Steps]](https://img.swifdoo.com/image/how-to-screen-record-on-mac-with-audio.jpg)
How to Screen Record on Mac with Audio in 3 Ways [Simple Steps]
Wonder how to screen record on Mac with audio without a hassle? This article covers three ways and screen recorders to help along with steps to record.
READ MORE >Final Thoughts
This post recommends you 4 ways to screen record with audio on Windows, along with their pros and cons. If you’re a vlogger, DemoCreator is recommended. If you want to share a video message with friends, you can choose Game Bar and ScreenRec. Try AWZ Screen Recorder, if you need a handy tool to highlight while recording.