⭐️⭐️ Quick Start
Many YouTubers record video and audio separately to guarantee high-quality content, and it's nothing new that you can do the same. Two simple methods are available if you want to attempt as well.
➡️ If you want to record audio from or for a video, AWZ Screen Recorder is the best choice. This professional recorder can record screen, audio, and webcam. The great thing is that it allows you to record a webcam with an AI background or green screen. You can click the download button to get the recorder and try it yourself.
➡️ If you want to record video and audio simultaneously but want to save them as separate files, you can use OBS Studio. It is one open-source recording software that will keep the audio track separate.
Read on if you want to learn how to use these two programs.
1. Record Audio and Video Separately via AWZ Screen Recorder
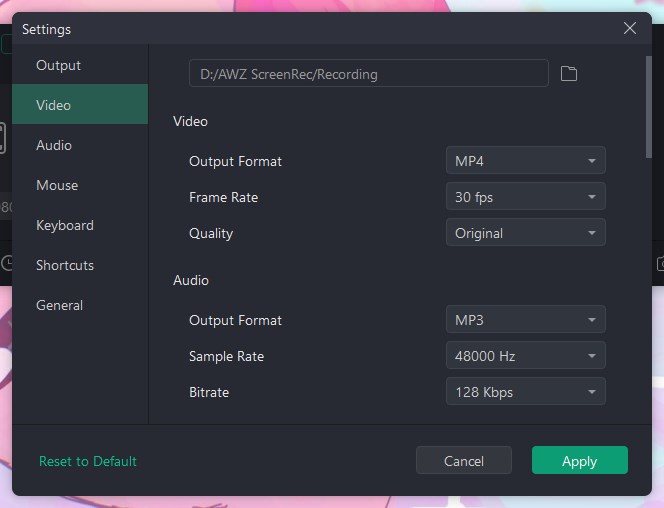
AWZ Screen Recorder is one powerful yet tiny recorder designed to help users record high-quality video and audio. It offers a variety of customization options to give you complete control over your recording. For example, you can adjust the output format, frame/sample rate, quality, webcam background, mouse clicks, key presses, etc.
Below is how to use AWZ Screen Recorder to record video and audio. Download the recorder and follow the steps to start.
Before the recording, click the hamburger icon and go to Settings to adjust the format and other settings.
How to Record Screen Only
AWZ Screen Recorder can record any on-screen activity. It allows you to record the entire screen, an app window, or any part of the screen.
1. Launch AWZ Screen Recorder and go to Record Screen.
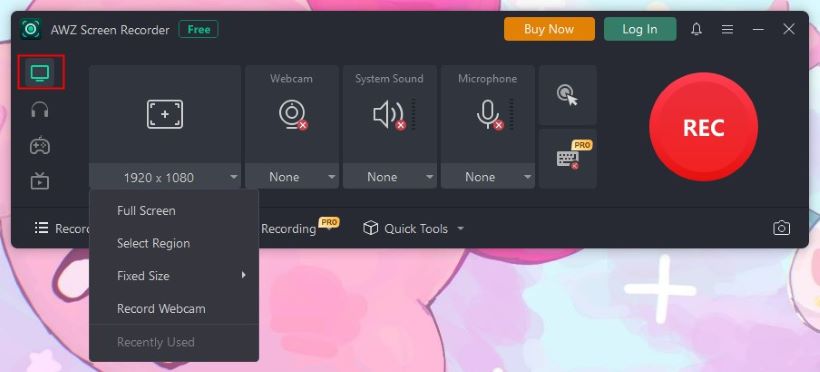
2. Adjust the recording area.
3. If needed, turn on the webcam and let it show mouse clicks and keyboard key presses.
4. Click the REC button to start.
You can use the annotation tools to add rectangles, ellipses, arrows, and text or draw anything during the recording.
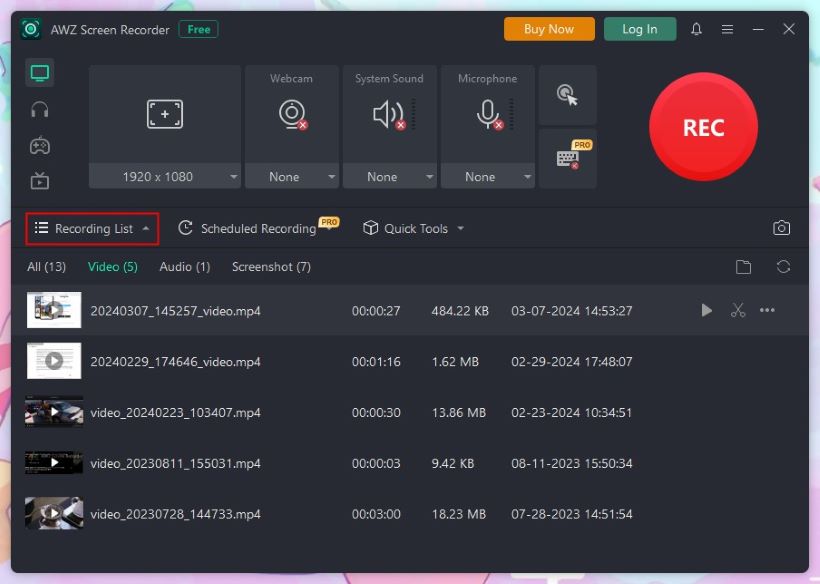
5. Click the Stop button and go to the Recording List to check the recording. From there, you can edit and compress the video.
How to Record Webcam Only
AWZ Screen Recorder allows you to change your webcam background to protect your privacy and make videos more fun. You can upload images to customize the background.
1. In AWZ Screen Recorder, go to Record Screen > Enable Webcam and select the device.
2. Click the Preview option to access Advanced Settings.
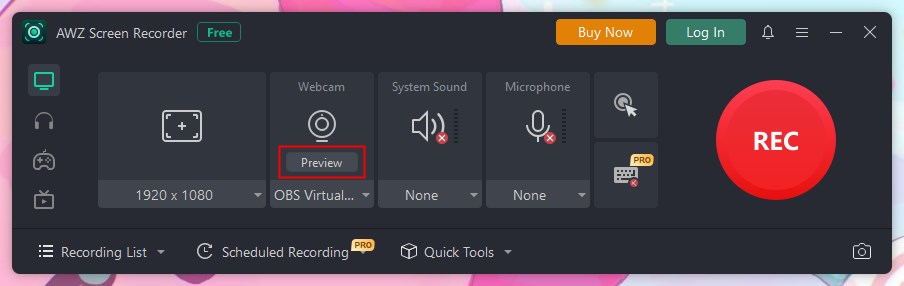
3. Under General, you can adjust the position and shape; Under Background, you can change the background.
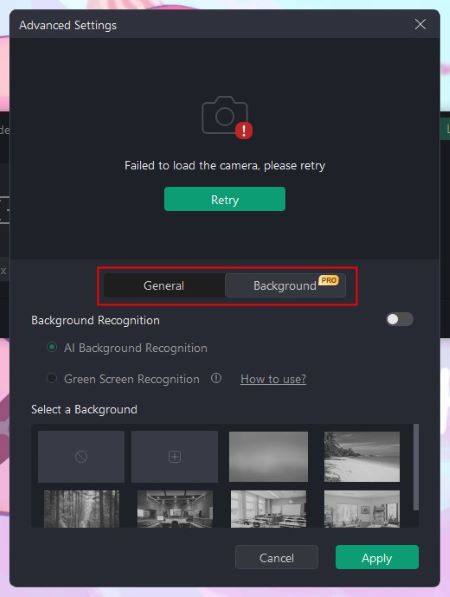
4. Save the changes and click the REC button to start.
How to Record Audio Only
AWZ Screen Recorder can record system sound and microphone. It has Gain and Noise Reduction features for quality assurance. The former makes the sound more precise, and the latter automatically eliminates noise.
1. Click Record Audio > Turn on System Sound or Microphone according to your needs. If you want to record audio separately from video, please select System Sound.
2. Click the drop-down icon to select the device and enable Gain or Noise Reduction.
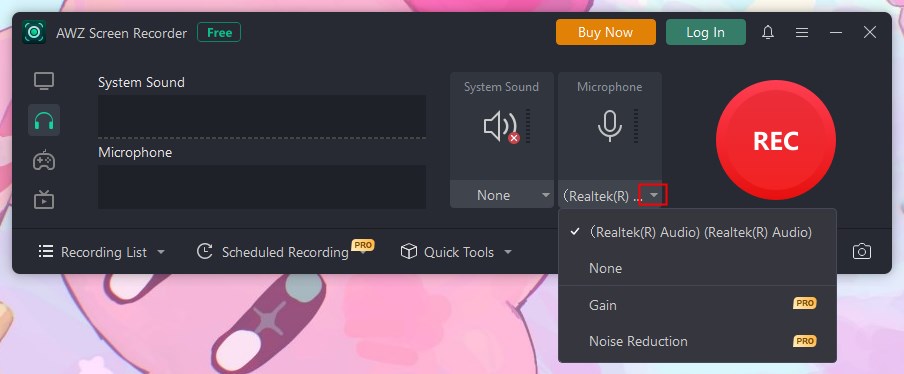
4. When ready, click the REC button to start.
As you can see, the AWZ Screen Recorder's workflow is straightforward; even a novice can complete the recording in a few clicks. Of course, it supports recording screen/webcam with audio. Take the chance to try it.
2. Record Audio and Video Separately via OBS Studio
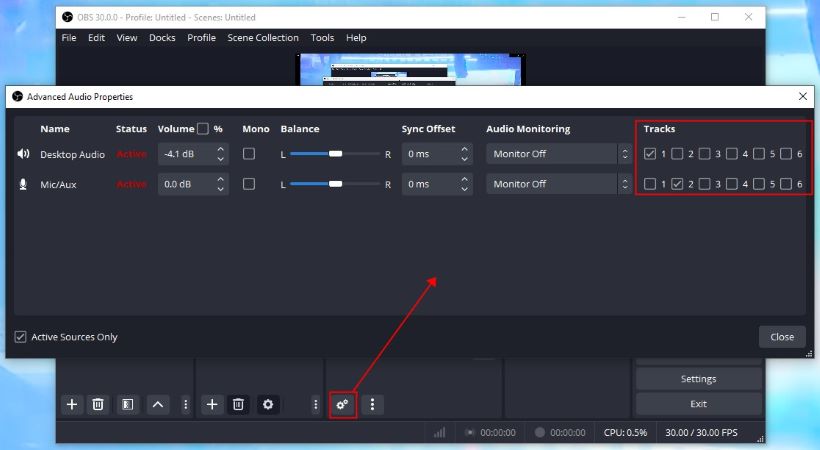
OBS Studio is a popular recording and streaming program. It can record audio and video on different tracks in the same video. It allows you to configure up to six audio tracks for your recordings. That’s to say, you can isolate the system sound, microphone, or any other external audio.
However, OBS's interface is complicated, which can overwhelm newcomers. If you do not mind the learning curve, go to https://obsproject.com/download to download OBS Studio and try it yourself.
Here is how to record audio and video separately with OBS Studio.
1. Open OBS Studio > Go to Scenes and click the + icon to create a new one.
2. Go to Sources and click the + icon to select a recording mode. Select Display Capture to record the entire screen or Window Capture to record any app window.
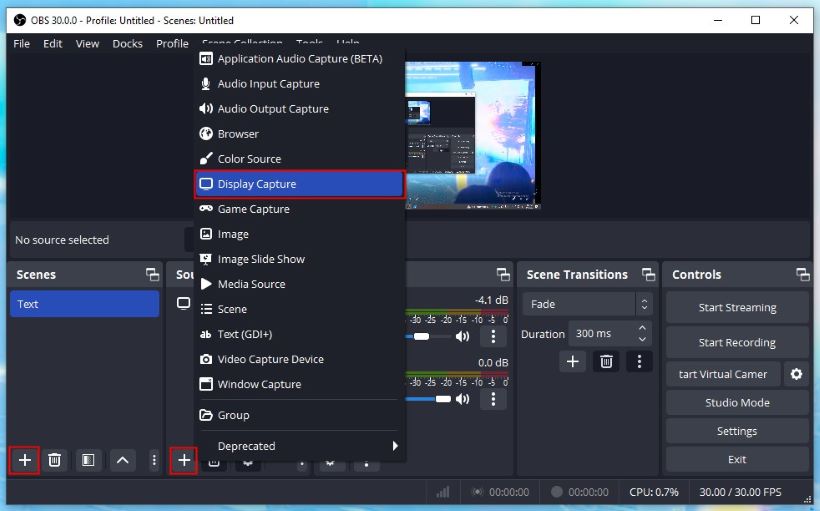
If you want to add an external audio, select Audio Input Capture to make it.
3. Go to Audio Mixer and click Advanced Audio Properties to assign each source to a separate track. For example, set Desktop Audio to Track 1 and Microphone to Track 2.
4. If needed, you can go to Control > Settings > Output to adjust the output format and location.
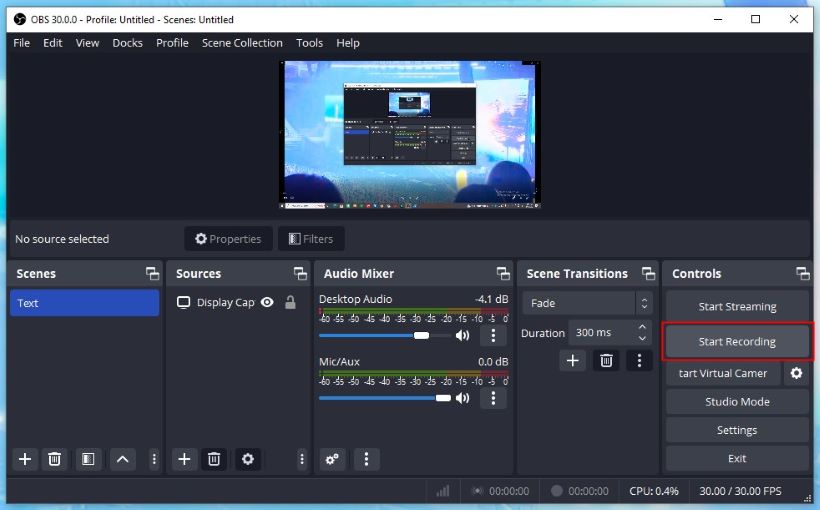
5. Prepare what you want to record and click Start Recording.
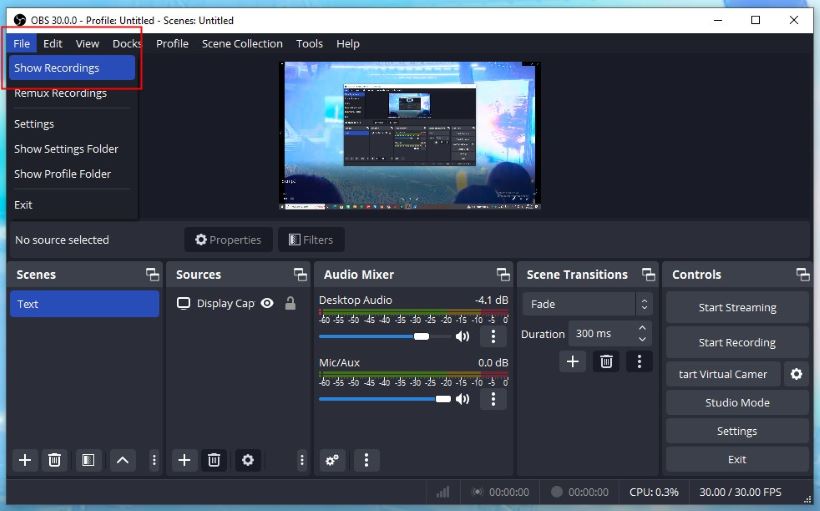
To check the recording, please click File and select Show Recordings.
Should I Record Audio and Video Separately?
Recording video and audio separately has many advantages, but the disadvantages are also obvious. If you're unsure whether to do this, read the analysis below.
Situations suitable for separate recordings:
- Need to create high-quality content; after all, professional microphones have better sound quality.
- Want to place the microphone in the optimal position for recording without limitations.
- Better control over the recording and want to edit the audio and video separately.
Situations suitable for recording video with audio:
- Want to create simple or casual content.
- A controlled and quiet recording environment.
- Don't want to spend time synchronizing video and audio.
Conclusion
That’s all about how to record audio and video separately. You can choose AWZ Screen Recorder or OBS to help you with your recording according to your needs. AWZ Screen Recorder is the way to go if you want better sound quality. It has Gain and Noise Reduction for more precise sound.
Lena