Introduction:
Automatic recordings can quickly consume storage space and impact performance. Learning
how to stop recording GTA 5 helps you avoid unwanted clips. This
AWZware guide shows how to manage recordings on PC, PS5, PS4, and Xbox.
How to Stop Recording GTA 5 on PC
Rockstar Editor is the default tool GTA 5 uses on PC to automatically capture gameplay clips. While this feature is helpful for creating cinematic videos, it often runs in the background and gradually fills up disk space. You can stop recordings quickly by using Rockstar Editor shortcuts or by turning off background capture in the settings menu. Below are the methods you can use to manage and stop GTA 5 recordings effectively.
1. Rockstar Editor Keyboard Shortcuts
Default keyboard shortcuts offer the easiest way to manage an ongoing recording.
- Stop Recording: Use F1 to stop the recording and save the clip right away.
- Cancel Recording: Use F3 to end the recording without keeping the footage.
- Action Replay: Press F2 to toggle Action Replay on or off; it captures gameplay automatically but saves clips only when you trigger it.
2. Disabling Automatic Recording
To disable automatic clip saving, modify the recording options in the menu.
- Delete Clips: Open Pause Menu > Rockstar Editor > Clip Management to remove unwanted clips and free up disk space.
- Unbind Keys: Prevent accidental captures during gameplay by unbinding F1, F2, and F3 in the Key Bindings menu of the Rockstar Editor.
Top 10 Games Like GTA: 2026 Collection
Are you anxiously waiting for GTA 6? While waiting, you might as well play games like GTA that carry the same vibe and deliver high-octane action.
READ MORE >
Bonus Tip: An Easy Way to Record GTA 5 on PC
Understanding how to stop recording GTA 5 gives you control, yet reliable gameplay recording is still valuable when you choose to record. The right game recording software, including AWZ Screen Recorder, ensures a smooth and efficient recording experience.
Why Choose AWZ Screen Recorder
AWZ Screen Recorder provides high performance while keeping resource usage low. You can record gameplay on PC with excellent quality while avoiding resource-heavy background tasks. Capture your full screen, selected apps, or custom areas for tutorials, guides, and highlights.
Key features include:
- Smooth Performance: Guarantees high-quality recording without any drop in system performance.
- User-Friendly: Built for easy operation, no experience required.
- High-Quality Output: Save your gameplay in smooth HD or breathtaking 4K quality.
- Flexible Recording Modes: Record full screen, chosen portions, application windows, or enable game mode for optimal capture.
- Advanced Controls: Built-in tools let you trim, cut, annotate, and reduce noise easily.
- Easy Hotkeys: Edit recordings with trimming, cutting, annotations, and noise reduction built in.
Simple Steps to Use AWZ Screen Recorder
Step 1: Install and Launch
Get the AWZ Screen Recorder installer and run it on your Windows PC (compatible with Windows 7–11).
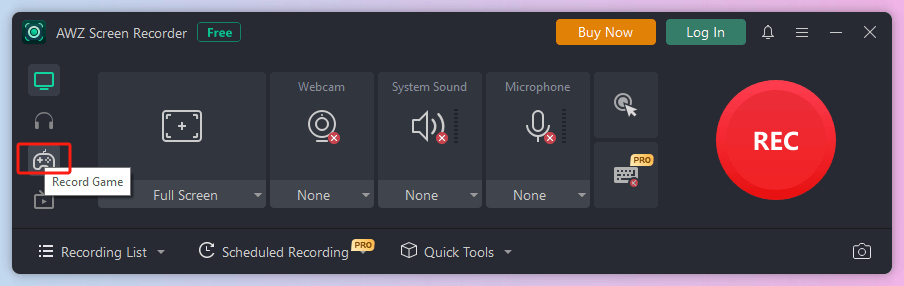
Step 2: Select Capture Mode
From the left navigation panel, choose Record Game. Ideal for 2D/3D games, with automatic identification of the active game window.
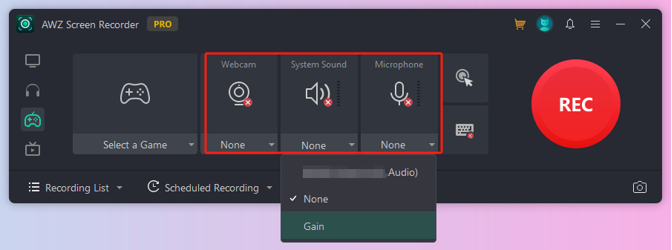
Step 3: Set Up Audio
Set up your audio sources by choosing system audio for game sounds and a mic for narration.
Step 4: Assign Hotkeys
Access Settings via the three-line icon at the top right to configure start/stop hotkeys for effortless control during gameplay.
Step 5: Record GTA 5
Launch GTA 5, verify it’s chosen from the software’s game menu, and record only the gameplay segments you need using assigned hotkeys.
Conclusion
Making in-game recordings can be simple and stress-free. Master your system settings and tools to manage captures on PC, PlayStation, and Xbox. Knowing how to stop recording GTA 5 helps conserve storage, enhance performance, and avoid saving unwanted clips. With the right configuration, you decide exactly which moments are worth keeping and sharing.
Lena