Some built-in tools will settle this little matter. But you can also quickly study a more powerful external screenshot cropper for a better experience. This AWZware post shows you four methods to crop a screenshot on Mac, including how to screenshot on Mac first and then crop it.
How to Crop a Screenshot on Mac with AWZ Screen Recorder
AWZ Mac Screen Recorder provides an array of tools for you to add comments on and crop screenshots on a Mac. It allows for adding text, arrows, shapes, and other objects. You can crop any part of an image by drawing in the size and aspect ratio you want.
To crop a screenshot on a Mac, use the step-by-step tutorial below. This method also allows you to screenshot on a Mac and crop the image seamlessly.
Step 1: Double-click the cropping tool on your desktop to open it;
Crop Screenshots on Mac for Free with AWZ Mac Screen Recorder

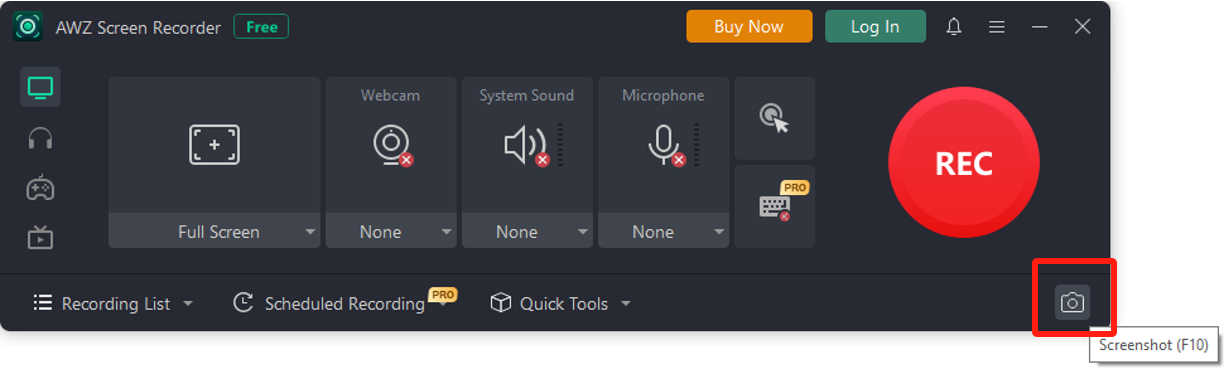
Step 2: Click the Screenshot icon at the bottom corner;
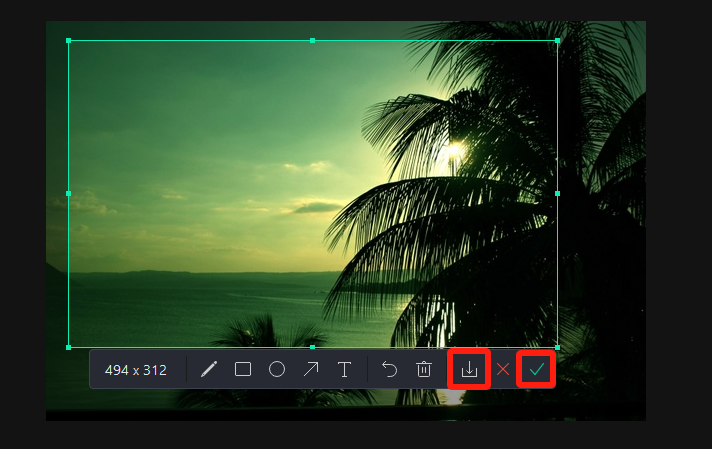
Step 3: Draw on the screenshot to select the required area;
Step 4: Click the checkmark to copy the screenshot to the clipboard or hit the down arrow to save it.
When you crop a screenshot on Mac or take a cropped screenshot, you can click the pencil icon in the toolbar to expand the annotation options and choose one to make your screenshot more understandable. AWZ Screen Recorder is one of the best screen recorders for Mac and supports recording video, audio, and webcam simultaneously. Users have the choice of recording any partial or full screen and scheduling an auto recording.
Start to crop a screenshot on Mac without effort now by downloading the AWZ Mac Screen Recorder below.
Download AWZ Mac Screen Recorder for Image Cropping
How to Crop a Screenshot on Mac Using the Photos App
When Mac or MacBook users wish to crop a screenshot, the native Photos app is at their disposal. It is a basic image and video editor that enables you to change the light and apply a filter. You can also trim a video using it without asking for paid software.
Here is how to crop a screenshot on a Mac in Photos.
Step 1: Control-click the screenshot you need to crop and choose Open with > Photos;
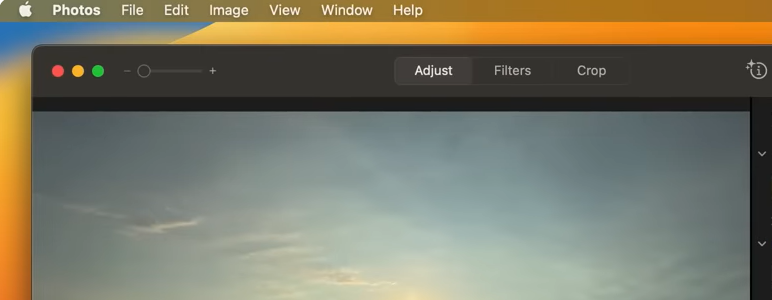
Step 2: Click the Crop tab and select the part to keep or specify your needed aspect ratio;
Step 3: Tap Done and follow the on-screen prompts to crop and save your screenshot photo on the Mac.
How to Crop Screenshot on Mac in Preview
Another application you can use to crop a screenshot on Mac after saving it is Preview. This is also a helpful preinstalled program that allows you to view, convert, and edit photos and PDF documents. It can also merge and split a PDF and reduce the file size.
Check out how to crop and edit a screenshot on your Mac with this application.
Step 1: Open the Preview program and drag your picture into it to open;
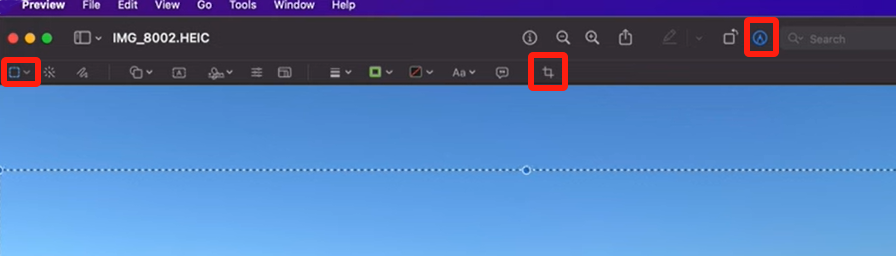
Step 2: Go to View > Show Markup Toolbar and highlight, add notes to, and do more to the image;
Step 3: Drag to select the portion you want to save on the screenshot and click Crop;
Step 4: The screenshot will be cropped with the unselected area deleted.
Take Cropped Screenshot on Mac Using AWZ Mac Screen Recorder
How to Screenshot and Crop on Mac with the Inbuilt Feature
Mac comes with shortcut keys that enable you to take a screenshot and crop it consecutively without interruption, so you don't need other image cropping tools. Instead of using Shift + Command + 3 to capture a full screen, you must grab a chosen region. Check out how to take a cropped screenshot on Mac with the right shortcuts.
Step 1: Press Shift + Command + 4 on your keyboard;
Step 2: Use the cross-hair to outline the part of the screen you want;
Step 3: Click into the screenshot thumbnail, and you will be able to get the image cropped or edited.
To crop a screenshot on Mac right after taking it from an active window, press the Command + Shift + 4 hotkey > Space > Enter and then go into the thumbnail to make edits.
To screenshot on Mac with the crop window, another shortcut to use is Command + Shift + 5, which captures a portion of or the entire screen.
Final Words
Cropping is a regular image manipulation process in daily life and work. This article saves you from the question of how to take and crop a screenshot on Mac desktop computers and laptops. If all you need is to crop the photo, take advantage of the macOS's capabilities supplied by Apple Inc.
However, to draw the audience's attention to the specific part of your screenshot further, you will need a photo cropper with annotation tools. Then, the AWZ Screen Recorder is a convenient and worthwhile choice.
Charlotte