Can VLC Record Screen with Audio?
Recording your screen with VLC is very simple. Although the record button is not shown on the main screen, it can be found and enabled with just a few clicks. As we all know, the sound brings video to life, so can VLC record screen with audio? Fortunately, the answer is No. VLC cannot record screen with audio at the same time.
If you want to record the screen with audio, you can use other professional recording software. Here in this AWZware guide, I’ll show you how to record screen with VLC on Windows and Mac. In addition, I’ll also tell you how to record screen with audio via another recording tool. Here we go.
How to Record Screen with VLC on Windows
Let’s first see how to record screen with VLC on Windows computer. If you haven't installed the player yet, you can go to the Microsoft Store or its website (https://www.videolan.org/vlc/) to get it.
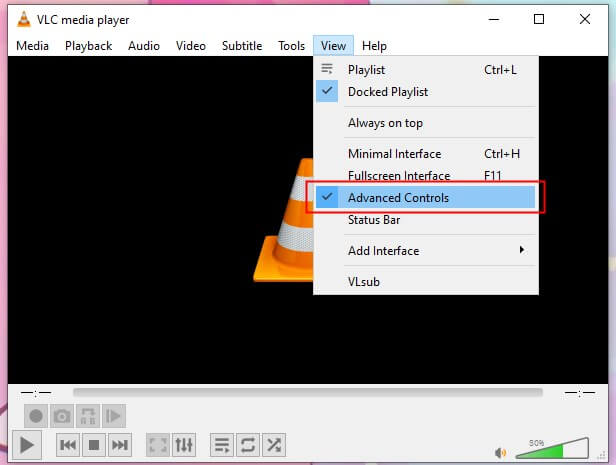
1. Open VLC media play on your computer > Click View from the menu bar > Choose Advanced Controls. In this way, you will see the record button and the screenshot button.
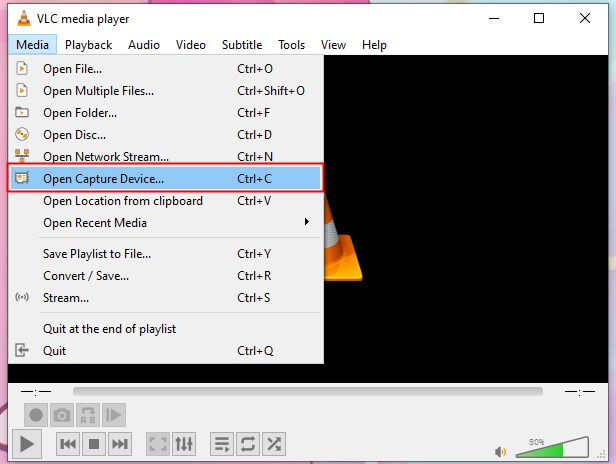
2. Then click Media and choose Open Capture Device… option.
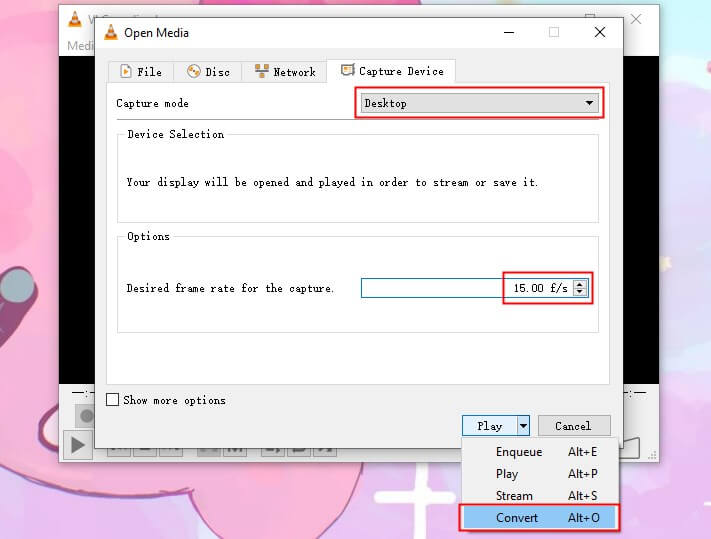
3. In the Open Media window, select Desktop next to Capture mode > Adjust the frame rate as per your needs.
4. Click the small down arrow icon next to Play and choose Convert.
5. Select the output format next to Profile.
6. Click Browse > Name the file and select a destination > Finally, click Start.
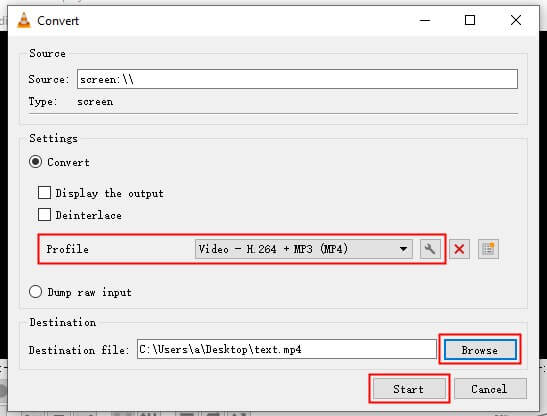
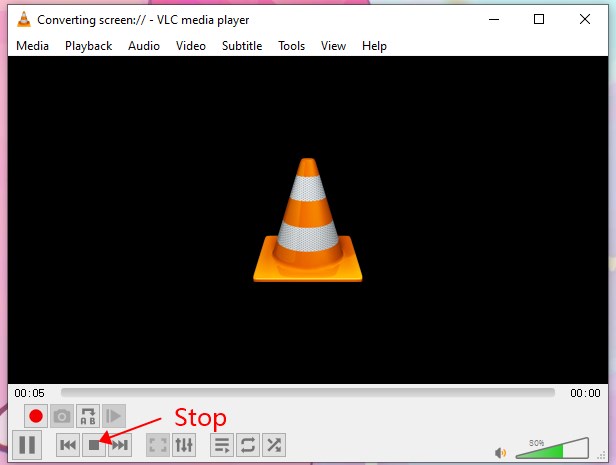
When you click Start, it will start recording the screen immediately. You can click the Pause button to temporarily stop recording. When it's time to end the recording, just click the Stop playback button.
How to Record Screen with VLC on Mac
When you want to record screen with VLC on Mac, please follow the steps below.
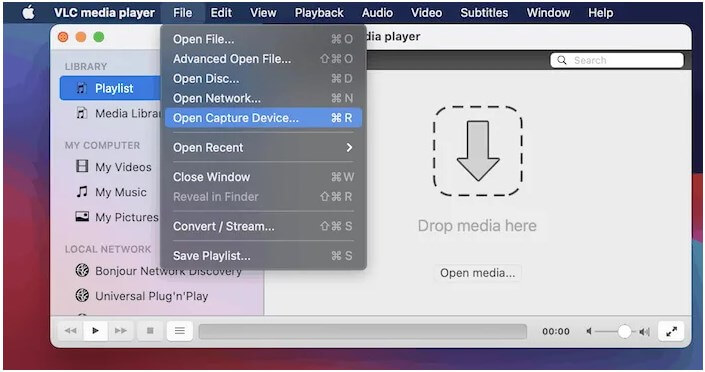
1. Open VLC > Click File from the menu bar and choose Open Capture Device... option.
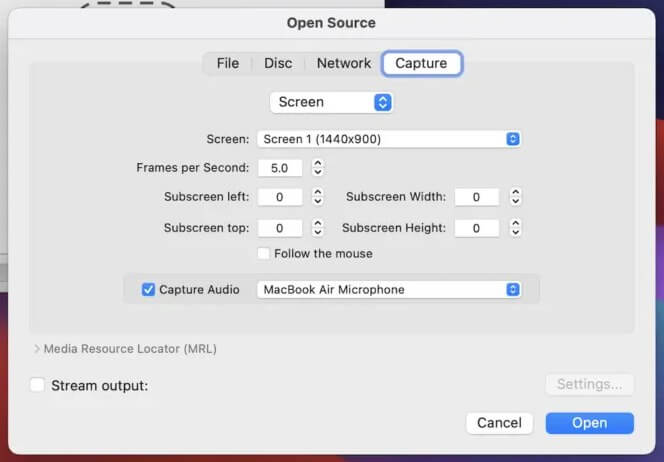
2. In the Open Source window, go to Capture > change Input Sources to Screen. Set the frame rate. Same as on PC, 10-15 fps is generally enough > Click Open to continue.
3. Now you can minimize the VLC > Click Playback from the menu bar and click Record to start the recording.
Disadvantages of Using VLC to Record Screen
Now you know how to record screen with VLC media player. So, do you think the program is a good helper? Well, when you just need to record a computer screen, VLC is a handy solution. However, if you want to record what you want, VLC won't be able to help you. Here are some of the inconveniences of recording screen with VLC.
❌ It will not record your mouse pointer.
❌ It is not able to screen computer screen and audio at the same time.
❌ It can only do full-screen recording, which means you can't specify the recording area.
❌ It doesn't allow you to add annotations during the recording nor does it allow you to edit the recorded video.
In short, VLC media player offers limited features for recording the screen. If you want to take control of the recording, you can turn to a professional screen recorder. For more details, just move on to the next part.
Bonus Tip: Record Screen with Audio via AWZ Screen Recorder
AWZ Screen Recorder is one of the reliable screen recording tools for Windows users. With this recorder, you will be able to capture anything on your screen with or without audio. Below are its outstanding features.
⭐ Record any part of the screen, full screen, fixed size, webcam, manually drawn areas, etc.
⭐ Record video with audio. Capture video, webcam, system audio, and microphone together.
⭐ Add annotations when recording the video to bring out the main points in the video.
⭐ Cut off the parts you don't need and compress the video without losing quality.
Whether you want to record computer screen, a meeting, or an online video, AWZ Screen Recorder can help you do it. Just click the download button to get the tool and let me show you how to use it to record screen with audio.
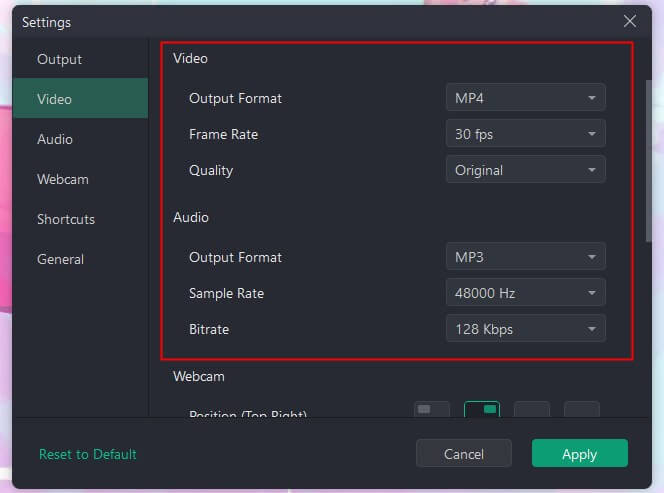
1. Open AWZ Screen Recorder > Click the hamburger button > Choose Settings > Go to Video to set the output format, frame rate, and quality.
2. Choose Record Screen > Click Full Screen to adjust the area you want to record > Enable the system audio or microphone as per your needs.

3. When it’s ready, click the REC button and the recording will start after 3 seconds.
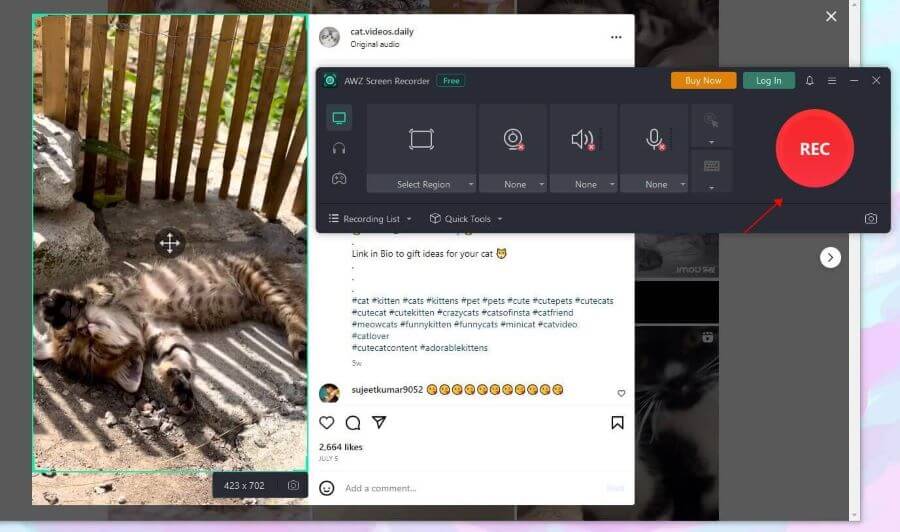
4. When you want to end the recording, just click the Stop button.
5. After that, you can go to Recording List to check the recorded video and edit it.
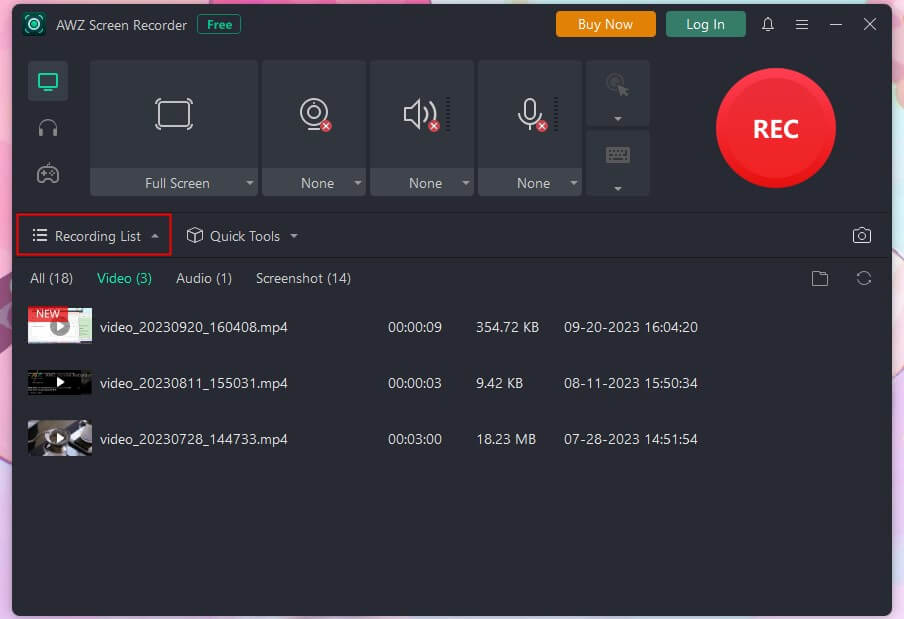
As you can see, with AWZ Screen Recorder, you can easily record computer screen with audio. In addition, when you want to download online videos to computer, you can use it to record the video directly.
Final Words
That’s all about how to record screen with VLC media player. Although its built-in tools can help you record computer screen, the fact is that VLC is not a replacement for a professional screen recording tool. If you want to record screen the way you need to, then a professional tool such as AWZ Screen Recorder would be a better choice. Hope this article is helpful to you.
Share this guide to help more people record screen with VLC!
Lena