Understanding Video Overlays
A video overlay, also known as a picture-in-picture or video-on-video effect, superimposes an animation or image over another running in the background. The animation or image effect that is put on top generally appears at the bottom of the video screen.
The video overlay technique in video content is quite beneficial during gameplay. A visual example is gaming videos, where the player's video is placed on top of the gameplay video.
There are four types of overlays: text, images, graphics, and animations. You can use video overlays to create a filter effect that plays over a video to produce a specific emotion, such as creepy, nostalgic, romantic, funny, etc.
1. How to Overlay Videos in Premiere Pro
Adobe Premiere Pro is a professional and reliable video editing program available for Windows PC and Mac systems. With its built-in color effects, you can effectively apply video overlays, whether you want to spice up a clip or add a splash of color to a social media post.
Step-by-step guide for overlay videos in Premiere Pro
Step 1: Launch Premiere Pro and start a new project.
Step 2: Import your video and drag the clip onto the timeline.
Step 3: Select the Effects workspace by moving to Window and tapping Workspaces.
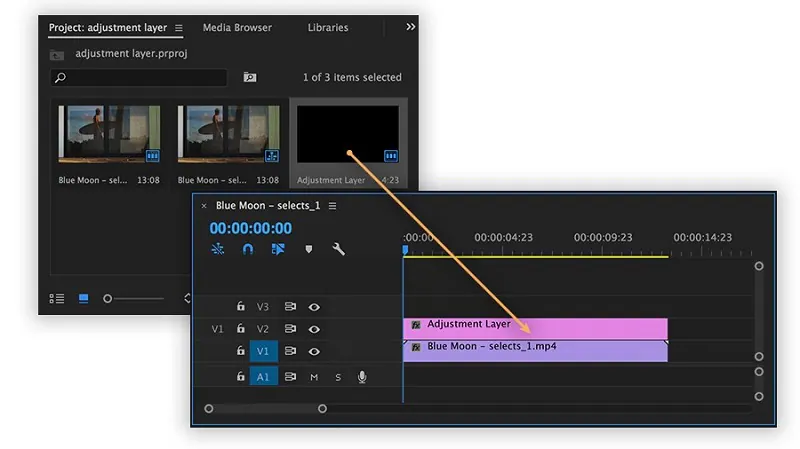
Step 4: Now go to File, click New, and choose Adjustment Layer. Ensure the Project Panel is selected.
Step 5: Add the timeline with the adjustment layer selected.
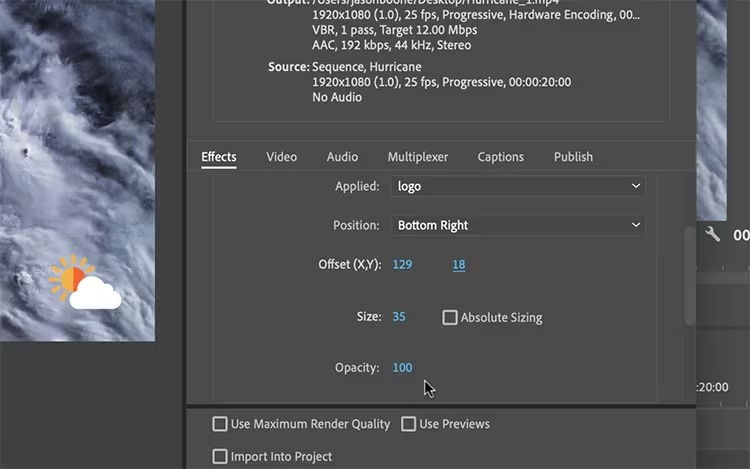
Step 6: Go to the Generate folder under Effects and select the 4-Color Gradient to generate a video overlay effect.
Step 7: Right-click the adjustment layer in the timeline and drag the required effect.
Step 8: Manage and adjust effects in the Effects Controls panel.
Step 9: On the right side of the Presets dropdown menu, click the Auto Save button.
Step 10: Check the Save Effects Settings box in the Choose a Name dialog box.
Step 11: Future exports made with this preset will automatically consider any Image Overlay settings you've configured.
Pros and cons of Adobe Premiere Pro
⭐ Pros:
- Allows the layout of still and video elements
- Available for Windows and Mac computers
❌ Cons:
- It is a bit of a resource hog
- The learning curve is a bit high
2. How to Overlay Videos in iMovie
iMovie is a great built-in app on Apple devices that helps you overlay videos. In movie projects, you can easily add video clips and images as overlays, which appear on top of your main clip in the timeline. Overlays can easily be arranged in the same way as any other clip.
Step-by-step guide for overlay videos in iMovie
Step 1: Open iMovie on your Mac and import your videos.
Step 2: Place the playhead where you want to insert the video overlay.
Step 3: Drag and drop the second video onto the timeline.
Step 4: Go to the iMovie toolbar on the top screen and tap the Video Overlay Settings.
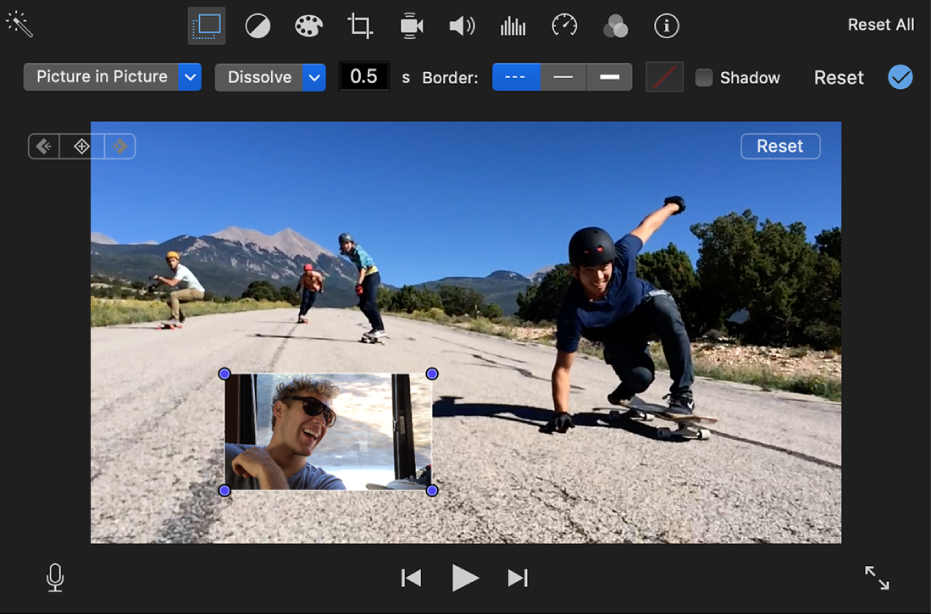
Step 5: Click the little download arrow near the overlay setting and select different ways to position the video. You can choose split-screen, green/blue screens, cutaways, etc.
Step 6: After editing the video and working on overlays, export it to your Mac. Tap the File Menu, choose Share, and tap File. Save the video in the desired format, resolution, and quality.
Pros and cons of using iMovie
⭐ Pros:
- Built-in software for Apple devices
- Works on both Mac and iOS devices
❌ Cons:
- Offers only four overlay options
- Exclusive to Apple devices and unavailable on Windows computers
3. How to Overlay Videos in Windows Movie Maker
Windows Movie Maker was an easy-to-use video editor that came with Windows XP, Vista, 7, and 8. However, Microsoft discontinued it in 2017, replacing it with the Video Editor for Windows 10. Here's how you can use the software to overlay videos.
Step-by-step guide for overlay videos in Windows Movie Maker
Step 1: Open Windows Movie Maker and apply your videos and images to Timeline.
Step 2: Click Effects and choose Overlays.
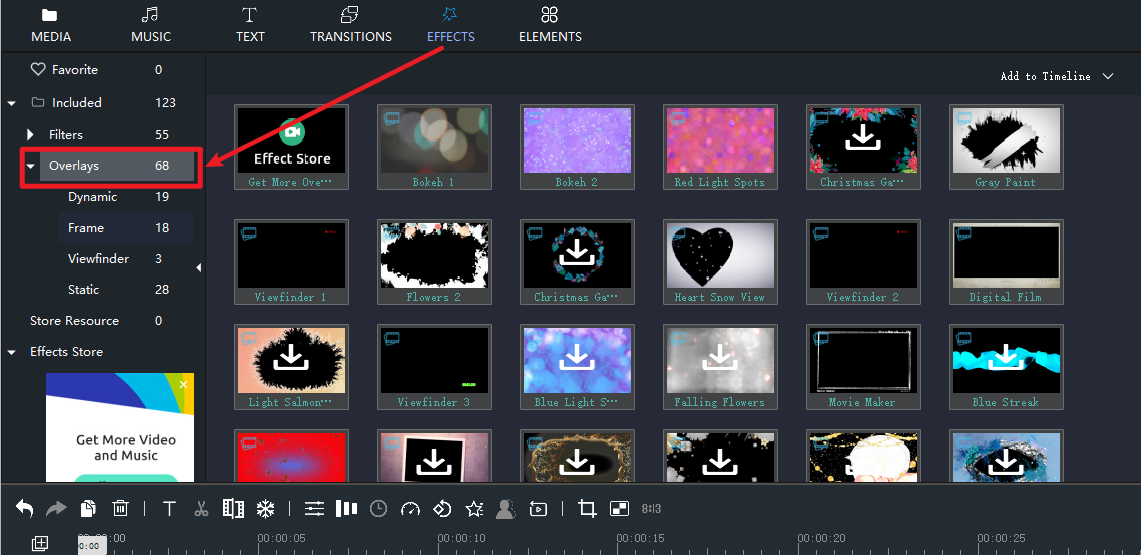
Step 3: Choose an overlay you want to add to your video.
Step 4: Click Add to Timeline to add the overlay either in the current position or selected clips.
Step 5: Tap the Play button to check the performance.
Pros and cons of Windows Movie Maker
⭐ Pros:
- Freeware with Effects auto preview
- Sharing capabilities
❌ Cons:
- It does not offer adjustments to visual effects
- Installation challenges
4. How to Overlay Videos in InShot
InShot is a great mobile app with easy-to-create projects. It helps you edit footage, add effects, titles, transactions, and color correction. The interface works smoothly whether you use a phone or tablet, and everything feels easy to operate and understand.
Step-by-step guide for overlay videos in InShot
Step 1: Install and launch InShot on your phone.
Step 2: Download the final video to your phone and upload it into InShot.
Step 3: Create and upload a new video from your camera roll.
Step 4: Click the PIP (Picture-in-picture) option that looks like a little square with another square inside.

Step 5: Add another video from your camera roll and drag it to where you want it on the video.
Step 6: Adjust the time for how long it will be on the screen, depending on your video's length.
Step 7: Review and export it from InShot to your camera roll by clicking the up-pointing arrow in the top-right corner.
Pros and cons of using InShot:
⭐ Pros:
- Available on Android and iOS
- Free software with ease of use
❌ Cons:
- Privacy concerns
- Lacks professional effects
The Bottom Line
That's all, folks! We have guided you through the best methods on how to overlay videos on each device. You can experiment with video overlays using any of the methods listed above that best fit your needs and requirements. Following this comprehensive guide, you'll master the art of overlaying videos, taking your content to the next level.