AWZ Screen Recorder allows you to capture and take screenshots of whatever you are seeing on your computer screen. It provides real-time annotating feature and tools for you to take screenshots with numbers, text, arrows, and other markups. So you can create your step-by-step guides, tutorials, presentations, and process documentation or share with others instantly.
AWZ Screen Recorder enables you to take a screenshot whether you are recording the screen or not.
How to Take a Screenshot When Not Recording the Screen
You can start to screenshot directly once you’ve launched AWZ Screen Recorder.
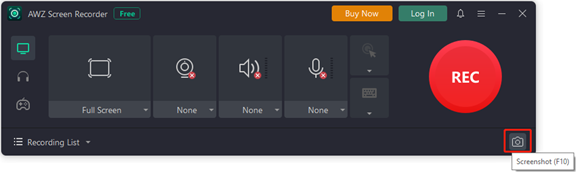
Step 1: Open the screen recording software, and click the camera icon in the bottom right corner or press F10;
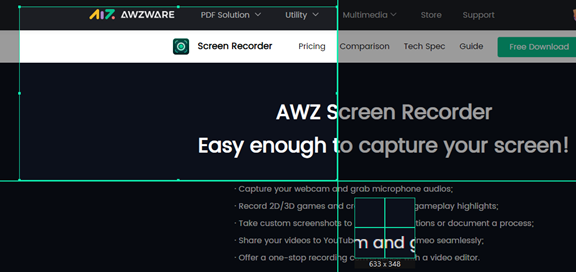
Step 2: Drag and draw to select the entire screen or specific part of it that you want to capture;
Step 3: Click the Tick in the toolbar that appears to copy the screenshot or hit the down arrow to save it to your computer.

How to Take a Screenshot While Recording the Screen
You may sometimes need to take a screenshot when you are recording a video. Here is how to do that.
Step 1: When you are recording your screen, click the camera icon in the toolbar;
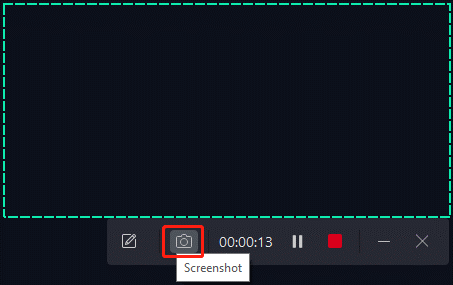
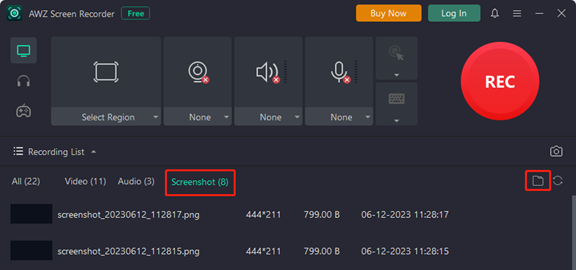
Step 2: A screenshot has been created and saved. You can check it from Recording List > Screenshot or click the file folder icon to view it.