How to Record Screen on Windows 11 with AWZ Screen Recorder
AWZ Screen Recorder can surpass the native Windows 11 screen recorders with its powerful recording ability. When you record a screen on Windows 11, you can specify the video and audio format and quality from multiple options. The software application enables you to record any portion of or the entire screen. The system audio, your voice, and your webcam can be recorded together. You can schedule and automate a recording.
Step 1: Open the software, turn it on, and select the audio or webcam recording options;
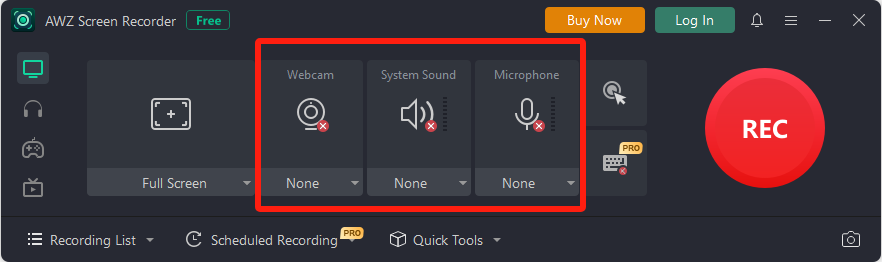
Step 2: Start your screen activities and click REC to record the screen on Windows 11 in 3 seconds;
Step 3: Click Stop in the toolbar to finish the recording.

From the above steps, you will discover how easy it is to screen record on Windows 11 with AWZ Screen Recorder. One of the great things is that it offers a free version that doesn't require registration. While recording, the floating toolbar allows you to take screenshots of your screen and add drawings, text, and more comments to frames.
Record screen on Windows 11 with audio or yourself to HD videos for free now by downloading AWZ Screen Recorder below.
Unlock AWZ Screen Recorder’s full potential:
- Record gameplay on a PC with keystrokes and mouse cursor shown without frame drops;
- Record videos from streaming sites to your desired resolution;
- Auto recording schedules;
- Compress and trim a video to delete unnecessary scenes
How to Screen Record on Windows 11 with Snipping Tool
To record the screen on Windows 11 with a preinstalled software program, use the decent app Snipping Tool. To access the new feature, you should first check and update your computer's system to the latest version. The tool will export the recordings to MP4, MOV, and AVI formats. The Windows 11 screen recorder allows you to record screen and audio.
Here is how to do a screen recording on Windows 11 on a laptop or desktop PC.
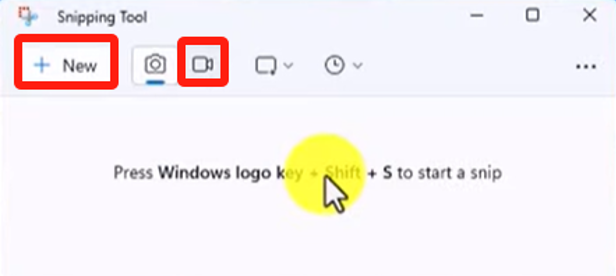
Step 1: Tap the Start menu to go for and open the Snipping Tool;
Step 2: Hit Record (camera icon) and tap New to select the recording portion;
Step 3: Click the microphone icon to set the audio device and start recording;
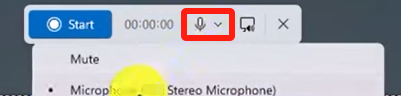
Step 4: To end the recording, click the red square button in the small toolbar.
After you record your screen on Windows 11 using the most recent Snipping Tool, you can play it within the app and save the video using the Save as option.
Record Screen in Windows 11 with ApowerRec
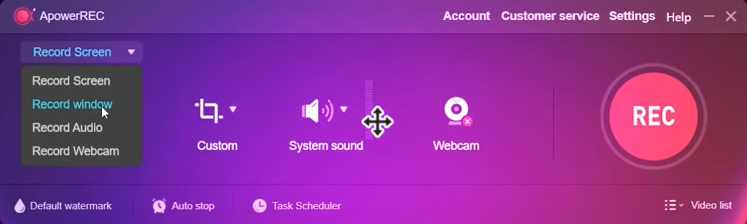
ApowerRec is user-friendly screen recorder software that lets you screen a record in Windows 11 for free. But there is a 1-minute time limit. This multi-functional software is compact and lightweight and doesn’t need you to be tech-savvy. It is good for recording short videos and can add watermarks to videos.
Check out how to record the screen on Windows 11 with audio using this third-party application.
Step 1: Click Custom and draw the recording area on the screen;
Step 2: Adjust the System sound and Webcam settings;
Step 3: Tap REC to make the recording start seconds later;
Step 4: Click the red button to end the recording.
ApowerREC allows you to screen record in Windows 11 with sound and upload and share the videos seamlessly to YouTube, Google Drive, and other cloud platforms.
Screen Record in Windows 11 with Microsoft PowerPoint
Another way to video record a screen on Windows 11 is using Microsoft PowerPoint. The Office program incorporates a screen recorder you might not know, which lets you record screen and audio at the same time or individually.
Step 1: Open a presentation file in PowerPoint and choose Insert > Screen Recording;

Step 2: Click Select Area in the recording dock at the top of the screen to select your recording part;
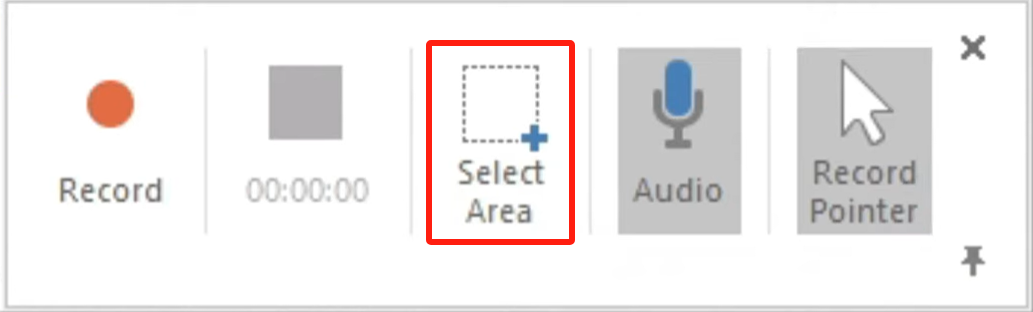
Step 3: Hit the Record button to record your Windows 11 screen in 3 seconds, and PowerPoint will automatically record audio and your cursor;
Step 4: Press the Windows logo key + Shift + Q hotkey to create your recording.
You can also video record yourself presenting a PowerPoint using the newer version of the software.
Conclusion
Windows 11 users have various methods to record screen and save as videos. Typically, if you want the recorded video with sound, there is no need to download extra software, and the Snipping Tool utility is enough. If you wish to record screen and webcam at the same time on Windows 11, try PowerPoint or AWZ Screen Recorder. The latter app not only helps record picture-in-picture videos but also edit a video without a curve.
Charlotte