Whether you’re a gamer, content creator, podcaster, or simply looking to enhance your multimedia experience, knowing how to record internal audio on PC is essential. In this comprehensive blog, we’ll guide you through recording system sound on your PC and output an audio file in various formats such as MP3, WAV, FLAC, etc. Now, follow our steps, and let’s get started!
#1. Record Internal Sound with a Voice Recorder
⭐ Built-in tool in the Windows operating system
⭐ Intuitive interface and simple operating
⭐ No requirements for downloading or logging
Every PC has a built-in tool for recording system sound: Windows Voice Recorder (called Sound Recorder on Windows 11). It’s freeware that lets you record all the sound on a Windows operating system, including lectures, interviews, and other events. You can effortlessly mark critical moments in a recording, as well as edit, trim, and rename the audio files.
When recording system sound with Voice Recorder, you have five audio formats to choose from: AAC, MP3, WMA, FLAC, and WAV, covering all the popular formats you’ll use in daily life and work. Before reading, you can also customize the recording quality to meet various requirements and save your storage space hassle-free.
Only two steps are required to record system sound with Voice Recorder:
Step 1. Open the Voice Recorder app on your PC.
Step 2. Tap the blue record button to start recording (Windows 11 users need to click the red record button instead.)
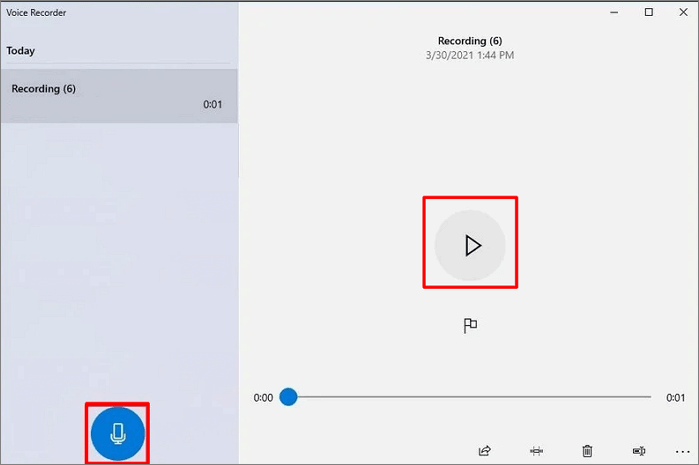
Voice Recorder is also an excellent audio player. You can play an audio file at a custom speed, and the markup tool helps you identify any important information in an audio file.
#2. Record Internal Sound with AWZ Screen Recorder
⭐ A third party recorder offers advanced recording features
⭐ Customizable sample rate and bitrate for users to select
⭐ A wide range of audio formats supported
⭐ Smartly reduce the noise in your audio files
Preparing a competent third-party program can help you find a way out when built-in tools can’t satisfy your needs. AWZ Screen Recorder is a powerful recording tool for Windows and Mac users. It’s compatible with all the major Windows operating systems, from the latest Windows 11 to Windows 7, making itself widely acceptable by Windows users.
AWZ Screen Recorder allows you to capture all the activities on your screen, as well as system sound, microphone voice, and your webcam. With a navigable interface, even a new user can master this recording tool like a pro.
- Record gameplay clips with no lag
- User-friendly interface & easy-to-use
- Record system sound & voice from yourself
- Automatically block extraneous sounds
Windows 11/10/8.1/7/XP
Key features of AWZ Screen Recorder:
- Record all the sound on your computer. When you choose to record system sound in AWZ Screen Recorder, it will capture any subtle sound inside your computer, whether from a website or an app.
- Nine audio formats are supported. AWZ Screen Recorder enables you to quickly record internal audio from a Windows PC and output the audio file with nine popular formats, including MP3, WAV, AAC, WMA, FLAC, OGG, MP2, M4A, and AC3.
- Customizable sample rate and bitrate. Professional users can effortlessly record audio at 48000 Hz and 320 Kbps. However, 8000 Hz and 64 Kbps are also available for special needs.
- Built-in audio editor and denoiser are available. After finishing recording, you can trim your recordings and eliminate the background noise with a single tap on AWZ Screen Recorder.
How to record system voice on Windows 11 using AWZ Screen Recorder:
Step 1. Install AWZ Screen Recorder for Windows.
Download and install AWZ Screen Recorder from its official website. Alternatively, click the following download button to get this program directly.
Step 2. Record audio from your computer.
Click the hamburger button and select Settings. Then, choose Audio in the left pane. Select your preferred output format, sample rate, and bitrate.
After setting it down, go back to the AWZ Screen Recorder homepage and select the Record Audio mode. Turn on the System Sound and turn off the Microphone.
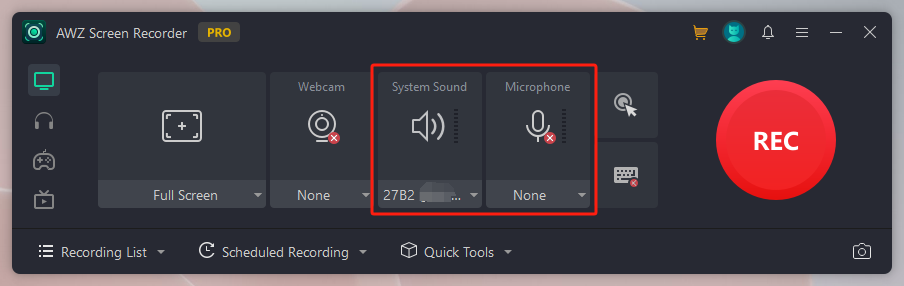
Now, play the media file you need to record and check whether the audio can be detected in AWZ Screen Recorder.
If so, press the red REC button to start recording the system sound on your Windows PC.
Step 3. Stop recording and further editing.
Click the red square to stop recording. Alternatively, you can press F9 on your keyboard to stop. The recordings can be easily accessed in Recording List > Audio.
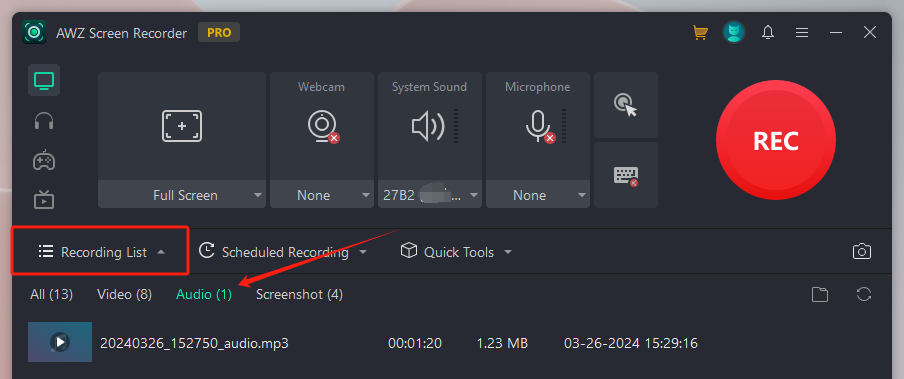
In Quick Tools, you can use the audio editor tool or denoiser to modify your audio files for free.
AWZ Screen Recorder also supports recording internal audio on Mac using its Mac version. Explore more features by downloading and using AWZ Mac Screen Recorder!
For Windows Users:
For Mac Users:
#3. Record Internal Voice on a PC with Audacity
⭐ Open-source software that is compatible with all operating systems
⭐ All features released to users without a pay
Audacity is a popular open-source audio recorder and editor. It’s perfectly compatible with Windows, macOS, Linux, and other Unix-like operating systems. Audacity has accumulated a wide range of users worldwide since users can enjoy comprehensive recording features without paying a bill.
Users can use Audacity to record live with a microphone or mixer and internal audio playing on a computer. It offers advanced tools for editing an audio file, including cutting, pasting, and smooth volume mixing. Moreover, Audacity also allows you to combine clips from multiple formats into the same audio project.
Recording computer audio with Audacity can be easy. Here’s a YouTube video that shows you the process in detail:
https://www.youtube.com/watch?v=VB0-XfW6lms
#4. Record Internal Voice on a PC with OBS Studio
OBS Studio is another reliable open-source screencasting and streaming app that supports audio recording only on a computer. For people looking for methods of recording desktop audio using OBS Studio, we’ve also got you covered!
Steps for capturing internal audio on a PC using OBS Studio:
Step 1. Launch OBS Studio and adjust audio parameters in Settings.
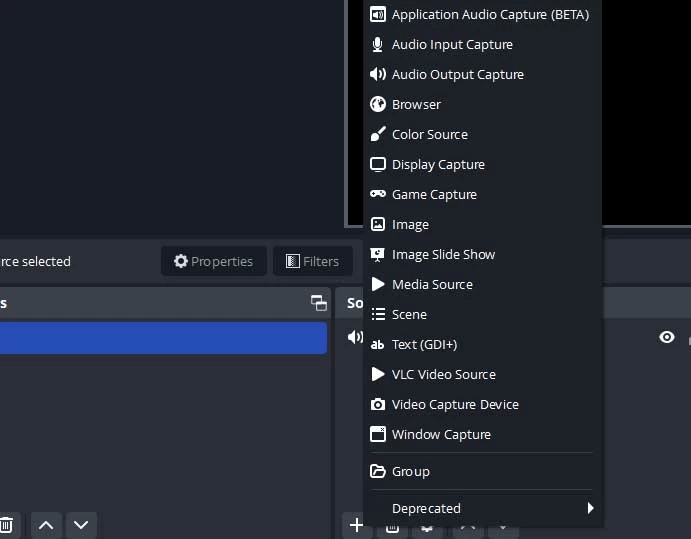
Step 2. Create a new scene and source. Choose Audio Output Capture in Source. Then, select Add Existing and choose Desktop Audio. Click OK to confirm your selection.
Step 3. Prepare a media file and click Start Recording in the Controls panel.
The Bottom Line
This article explains how to record internal audio on a PC. We’ve provided four methods for capturing desktop voice from a Windows computer, covering built-in tools, third-party apps, and open-source programs. Feel free to choose any tool you prefer.
Monica