The problem with you might be you have no idea how to get the internal audio recording done successfully and which handy audio recorders to install. So this AWZware’s post focuses on 4 ways to record internal audio on Mac with ease in nearly any case. You will also learn how to screen record with internal audio.
How to Record Internal Audio on Mac with AWZ Mac Screen Recorder
AWZ Mac Screen Recorder is your energy-saving screen and audio recorder that allows you to record internal audio on Mac for free. Coming as a tiny and fast application, it allows you to record the screen, internal audio, external audio and webcam simultaneously or separately. The output audio quality will be as high as possible. A list of audio formats such as MP3 and WAV are available to choose from before recording.
Check out how to record internal audio on Mac effortlessly using AWZ Mac Screen Recorder.
Step 1: Prepare Audio and Launch AWZ Mac Screen Recorder
Make the audio ready for recording. Make sure your Mac speaker is in good condition. Then, you should quickly download, install and open the screen recorder software.
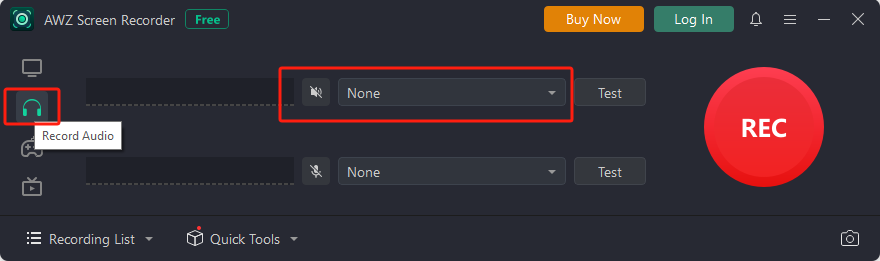
Record Internal Audio on Mac with AWZ Screen Recorder
Step 2: Choose Record Audio Mode and Set Audio Format
Click the Record Audio icon on the left side, which lets you record internal audio on Mac. Enable the system audio recording and select the right output device. Enable microphone recording if required. Hit the hamburger icon (three lines) to choose Settings and set the audio format and other options.
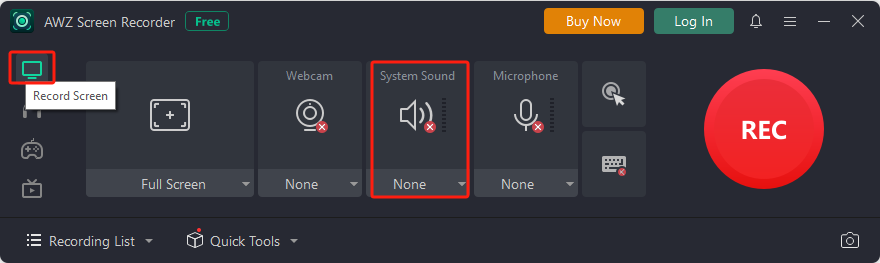
If you need to screen record on Mac with internal audio but not only record the audio, choose the Record Screen mode and click System Sound to select the audio source.
Step 3: Record Internal Audio on Mac and Access the Recording
Press the F12 key or click the REC button and the recording will begin in 3 seconds. During the countdown, playback the audio. To finish the recording, press F12 or click the red button. Then you can check the recorded audio from Recording List.

AWZ Mac Screen Recorder is handy for you to record only internal audio or record the screen with internal audio on Mac. You can set the sample rate and bitrate from the “Settings” window.
Download AWZ Mac Screen Recorder
How to Record Internal Audio on Mac with QuickTime Player
Regarding how to record internal audio on Mac, QuickTime Player provides a workaround. It is a preinstalled audio recorder included in all Mac devices that can record your computer’s screen as well. The inbuilt application also lets you trim a video. As Mac doesn’t have the native ability to route your system audio output into the audio recorder, you have to install a kernel extension like Soundflower or BlackHole to help.
Now dive into how to record internal audio on Mac using QuickTime and Soundflower or BlackHole.
Step 1: Download and install the system audio extension, and switch your computer’s sound input to Soundflower 2 channel;
Step 2: Select the extension from the speaker's list and open the audio recording software;
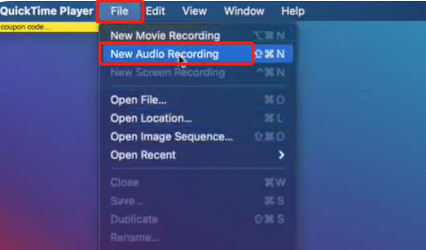
Step 3: Go to File on the menu bar to choose New Audio Recording and play the audio to start recording;
Step 4: Click the stop button to stop the internal audio recording.
After you record internal audio on Mac this way, you can change the output to your headphones and play the audio to listen to it. If all is good, go to “File” > “Save” to save the recording.
To record the screen on a Mac with internal audio, navigate to “File” > “New Screen Recording”, click “Options” in the controls bar and check “Soundflower (2 ch)” under “Microphone”. Then choose a recording area option and click the “Record” icon.
Not only record internal audio on Mac, you may also need to record internal audio and Mic at the same time. To do that, go to the MIDI configuration app to choose "Create a Multi-Output Device” and select both the mic and audio.
How to Record Internal Audio on Mac with OBS Studio
OBS Studio is another solution that lets you record internal audio on Mac without Soundflower. This is an open-source and free internal audio recorder, screen recorder and living streaming software. It is multiple platforms supported and can record either the internal audio or your voice on Mac. The thing you should note is that it cannot record only the audio but record the screen with audio together.
Figure out how to record internal audio on Mac with OBS Studio screen recorder by browsing the below steps.
Step 1: Click the plus icon in the Scenes section to create a scene, hit Add Source (+ icon under Sources) to choose Audio Output Capture and pick an audio device;
Step 2: Click Add Source again to choose Window Capture and select a window to create another source;
Step 3: Hit Start Recording. Then when the audio recording on Mac is completed, click Stop Recording.
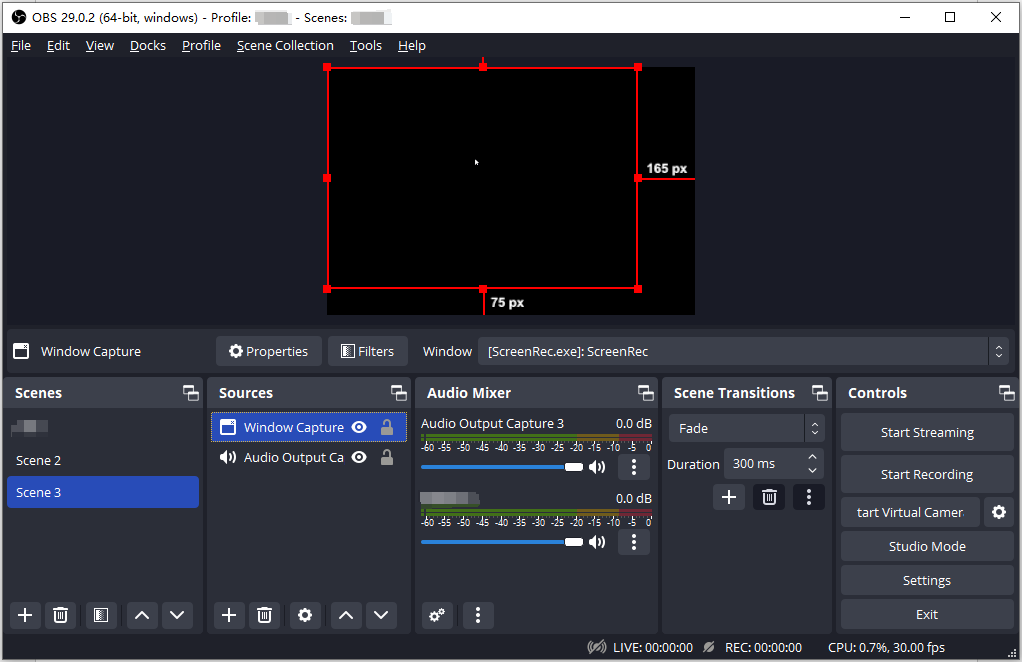
Before you record internal audio on Mac, you can tap “Settings” to customize necessary options such as recording quality, format and more.
Apowersoft Online Audio Recorder to Record Internal Audio on Mac
Apowersoft Online Audio Recorder is one of the best audio recorders you can try. No software download or registration. The website’s interface is clean and has no disturbing ads. You can record screen sound, browser audio or the microphone without recording the screen.
To record internal audio on Mac, follow the next guide.
Step 1: Click Start Recording on the site;
Step 2: Select System Sound or Microphone depending on your need and hit Start Recording;
Step 3: Choose a window, tab or screen and tap Share to record the audio from the selected place;
Step 4: End the recording by clicking the Stop button.

The software allows you to play the audio online after recording to review if it needs to be re-recorded.
Final Thoughts
Are you going to record internal audio on Mac while screen recording or record the internal audio only? For the former demand, the first three screen and audio recorders are good to go. The latter can be done by any of the 4 methods except for OBS Studio. Among them, AWZ Mac Screen Recorder encompasses all the capabilities and a basic video editor for possible video compressing and some other modifications.
Fulfill your internal audio recording task with your preferred software and share this post if it’s helpful.