Knowing how to record your voice is an essential skill. Suppose you frequently need to make a home video or audio, the ability to record high-quality audio helps effectively capture your thoughts on the go. In this comprehensive guide, we will show you how to record voice on Windows 10 with reliable audio recorders. Now, stay tuned with us and enjoy a seamlessly voice recording experience!
Preparing for Recording Voice on Windows 10
To guarantee a high-quality recording, before we explore the voice recording process on Windows, let’s see what you should prepare before recording.
- Check Microphone Compatibility
If you’re using an external microphone, it’s important to make sure that the microphone is compatible with Windows 10. Only in this way can the computer detect your voice. Choose a good microphone to ensure a clear audio quality.
- Connect and Set Up Your Microphone
Connect the microphone to your computer. Make sure that your system can recognize the microphone.
- Adjust Microphone Settings
Open Settings and click System > Sound to access microphone settings. Set the microphone as the default recording device and adjust the input levels for optimal performance.
#1. Record Voice on Windows 10 with Voice Recorder
Windows 10 has a built-in tool named Windows Voice Recorder that helps record audio only from the system or microphone. It offers basic recording tools, enabling you to capture audio from the computer effortlessly.
Here’s how you can record voice with Windows Voice Recorder:
1. Go to the Start menu and open the Voice Recorder app.
2. Click the Microphone icon to start recording. During recording, you may pause and resume it as needed.
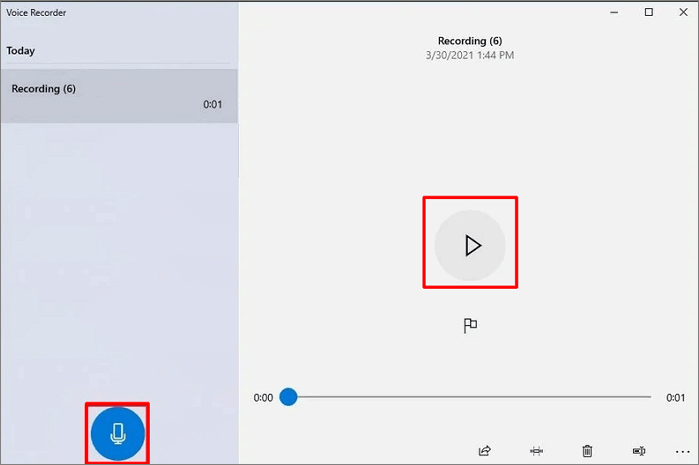
3. When done, click the Stop icon to finish the recording.
4. Save the recording and rename it. You can find it in the Documents folder under Sound recordings.
By default, the Voice Recorder app on Windows 10 only outputs audio in the M4A format. If you need other formats, an audio converter becomes necessary. Alternatively, you can use a more professional audio recorder that supports more advanced functions and output formats, which offers you more options for generating good recordings.
#2. Record Voice on Windows 10 in AWZ Screen Recorder
AWZ Screen Recorder is considered one of the most powerful choices for recording screens and audio on a computer. It’s compatible with Windows 11/10/8/XP, being a reliable option to record voice on Windows 10.
Steps for recording microphone voice on a Windows 10 PC using AWZ Screen Recorder:
Step 1. Click the following button to download and install AWZ Screen Recorder on your PC. Then, launch it.
Step 2. Select Record Audio from the left pane.
Step 3. You can select record audio from the system or microphone. To turn off an input source, click on it till there’s a cross mark.
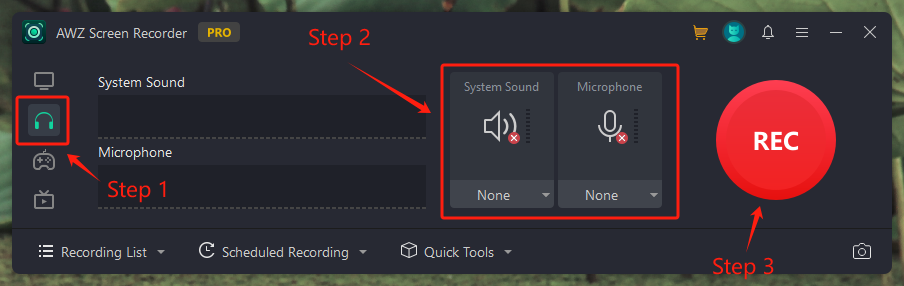
Step 4. Tap the red REC button to start recording.
Step 5. You can pause, resume, restart, and end the recordings whenever you need. Click on the red square box to stop the audio recording.
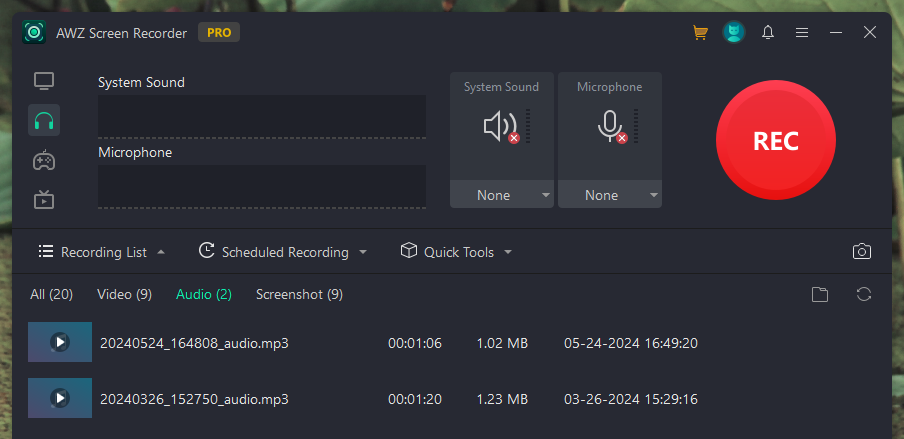
After recording, you can quickly access the recorded files in Recording List > Audio in seconds. When you put the mouse over the file list, you can play, edit, share, and delete the file with a few clicks.
The process of recording audio on Windows with AWZ Screen Recorder is intuitive and easy to follow. It simplifies the recording and editing process as much as possible, letting you effortlessly capture both system sound and microphone voice on a computer.
In addition, AWZ Screen Recorder allows you to customize the output formats and related audio settings before recording. If you have various audio recording requirements, AWZ Screen Recorder is an excellent option.
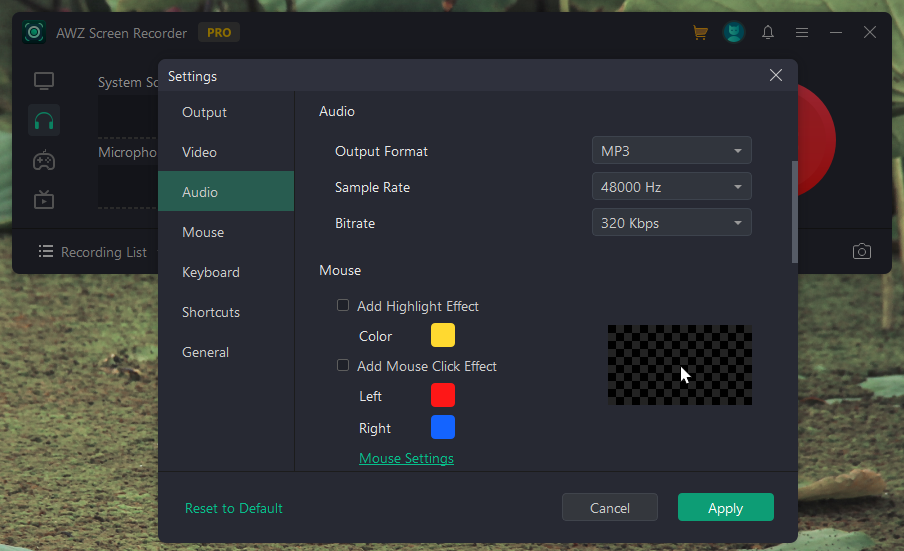
Audio-related settings in AWZ Screen Recorder:
| Output Format | MP3, WAV, AAC, WMA, FLAC, OGG, MP2, M4A, AC3 |
| Sample Rate | 8000 Hz – 48000 Hz |
| Bitrate | 64 Kbps – 320 Kbps |
Download AWZ Screen Recorder and generate high-quality recordings now!
- Record gameplay clips with no lag
- User-friendly interface & easy-to-use
- Record system sound & voice from yourself
- Automatically block extraneous sounds
Windows 11/10/8.1/7/XP
#3. Record Voice on Windows 10 with Vocarro
Another practical method to record voice on Windows 10 is to use an online recorder. Online tools can be accessed on a web browser, letting you capture audio in seconds without downloading and installing a desktop program.
In this section, we will show you how to capture voice by using an online audio recorder on a Windows 10 PC. Let’s use Vocarro as an illustration. Check the content below:
Tips: Before we go, make sure you have allowed microphone access in your web browser settings if you need to record voice from the mic.
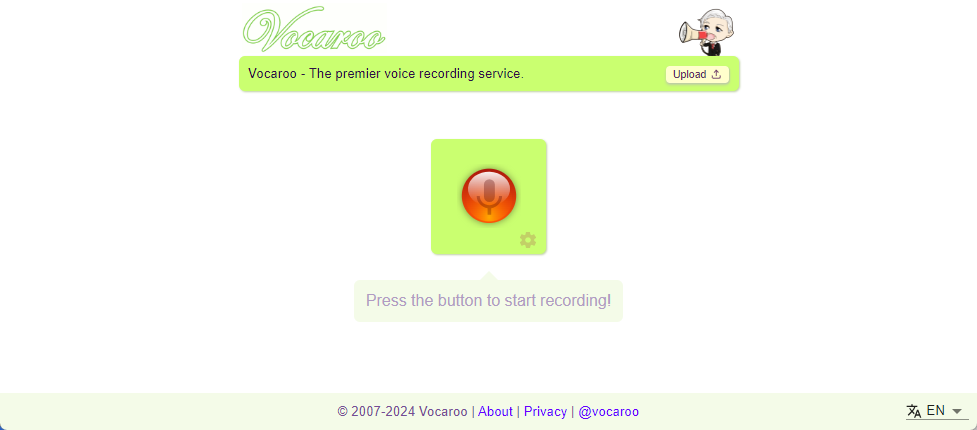
Step 1. Open a web browser and navigate to Vocarro’s official website.
Step 2. Click on the red record button.
Step 3. Stop when you’re finished and download the recorded audio file manually.
In Settings, you can open the Remove background noise and Auto adjust volume function to get a better recording result.
Vocarro boasts a very simple and clean interface, making it easy to navigate. In the bottom right corner, you can select different languages to change the interface language.
Conclusion
This blog post explains how to record voice on Windows 10. It covers three methods for capturing high-quality audio on your PC: built-in tools, third-party programs, and online solutions. Feel free to choose the one that best suits your needs.