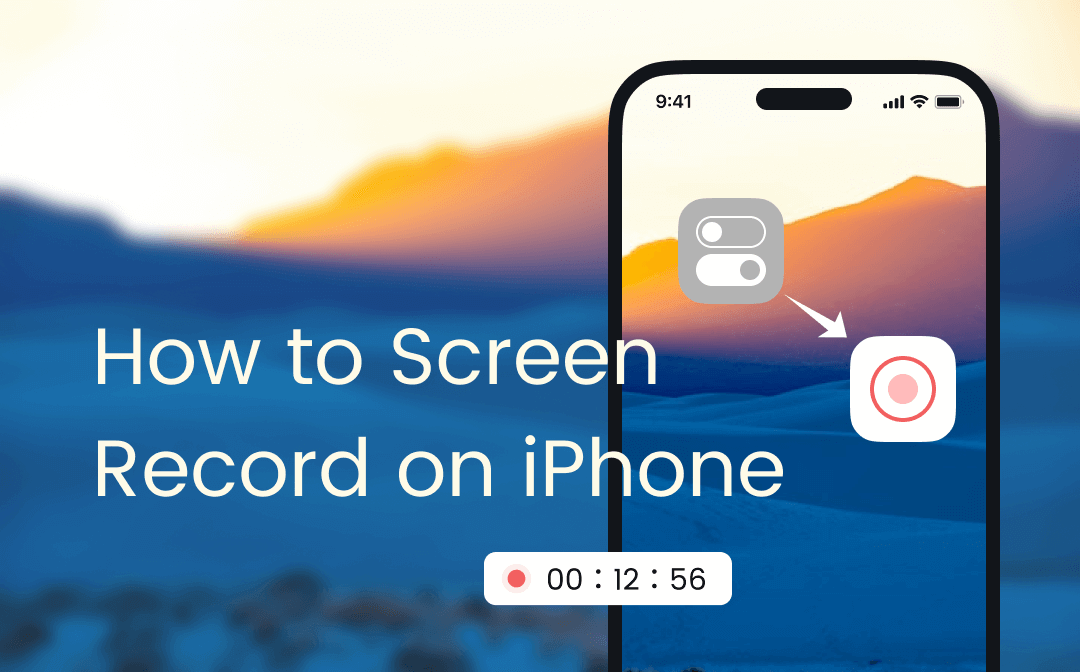
Screen recording means making a video recording on your computer or phone screen. You can record what's happening on a screen and share it with others or post it on video-sharing platforms, such as WhatsApp, Facebook, etc. In addition, when you need to record a game, create a tutorial, or save YouTube videos, knowing how to screen record on iPhone can help you a lot! In this blog, we'll offer you a step-by-step guide to screen recording on an iPhone. iPhone 12 is used as an example, and the steps may the same on iPhone 14, 13, 11, etc., as long as your iPhone is running iOS 11 or later.
How to Screen Record on iPhone with Built-In Feature
For iOS 11 and later, there's a built-in screen recording feature covered by default, which enables you to record the screen with one click. It's free and pretty easy to use. However, before recording, you need to check whether this function is added to the control center. If not, make sure to add it, which will help you record an iPhone within seconds.
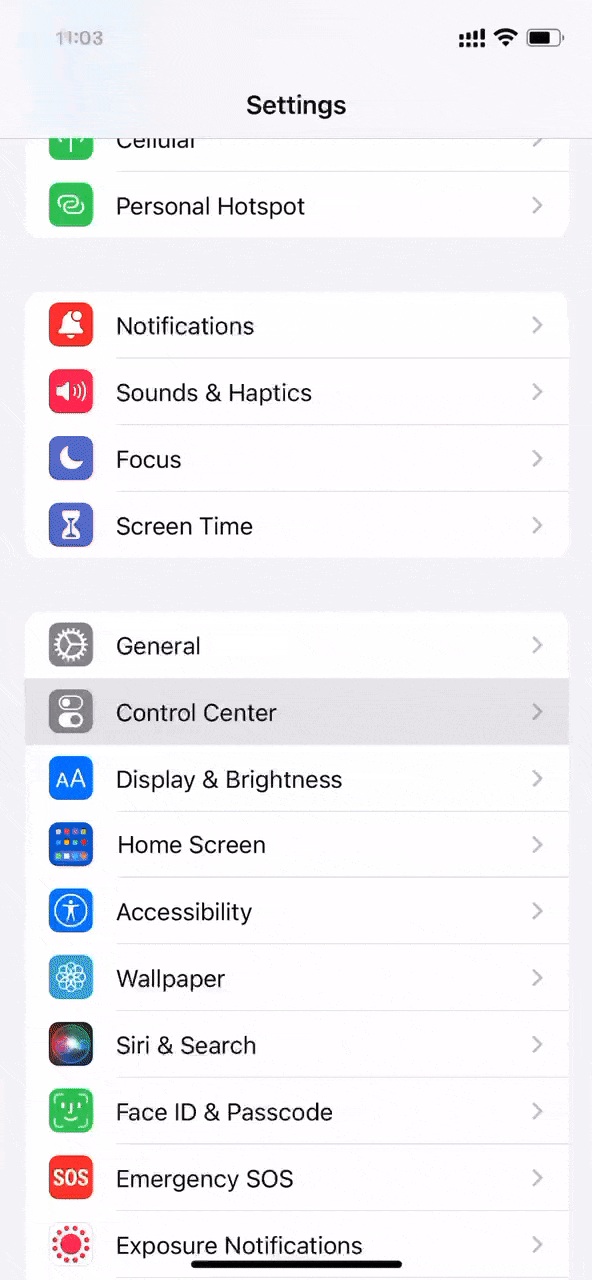
To add a record shortcut to the control center, follow the guide below:
Go to Settings and find Control Center. Then click the green plus symbol next to Screen Recording.
By tapping and dragging the three horizontal line icons on the right, you can adjust their location easily. And clicking the red minus sign next to every box can help remove it from the control center.
Now, let’s learn how to screen record on your iPhone:
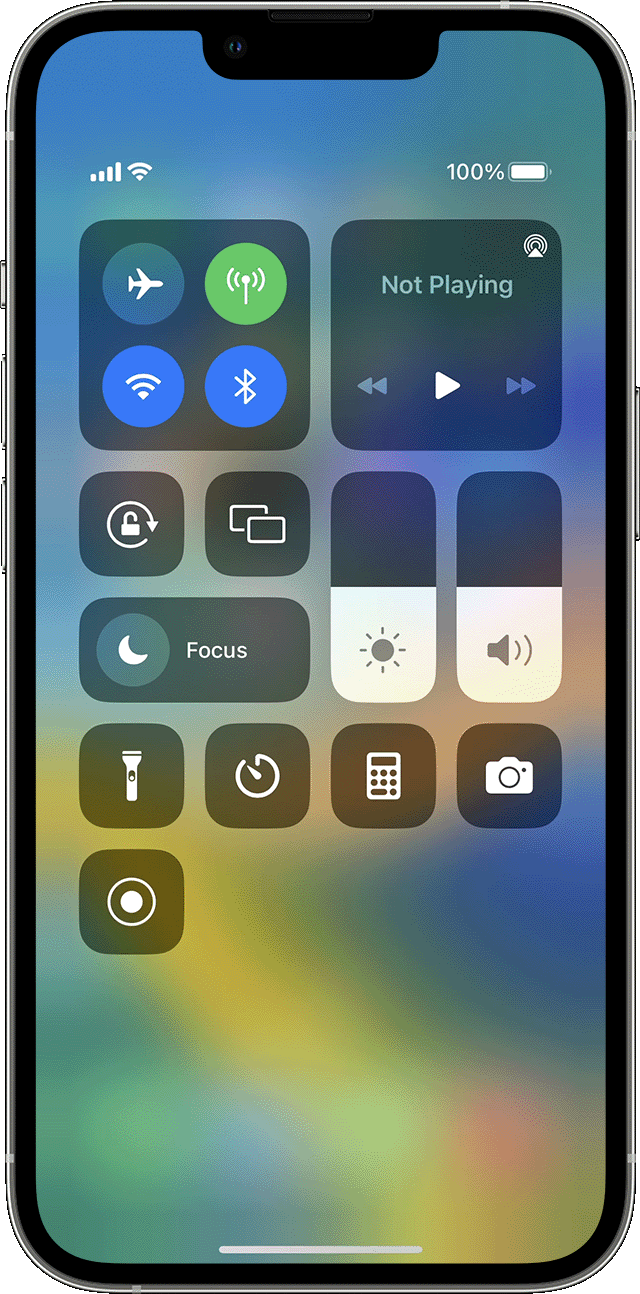
Step 1. Open the Control Center on your iPhone.
Step 2. Tap the record button, and it will start the countdown from three to one.
Step 3. Exit the Control Center and record your iPhone screen.
Step 4. Tap the red button in the top-left corner of your screen, or open the Control Center and click the record button again.
Simply by clicking the record button on the Control Center, you can finish the screen recording process effortlessly. To check the video file, you can open the Photos app and perform some simple edit functions, such as cropping, adjusting related parameters, adding filters, resizing, rotating, and mirroring videos.
How to Screen Record on iPhone Using Third-Party Tools
As we've mentioned before, the built-in screen recording feature is only available on iOS 11 and later. If you're running other versions, a third-party screen recorder is required. And admittedly, iPhone's screen record feature is relatively limited. A dedicated screen recorder, however, offers more powerful functions that let you record screens on iPhone more efficiently.
With aids from dedicated screen recorders for iPhone, you can adjust the video resolution and frame rates before recording. And they also allow you to record some media platforms, such as YouTube, TikTok, and so on. We’ve picked some outstanding apps from App Store, with which you can do more with your recordings on an iPhone.
- Screen Recorder for iPhone 4.6 3.4K Ratings
- Screen Recorder: Go Record 4.5 69.5K Ratings
- Record it! :: Screen Recorder 4.6 318.3K Ratings
Common Questions About Recording Your iPhone Screen
When screen recording an iPhone, you may encounter unexpected issues. In this part, we’ve listed several common situations and offered you corresponding solutions. Let’s check them out and make the video recording more enjoyable.
How to record the iPhone screen with sound
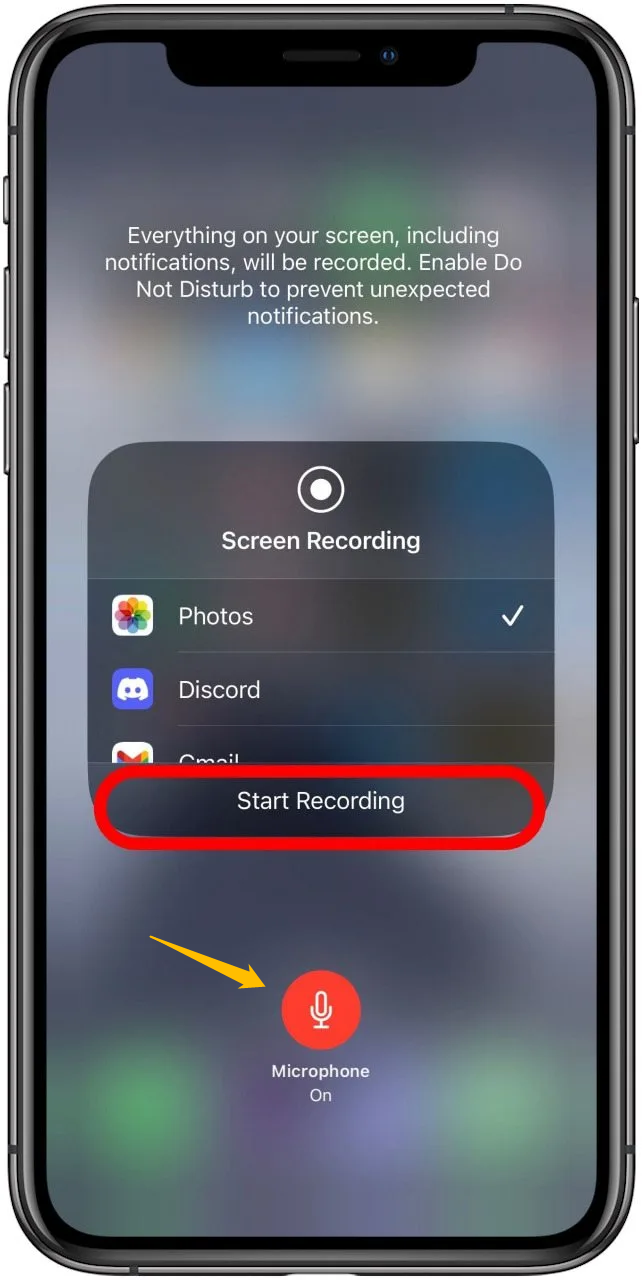
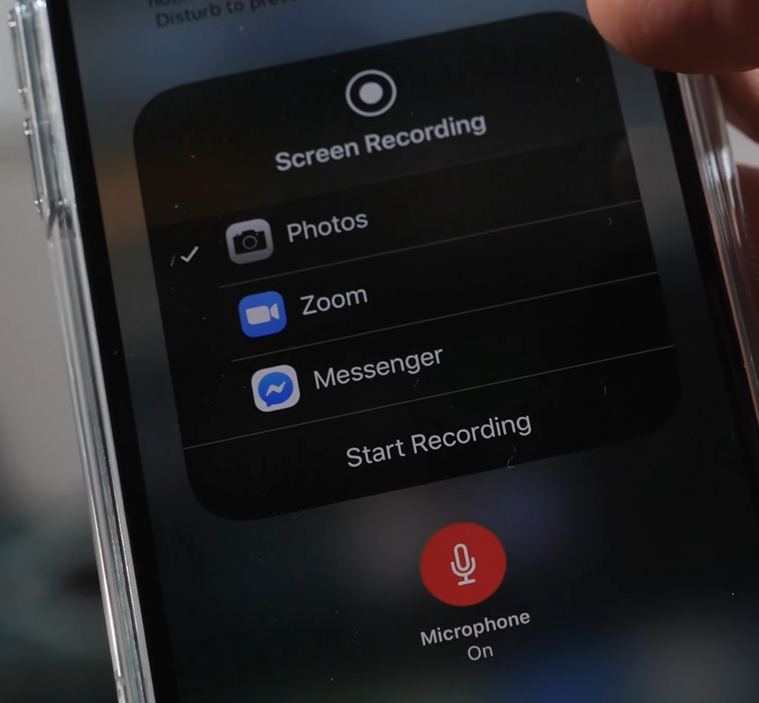
iPhone’s screen record feature enables you to record your screen with both system and speaker audio. To enable the sound button, simply tap the record icon and hold it for a while. Press the Microphone icon to turn it on.
Can I change the location of my recordings?
Let’s come up with the answer: it’s possible and very simple to change the location. Similarly, open the Control Center, tap the record icon for a while, and you’ll see a list of apps on the screen. Select any app on this list, and you successfully change where the screen recording file is saved. By doing so, you can upload the recording to Gmail, Zoom, Skype, and other apps directly.
My recordings are saved with poor quality, what can I do?
Usually, no matter what recording tools you use, you can adjust the recording resolution in settings. To make sure the recordings are of good quality, you can select 1080p and higher before recording. Go to Settings > Camera and select a resolution in Record Video.

Is there a time limit on screen recording in iPhone?
When video recording an iPhone, you don’t need to worry about any time limit or others. However, if your iPhone doesn’t have enough storage space, the recording may end automatically.
The End
Recording your iPhone screen can be a useful tool for sharing information and creating content. Whether using the built-in feature or a third-party tool, the process is simple. If you have questions, refer back to the common questions section or reach out to Apple support. Try screen recording on your iPhone today and see how easy it is to capture and share your screen with others.