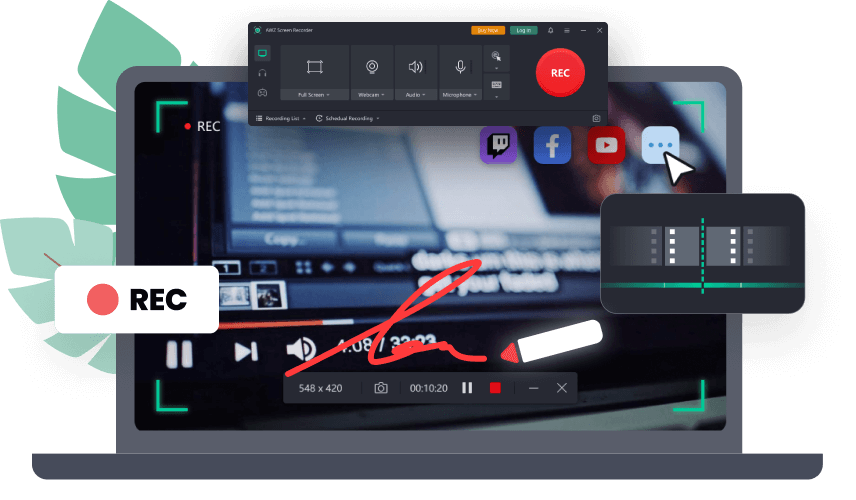
At some point in your life or work, you may come across that you need to record activities on your computer screen. This is usually for creating tutorials, gaming videos playback, or other purposes. If you are a Windows user, you might be querying how to screen record on Windows. What is the best way to do that? There are native support as well as third-party screen recording software to record screen on Windows 11, Windows 10, 8 and 7.
Windows 10 and Windows 11 users have Xbox Game Bar and Snipping Tool built into their OS to use. Screen capture software from AWZware is introduced to screen record on Windows 7 and all the later versions. Don’t experience the frustration of trying to understand the complicated recording process again from other places, this post provides you with simple and easy-to-follow steps to perform your task. Read on to learn how to screen record on Windows.
How to Screen Record on Windows with AWZ Screen Recorder
If you need to record your screen on Windows frequently and prefer a multi-function screen recorder, look no further than AWZ Screen Recorder. The software available for Windows 7/8/10/11 allows you to record videos, audio and webcam at the same time. When you screen record on Windows with it, you can record an entire screen, a part of your screen, a specific area and an active window. A gameplay recording mode is offered for capturing high-quality gaming videos.
In terms of how to screen record on Windows using AWZ Screen Recorder, browse the below steps to get it. Here we take recording a selected area on your screen as an example.
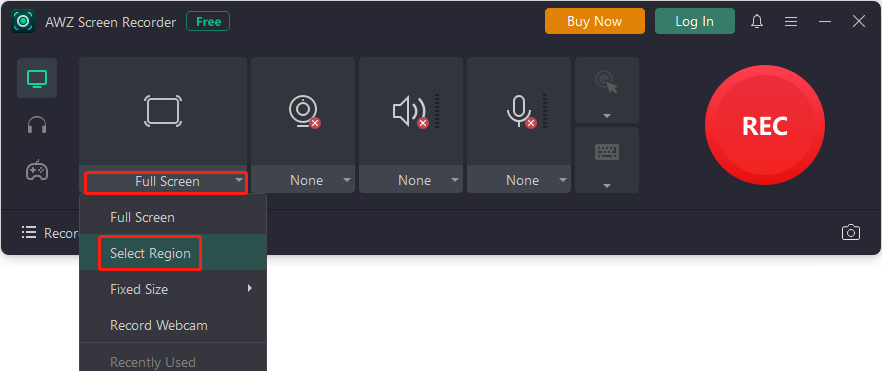
Step 1: Launch the screen recorder on your laptop or desktop computer, and click the Full Screen drop-down button to choose Select Region;
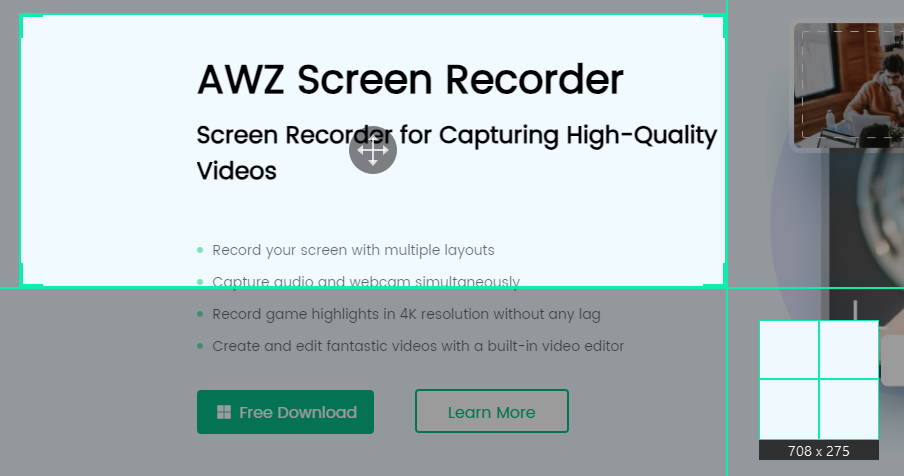
Step 2: Drag and draw to select the certain area you want to record;
Step 3: Enable the webcam, system audio and microphone recording on the home interface if needed;

Step 4: Tap the hamburger icon in the top right corner and choose Settings to set the output options;
Step 5: Press the F12 shortcut key or hit the REC button, and start to screen record on Windows right away;
Step 6: To stop the recording, press F12 again or click the red stop button.
![]()
The screen recording app supports multiple video and audio output formats for saving recordings, such as MP4, WMV, AVI, MKV, MPEG, and FLV. You can add annotations and take screenshots while recording a video. When you screen record on Windows with audio, you can test if the speakers and microphone are working properly and change the volume within the program.
Features:
All the widely used modes to record screen on Windows for free, including full-screen, partial-screen and app window recording.
Record your face and screen at the same time.
Screen record gameplays on Windows PC without Xbox Game Bar.
Schedule recording to auto screen record on Windows at a future time.
Screen record YouTube videos, Instagram stories, FaceTime, TikTok and videos and music from all the social media sites.
Screenshot on HP and any other branded Windows-based computers.
How to Screen Record on Windows Using Xbox Game Bar
A convenient way to screen record on Windows is to use the Xbox Game Bar pre-installed on your device. Game Bar is a gaming overlay coming included with Windows 10 and Windows 11, having widgets for screen capturing videos and screenshots while playing PC games. It also works as a general screen recording tool to record a single application window on your screen and save videos to MP4 format.
Here is how to screen record on Windows 10 or 11 with the tool, regardless of the HP, Dell or any other laptop or desktop computer you run.
Step 1: Get into the game or app you want to record;
Step 2: Press the Windows logo key + Alt + R keyboard shortcut to record the screen using Xbox Game Bar without external software at once, and a capture widget will appear with the recording time shown;
![]()
Step 3: Do what you need to record within the game or app. To stop the recording, press the Windows logo key + Alt + R again. Then click the blue recording completion prompt window to open the recorder app;

Step 4: Check the Gallery list on the tool’s interface for the recorded video or go to Videos on your computer to view it.
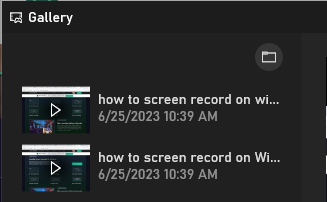
When you screen record on Windows using the built-in screen recorder, a small recording widget appears on the screen to show the recording time. If you wish to screen record with sound, you can tap the “Windows Key + G” shortcut key to launch the Xbox Game Bar capture widget and set the system audio and microphone as needed.
While Xbox Game Bar enables you to do a screen record on Windows through the above steps, it only captures a single application and cannot help record the Windows desktop. If you want to record what’s happening in the Windows 11 or 10 UI or File Explorer, the aforementioned AWZ Screen Recorder is good to go.
How to Screen Record on Windows with Snipping Tool
Snipping Tool is an inbuilt screenshot tool on Windows and is designed with a screen recorder on Windows 11. If you are wondering how to screen record on Windows with it, you should first know that it can record a portion of your desktop, the whole desktop or an app window. What you have to do is to draw a rectangle around the desktop portion you want to record.
To screen record on a Windows computer, you need to access the tool as there is no shortcut to directly start recording. The guide on how to screen record on Windows is given below.
Step 1: Search for Snipping Tool in the Start menu search box and open the tool;
Step 2: Click Record and tap New;

Step 3: Drag and draw a box around the portion of your screen or the full screen to record;
Step 4: Hit Start and the screen recording will start in a 3-second countdown;

Step 5: To end the recording, click Stop and the recorded video will be saved in MP4 format to the Videos folder.

Snipping Tool lets you video screen record on Windows through the simple 5 steps and can record any part on the desktop or screen, which is better than Xbox Game Bar. However, if you have more advanced needs to record screen and voice together, or record your screen and yourself simultaneously, a dedicated screen recorder, AWZ Screen Recorder should be the go-to solution.
Conclusion
This article walks you through how to screen record on Windows with the native tools on the OS or Windows-supported professional screen recording software. Screen recording is incredibly useful when you hope to capture something taking place on your screen. It works like a camera to record your actions and what you see. If you are not aware of how to screen record on Windows 11, 10, 8, or 7 but need to do that all the time, this post might be worth reading.
AWZ Screen Recorder is your top choice if you want different recording output formats, and record screen with audio or webcam. It can be used regardless of the older or newer Windows computer.


