VLC is available on all the major desktop systems - Windows, Mac and Linux. It can help compress audio and video files in many formats such as MP4 and offers multiple compression methods. Based on its features of de/encoding, format changing and screen recording, this AWZware post teaches you how to compress videos with VLC in 4 ways. The steps are foolproof to follow.
Compress Video with VLC by Changing Video Parameters
VLC allows you to compress video files by changing, specifically lowering the video resolution and encoding parameters. These parameters that determine the file size include mainly bitrate, video duration and frame rate. Now you can customize them. Download the software application, complete the set-up, and then follow the next steps to compress videos with VLC.
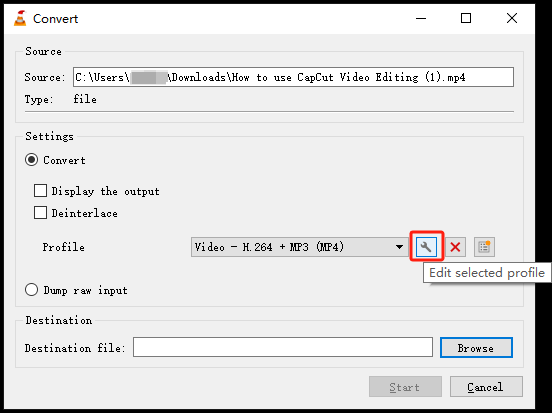
Step 1: Launch the software, go to Media and choose Convert / Save;
Step 2: Click Add in the pop-up window to import your video, and hit the Convert / Save button;
Step 3: Click Edit selected profile - the wrench icon in the new window;
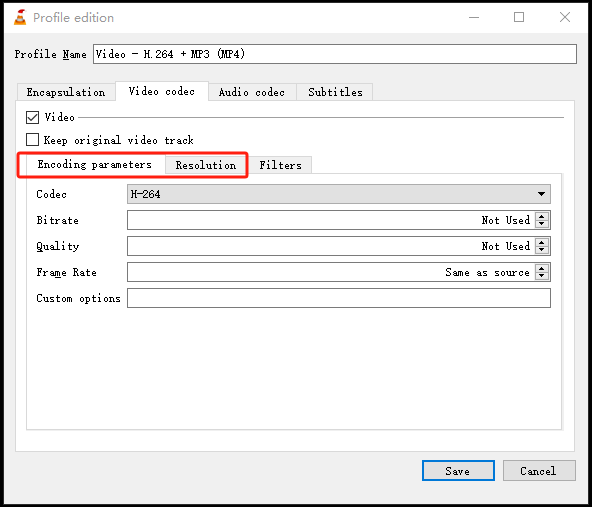
Step 4: Tap Video codec in the Profile edition window, then reduce the bitrate, frame rate, frame size or other encoding and resolution parameters by giving a lower value;
Step 5: Hit Save, click Browse to select the output location and start to compress the video with VLC.
VLC will complete the video compression in tens of seconds. The resolution setting function can auto detect and fill out other options after you fill one.
Compress Video with VLC by Altering Audio Parameters
The second way to compress videos to reduce the video size with VLC is to adjust the audio encoding parameters. Similar to what you do with video parameters, you can re-encode your video with a lower audio bitrate and sample rate. The process to achieve that is also similar. Check the below tutorial to learn how to compress a video with VLC by editing the audio codec settings.
Step 1: Choose Media > Convert / Save, and add your video file to the VLC video compressor;
Step 2: Tap Convert / Save and specify the file saving destination;
Step 3: Click the first icon at the right side of the Profile button to open the profile editing window;
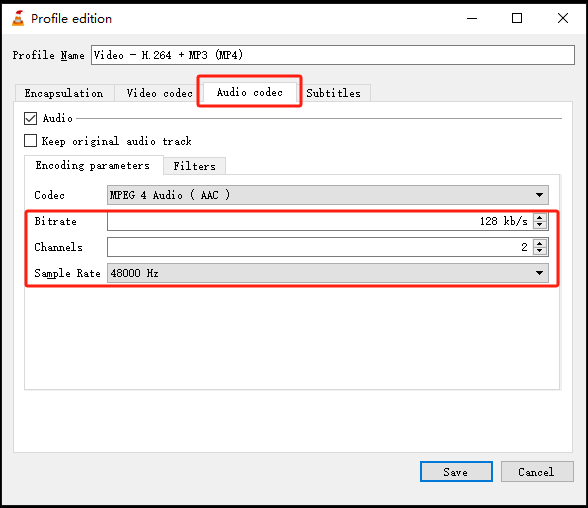
Step 4: Select Audio codec, and set the sample rate or other options to a lower value;
Step 5: Click Save > Start to compress the MP4 or any video file with VLC.
How to Compress a Video in VLC by Video Format Conversion
You can also compress videos with VLC by converting the video format. Different video formats or say the encoding methods or encoders can result in different file sizes. H.264 MP4 and H.265 MP4 (or HEVC) are two popular video formats for a smaller video size. H.265 MP4 compresses videos much more than H.264 but is supported by less devices.
Take a look at how to use VLC to compress videos by format conversion.
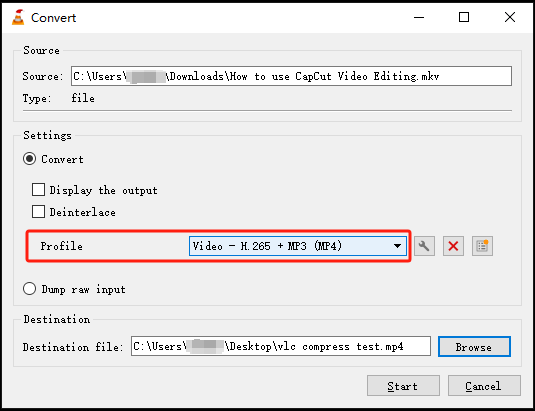
Step 1: Import the larger video file into the program and click Convert / Save according to the same workflow in the former parts;
Step 2: Click Browse to determine the file saving path;
Step 3: Select H.265 or a proper format from the Profile menu and hit Start.
VLC Recorder to Reduce Video Size
If you wish to compress videos with VLC to shrink the video size, you can consider recording only the necessary video parts. Shorter video, smaller file. Thankfully, VLC makes the thing easier than ever and provides a way to trim a video. Here is an instruction on how to get VLC Media Player to compress the video size without losing quality.
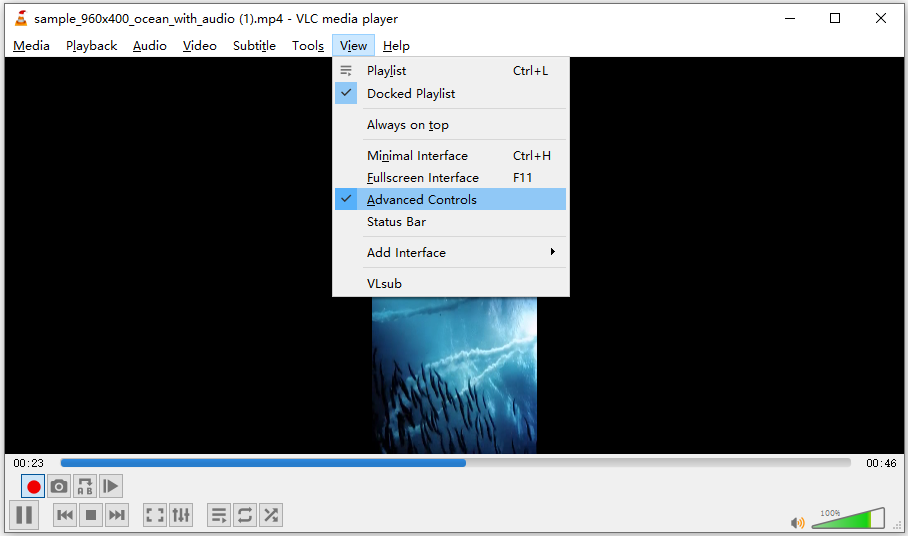
Step 1: Choose View on the top and check Advanced Controls;
Step 2: Open your video by dragging and dropping it into the application;
Step 3: Play the video till the start point you want the video to begin and hit the red recording button immediately;
Step 4: Click the Record icon again when you wish the smaller video to end so that you can resize a video in VLC.
Check the video with less duration in the Videos folder on your computer.
How to Fix VLC Compress Video No Sound
After you compress videos using VLC Media Player, sometimes you may come across the compressed videos have no sound. This is often due to the wrong audio encoding settings. To fix the problem, access the Audio codec interface following the aforementioned process, choose Encoding parameters, set the audio sample rate to 48000 Hz and pick MPEG 4 (AAC) as the codec option. Then, save the file to a specific location.
VLC Alternative to Compress Video: Simple and Fast
Since you have figured out the methods to compress videos with VLC, you can find that they are not straightforward and take your time to get started. For novice users specially, the simplest solution is to choose a compression level and export the compressed file in just a few clicks. Not many customizable steps. That’s where AWZ Screen Recorder, the VLC alternative, comes into play.
Let’s see how AWZ Screen Recorder’s video compressor meets your needs to make a video smaller.
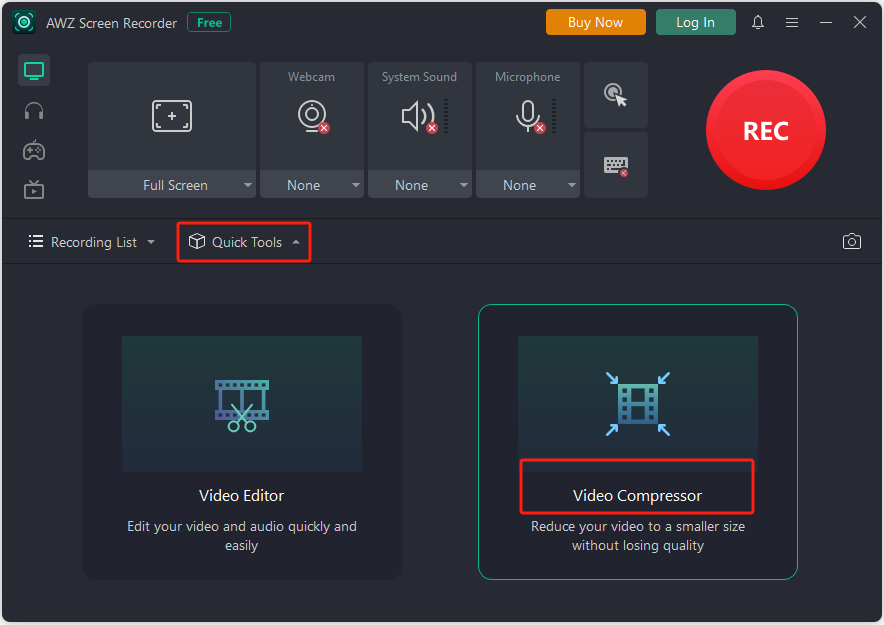
Step 1: Launch the software, click Quick Tools at the bottom and choose the Video Compressor tool;
Step 2: Upload or drop a video file to the interface, which can be MP4, WMV, AVI, etc.;
Step 3: Select a compression option from High, Medium and Low and choose an output path;
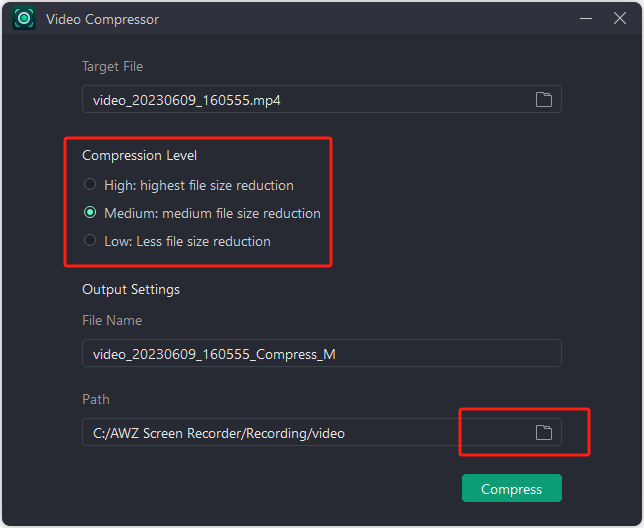
Step 4: Click Compress and continue to do the video compression.
Choosing the Video Editor tool in the app will allow you to use the video trimmer to decrease the file size.
Conclusion
This post has walked you through the most effective ways to compress videos with VLC in intuitive steps and screenshots. If you are familiar with video editing, you can compress a video bitrate or other parameters in VLC to achieve your most satisfied result. If you seldom process media files and don’t want to spend time learning how to change these values, try converting the video format. Or, give a specialized compressor in AWZ Screen Recorder a shot.