Quick Start
Audacity is a free and open-source audio recording and editing tool. Anyone can use it without having to buy expensive tools. Its audio editing features allow you to cut, copy, paste, trim, and split audio and improve its quality.
However, Audacity’s flow is not very simple, and newcomers may feel overwhelmed. That said, it requires a learning curve.
If you're in a hurry and want to improve the audio quality of a recording with a few clicks, we recommend you try AWZ Screen Recorder. Its Denoiser tool can automatically recognize and remove noise to improve audio quality. Click the button below to get this tool and give it a try.
Next, I’ll show you how to improve voice quality in Audacity. You will also learn how to use AWZ Screen Recorder to accomplish this task.
Steps to Improve Voice Quality in Audacity
One of Audacity's main features is its noise reduction tool. Many users use Audacity to remove background noise to improve overall audio clarity. In addition, it can help you remove DC offset, increase the volume of your vocals, enhance clarity with treble and bass, etc.
Let’s see how to improve audio quality in Audacity.
Step 1. Remove Background Noise
- Open Audacity > Choose File > Click Open to add the audio file.
- Choose the one part where the noise is most noticeable.
- Go to Effect > Noise Reduction.
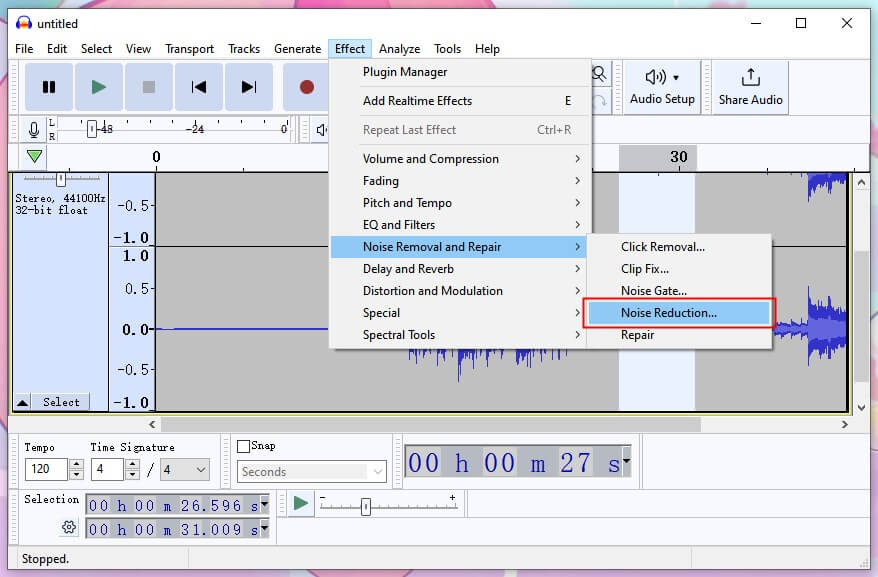
- Click on Get Noise Profile.
- Select the entire audio track.
- Go back to Effect > Noise Reduction.
- Adjust the settings (Noise Reduction, Sensitivity, and Frequency Smoothing) and click OK.
✏️ Note: You can use the Noise Reduction feature to remove echo from audio.
Step 2. Compression
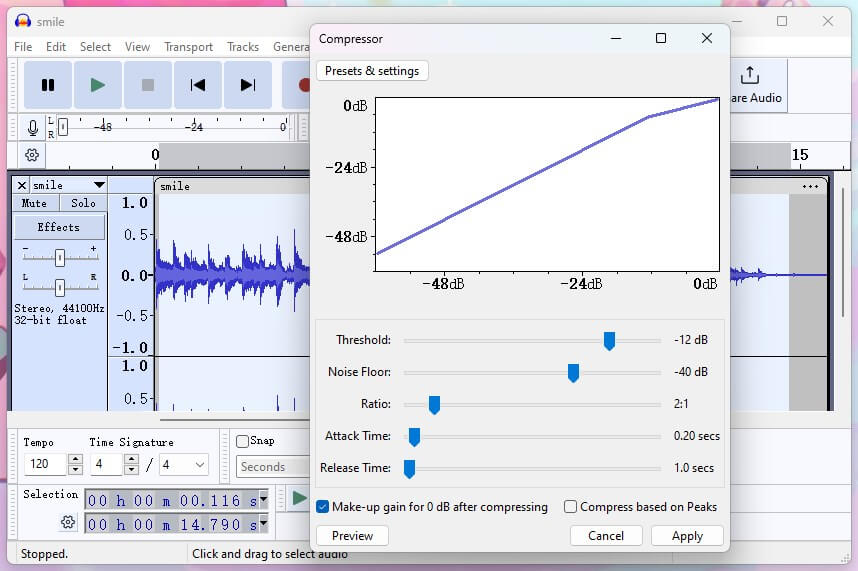
- Select the entire track.
- Go to Effect > Volume and Compressor > Choose Compressor...
- Adjust the settings (Threshold, Noise Floor, Ratio, Attack Time, and Release Time) to even out the dynamic range.
- Click Apply to save the changes.
Step 3. Normalize Your Audio
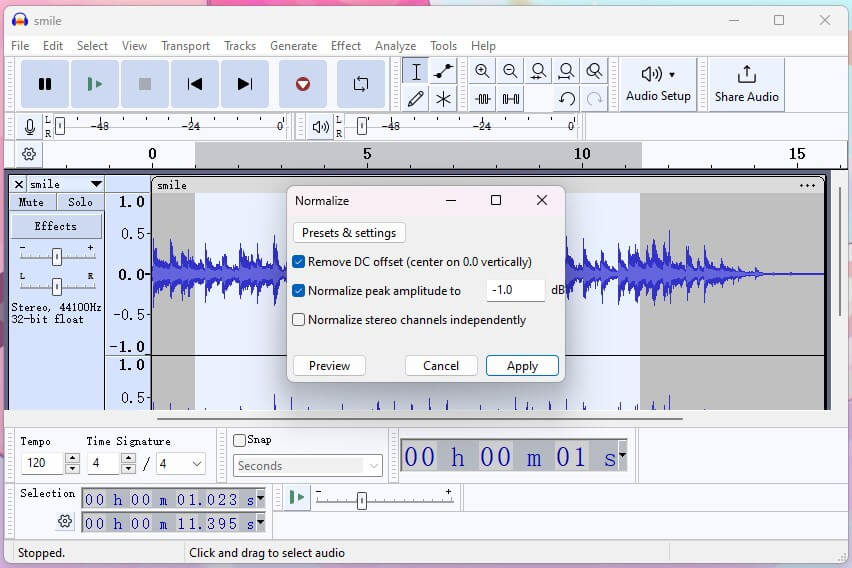
- Select the entire track.
- Go to Effect > Volume and Compressor > Choose Normalize...
- Check the box for Remove DC offset and Normalize maximum amplitude to -1.0 dB (or your preferred level).
- Click Apply.
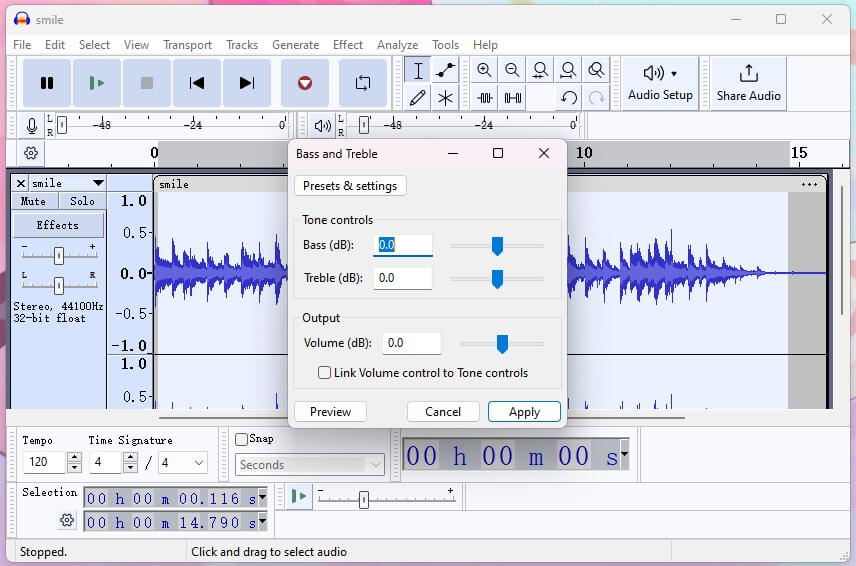
Step 4. Adjust Bass and Treble
- Select the entire track.
- Go to Effect EQ and Filters > Choose Bass and Treble.
- Adjust the Bass and Treble settings to enhance the clarity and depth of the audio.
- Click Apply.
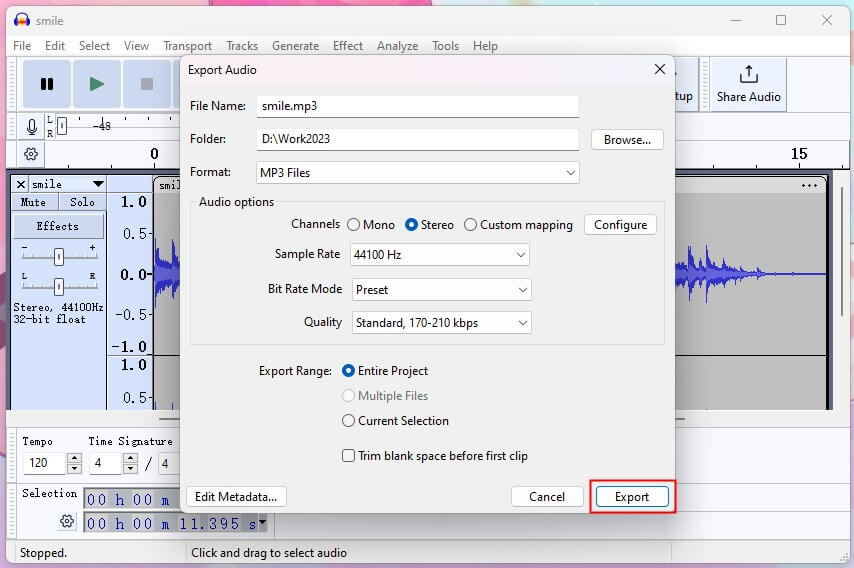
Step 5. Export the Improved Audio
- Click File and choose Export Audio.
- Choose the Export to computer option.
- Select the format and adjust other settings.
- Finally, click Export.
Another Easier Way to Improve Audio Quality
Indeed, you can improve audio quality in Audacity, but it takes time to learn. Also, perhaps you will find that the results are not as good as you would like after processing with Audacity. Well, it is better to record the highest quality audio possible than to record low-quality audio and try fixing it later.
If you want an easier way to improve video audio quality or re-record high-quality audio, AWZ Screen Recorder can help you.
✅ When you record video/audio using AWZ Screen Recorder, you can enable Gain and Noise Reduction features to enhance the sound quality.
✅ When you want to improve the quality of a recorded audio/video, you can use the Denoiser to remove background noise from audio.
Click the button below to get AWZ Screen Recorder and try it out!
Record High-Quality Audio
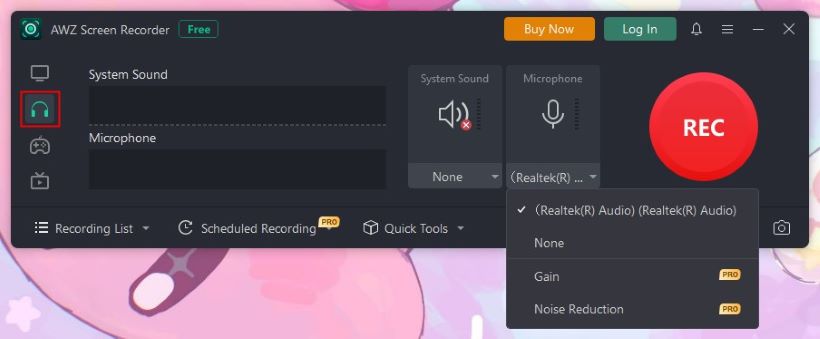
1. Launch AWZ Screen Recorder and go to Record Audio.
2. Enable System Sound or Microphone as needed.
3. Turn Noise Reduction and Gain. Click the REC button to start.
Improve Audio Quality
1. In AWZ Screen Recorder, click Quick Tools and choose Denoiser.
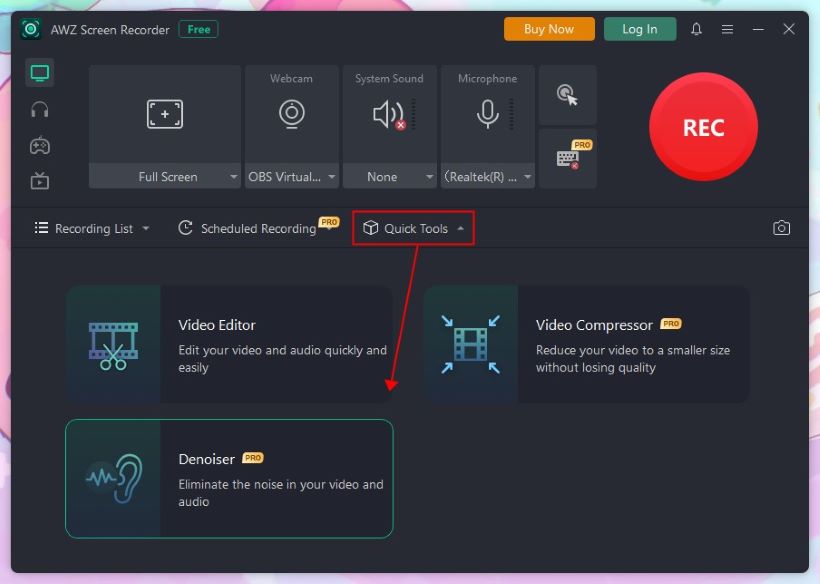
2. Add the audio or video.

3. Click Denoise to start.
As you can see, the workflow of AWZ Screen Recorder is very simple. Whether you want to record high-quality audio or fix unclear recordings, it's just a few clicks away!
Final Words
That’s all about how to improve voice quality in Audacity. You can use Audacity's audio editing features to make your voice sound better. It's a little complicated to use, but it's worth a try. If you want to quickly remove noise from your audio to make your voice clearer, AWZ Screen Recorder is the way to go. Hope this AWZware guide is helpful.