In this article, AWZware prepares a quick write-up on how to set up a green screen with OBS in two ways. Whether you own a green cloth or not, you'll find a counterpart in the following sections.
What You Need to Prepare Before Setting Up OBS Green Screen
The green screen tool in OBS allows you to use a real green screen or a virtual green screen to create a new background when streaming or screen recording. Based on your needs, some necessary elements are required before setting up the green screen on OBS. Check this table to make sure you have prepared them:
| Use Real Green Screen on OBS |
1. A green screen 2. Lightening 3. A webcam |
| Use Virtual Green Screen on OBS |
1. A video meeting program 2. A drawing application 3. A webcam |
How to Set Up OBS Green Screen with a Real Green Screen
Using a real green screen to remove your background guarantees the recording or streaming process without lag. However, one important thing is that the green screen should be evenly lit. Otherwise, the output video cannot be of good quality after enabling the OBS Green Screen feature.
Follow the step-by-step guide on how to set up a green screen with OBS:
Step 1: Create a new scene

Open OBS and head to the plus icon under “Scene”. Rename the new scene and hit “OK”.
Step 2: Add a new source for your video
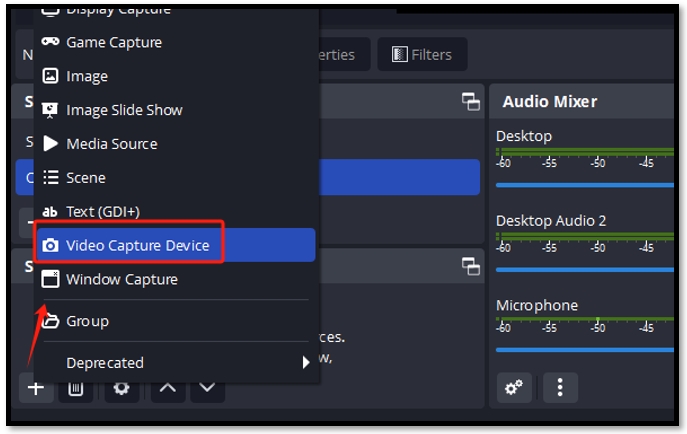
Tap the “+” button below the Sources tab and choose “Video Capture Device”. Enter the name of the source and press “OK”. Next to “Device” in the pop-up window, select the camera you want to use and tap “OK” to use the green screen on OBS.
Step 3: Remove the green screen background
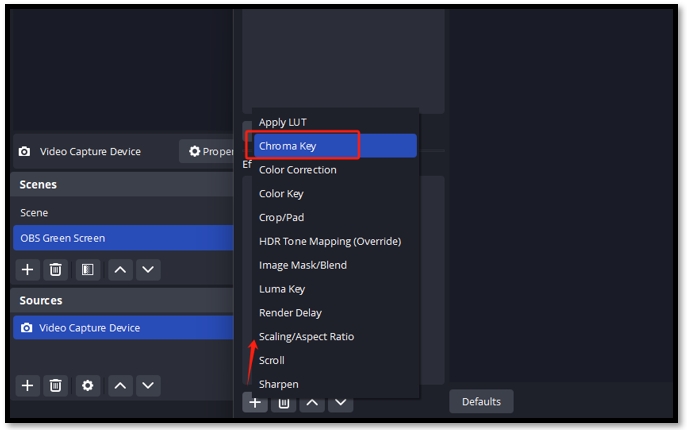
Right-click on your newly added source and select “Filters”. In the Filter dialogue, tap “+” under the “Effect Filter” section. Click “Chroma Key” and hit “OK”. The green screen will disappear.
Step 4: Insert a new background
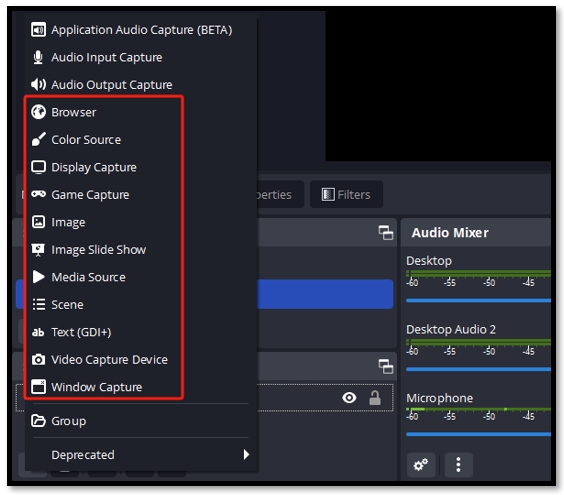
Tap on the plus icon below “Sources” and choose the background from the list. A new background will be added to the OBS green screen.
Step 5: Adjust the layer of your new background and start recording/streaming
Drag and drop the “Video Capture Device” you created to the top of the newly added background. Then, your face won’t be hidden behind the background. Finally, click on the “Start Recording” or “Start Streaming” button.
When recording a game, if you find your OBS game capture doesn’t work, please refer to this article:
OBS Game Capture Black Screen for Windows 10/11: 6 Solutions to Fix It
This article fixes the OBS game capture black screen problem with 6 solutions. Check them out if your OBS is not capturing games on your computer.
READ MORE >How to Set Up OBS Virtual Green Screen
To set up a virtual green screen with OBS, a video conference program like Zoom is essential. It is used as a tool to remove your background. Then, utilize the default drawing application – Paint, to create a green screen on your PC for free. Wonder how we made it? Take a look at the guide on how to use a virtual green screen on OBS:
Step 1: Create a green screen
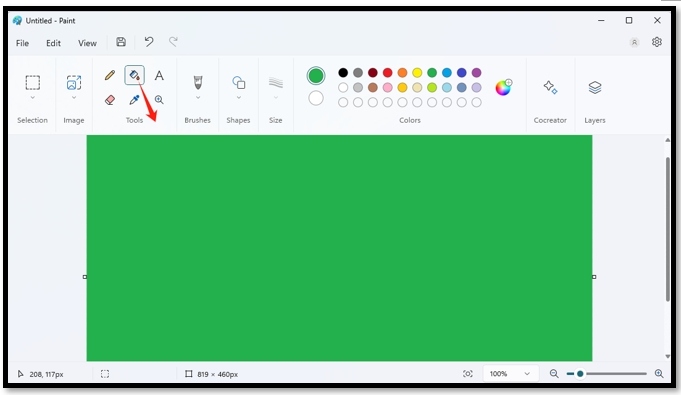
Open Paint and choose the green color from “Colors”. Tap “Fill” and click on the blank space to turn it into a green background. Go to “File” and save it as an image.
Step 2: Add the virtual green screen
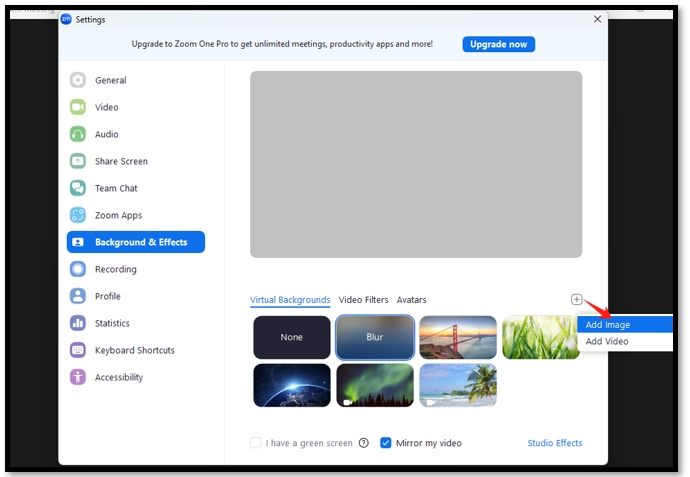
Launch Zoom on your PC and hit “New Meeting” to create a solo meeting. Right-click on the screen and select “Choose Virtual Background”. Click “+” and tap “Add Image” to insert the green screen.
Step 3: Enable the OBS Green Screen feature
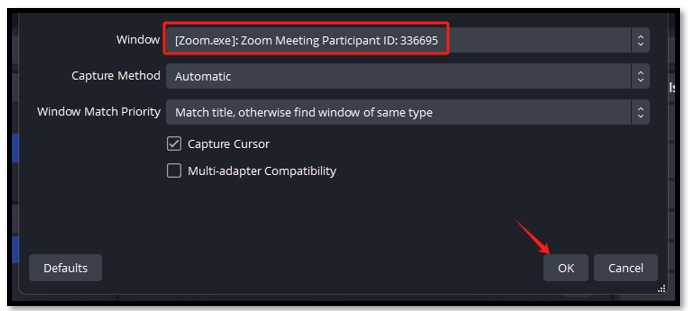
Tap on the plus icon under “Scenes” and click “OK”. Head to the plus button below “Sources”z select “Windows Capture” and tap “OK”. Choose your Zoom meeting as the target window and press “OK”.
Step 4: Remove and add a new background
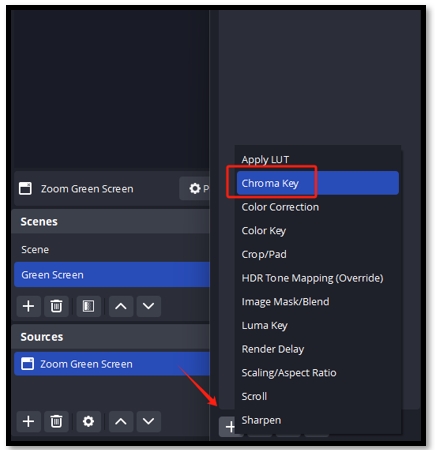
Right-click on the newly created source and select “Filter”. In the left bottom corner, click “+” and tap “Chroma Key”. Hit “OK” and close the dialogue. Navigate to “Sources” and create a new source again to add a new background from the list.
As you can see, using the green screen with OBS can be a little complex. The OBS settings and other features are also hard to navigate, especially for a beginner. As a result, to boost your proficiency, why not try an OBS alternative to streamline the process of turning on the green screen?
Bonus Tip: Try the OBS Green Screen Alternative
AWZ Screen Recorder is one of the best OBS Green Screen alternatives and has easy navigation. Its green screen tool enables you to hide your real background and add a new one as you wish. The AI-driven image segmentation technology accurately identifies the border of your body. Besides, the intuitive UI helps you locate the feature efficiently without being a seasoned professional.
Step 1: Run the application and tap System Sound to accept internal audio;
Step 2: Click Webcam to accept your webinar as the source of video;
Step 3: Hover the cursor on the Webcam option and hit Preview. Tap Green Screen to set up a green screen with the OBS alternative when recording.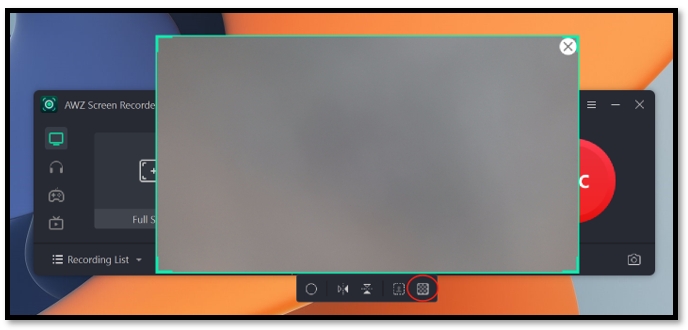
Bottom Line
The OBS Green Screen feature can be tricky for beginners. Two detailed methods are provided to help you know how to set up a green screen with OBS with different tools. Hope you can easily customize the background you like.
For users who need a simpler user interface and adjusting process, AWZ Screen Recorder is an ideal option to enable the green screen feature and change the background.


