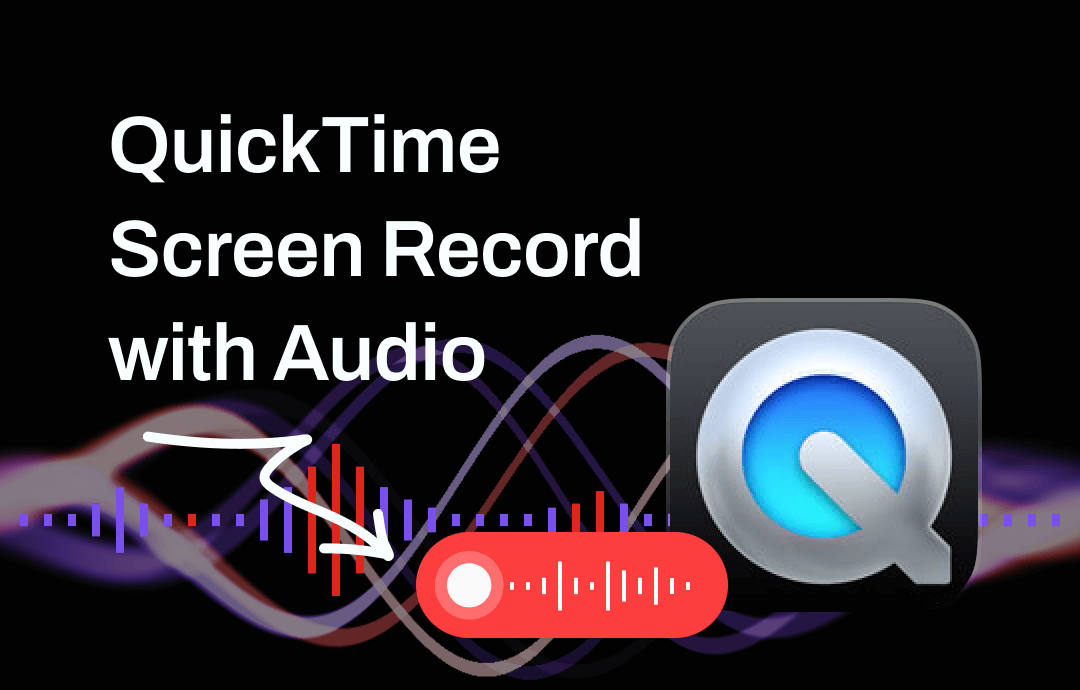
Can QuickTime Record Screen with Audio?
QuickTime is one extensible multimedia architecture, which is mainly used for playing and converting media files. In addition to that, it can also help users record audio and screen. As for screen recording, it can capture the entire screen or only a portion of the screen.
Screen recording with QuickTime is not difficult, just choose New Screen Recording, make some adjustments and you're ready to go. However, you may find that it does not record the audio. What’s going on? Can QuickTime record screen with audio?
Well, QuickTime can record screen with internal audio but you need to install additional software. By default, QuickTime can only audio that comes from the microphone. If you want to record audio from the computer, an extension called Soundflower is required. Just keep reading this guide provided by AWZware to learn more.
QuickTime Record Screen with Audio Guide
Let’s start to see how to record audio with QuickTime Screen Recording feature. If you want to record the internal audio, then you should first follow the steps below to install and enable Soundflower on your Mac.
Record screen with internal audio preparation:
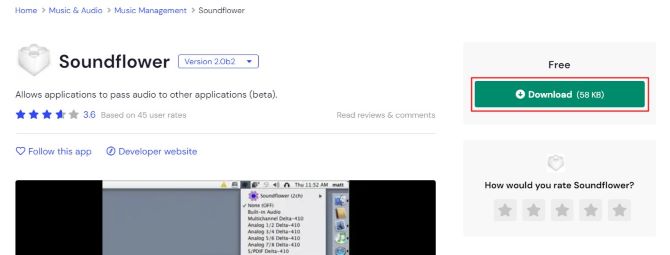
Souldflower can create a virtual audio output so QuickTime Player can capture the system audio. See how to download this plugin and set it as the output device.
- In your browser, go to https://www.macupdate.com/app/mac/14067/soundflower > Click the Download button.
- Click the Soundflower DMG file from the left corner of your browser > Follow the prompts to complete the installation.
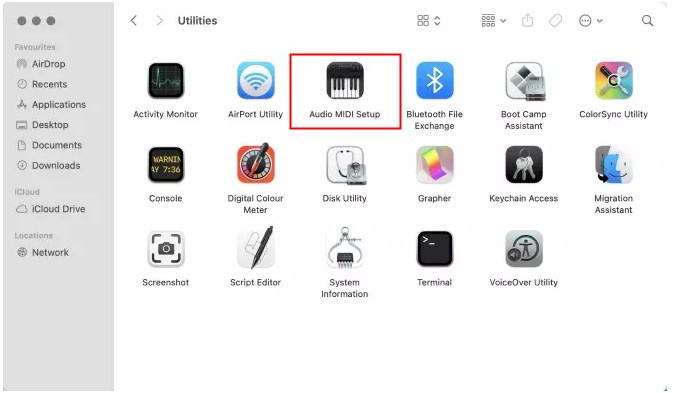
- Afterward, go to the Applications folder and choose Utilities > Open Audio MIDI Setup app.
- Click the + icon in the lower left corner > Choose Create Multi-Output Device.
- Check the box next to Soundflower (2ch) and Built-in Output > Under Drift Correction, select Built-in Output.
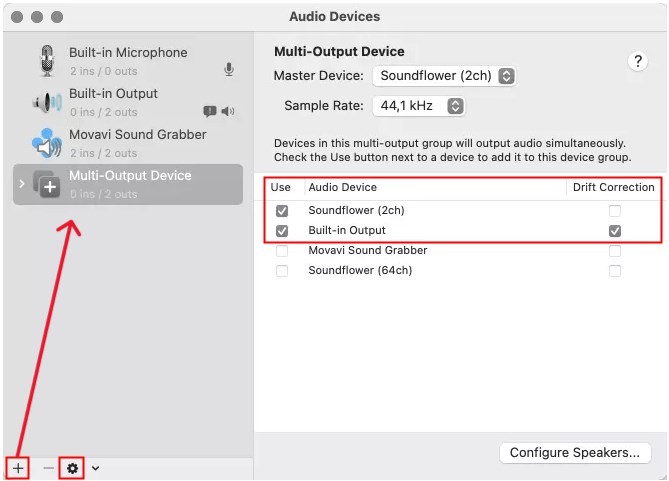
- Click the Gear icon > Choose Use this for Sound Output.
Quick Time Player record screen with audio:
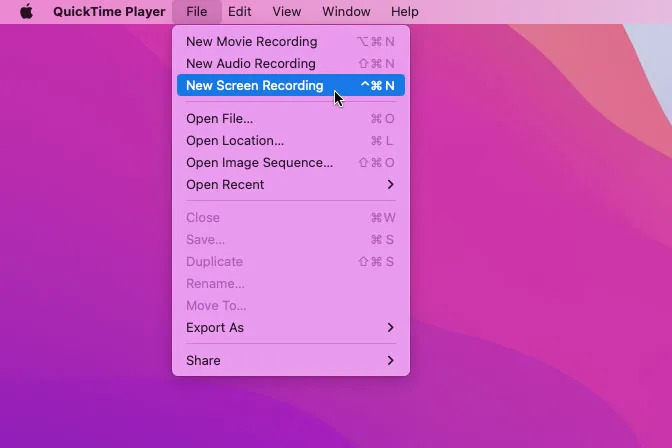
1. Open QuickTime Player > From the menu bar, click File and choose New Screen Recording.
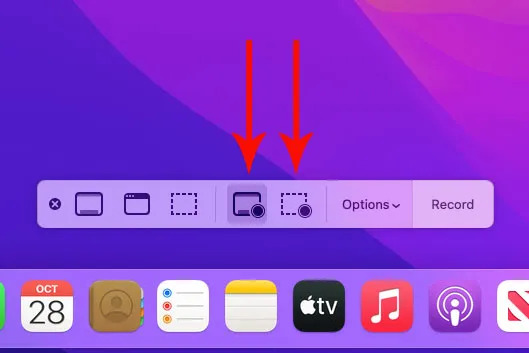
2. Adjust recording settings.
- In macOS Mojave and higher versions - Choose to record the entire screen or selected area > Click Options to select the output device: microphone for voice recording; Soundflower (2ch) for internal audio recording.
- In older versions - Click the arrow icon to select the recording device.
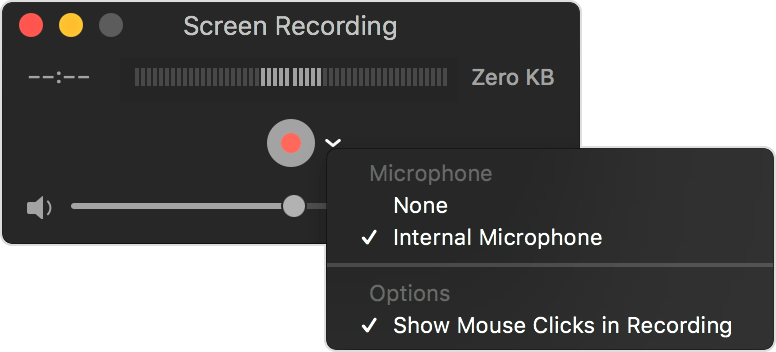
3. Start recording with QuickTime Player.
- In macOS Mojave and higher versions - Click the Record button and the recording will start immediately.
- In older versions - Click the Record button > click anywhere to start a full-screen recording or drag the cursor to select a recording area.
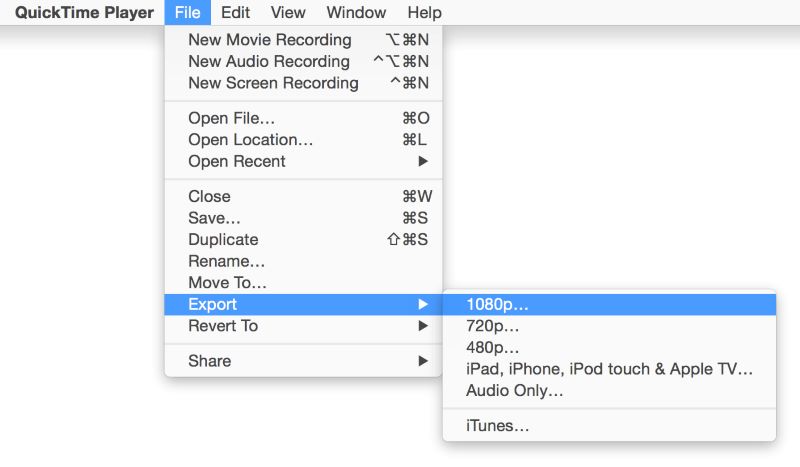
4. When it’s OK, click the Stop button. To export the recording, click File > select Save or Export.
Pros and Cons of Using QuickTime Record Screen
From the above, you already know how to use QuickTime to record screen with audio. QuickTime is indeed a good helper, but it may not be the best choice. Now, let's look at the benefits and drawbacks of using this software.
Pros:
- Built-in on macOS. QuickTime Player comes pre-installed on macOS, so you don't need to spend time downloading additional software.
- Ease of Use. The interface is relatively simple, making it easy for beginners to record their screens quickly.
- Satisfy Basic Recording Requirements. QuickTime Player allows you to record your entire screen or a selected portion. It's suitable for straightforward recording needs.
Cons:
- No Internal Audio Recording. By default, QuickTime Player doesn't capture internal system audio during screen recording.
- Limited Features. QuickTime Player is not as feature-rich as dedicated screen recording software. It lacks advanced editing features, annotations, scheduled recording, etc.
- No Webcam Integration. QuickTime Player does not provide direct support for recording screen and webcam at the same time.
- Limited Export Option. It does not allow you to choose the export format - you can only save the recording as a .mov file.
For simple recording, QuickTime is a good choice. However, if you want to take control of the recording, then professional software would be a better choice. Read on to learn more.
Another Easy Way to Record Screen with Audio
If you find it cumbersome to record screen with audio using QuickTime, then you can try AWZ Mac Screen Recorder. With this software, you can efficiently complete the recording in a few clicks. Below are its key features.
⭐ Record screen with internal audio or microphone audio.
⭐ Supports record webcam. It can record screen and webcam at the same time.
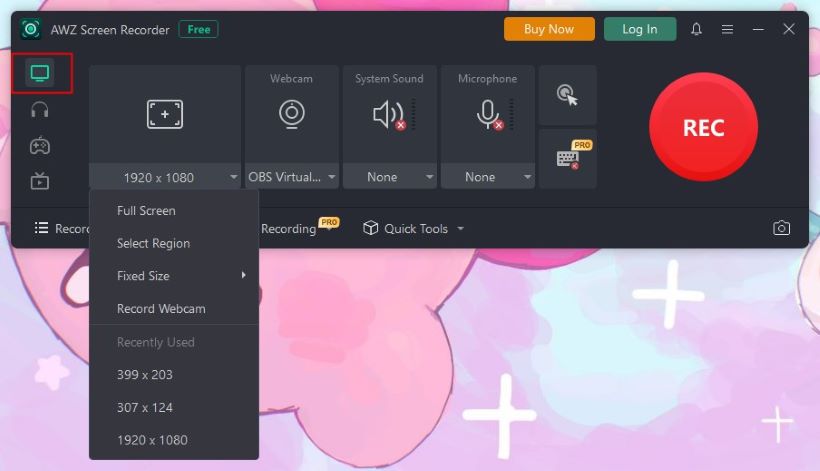
⭐ Lets you record any part of the screen, the full screen, selected region, fixed size.
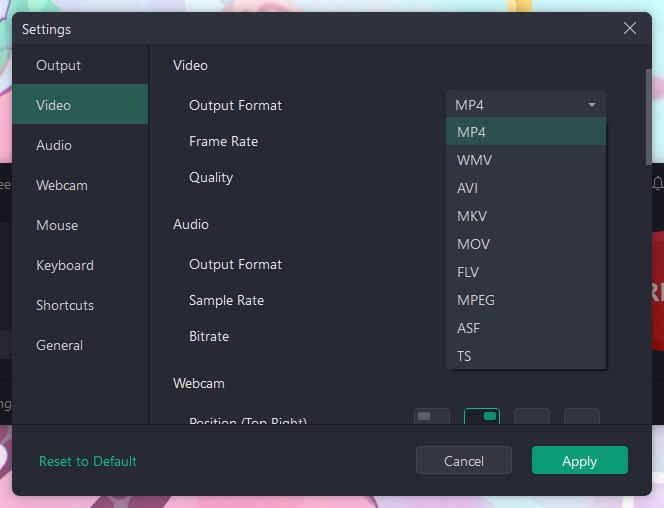
⭐ Allows you to save the recording in MP4, WMV, AVI, MKV, MOV, FLV, etc. format.
⭐ You can create an auto-start and auto-end task to have it automatically record the screen.
See how to use this recorder to screen record on your Mac:
1. Download, install and launch AWZ Mac Screen Recorder.
2. Go to Settings to adjust the output format.
3. Click Record Screen, choose the recording area > turn on the system sound or microphone as per your needs.
4. When ready, click the REC button to start recording.
5. Click the Stop button to end the recording.
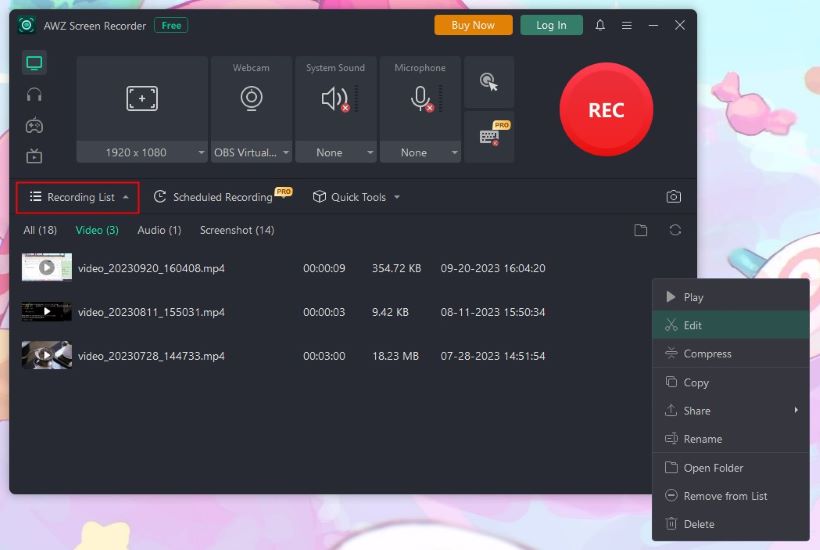
Under Recording List, you can check all the recordings. If needed, you can edit or compress the video.
AWZ Mac Screen Recorder can record microphone and internal audio at the same time. Therefore, you can use it to record meetings, video calls, and interviews.
Conclusion
That’s all about “QuickTime record screen with audio”. By default, QuickTime can only record audio from a microphone. If you want to record internal audio, then you need to install Soundflower, but this may not work on all Macs.
If QuickTime doesn't work, you can try AWZ Mac Screen Recorder. This program allows you to capture any screen and any audio.