Can PowerPoint Screen Recording with Audio?
PowerPoint has a built-in recorder for screen recordings. You can use it to record PowerPoint presentations or any on-screen activity. It is a good choice for a quick and simple recording.
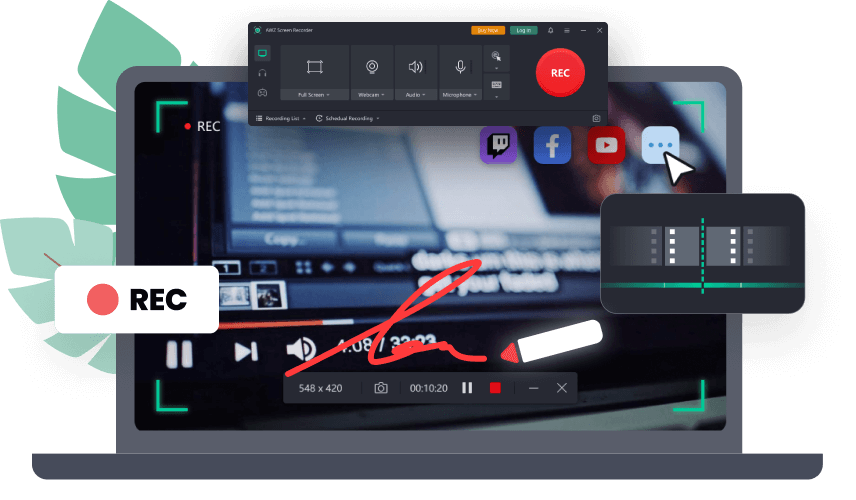
However, PowerPoint can only help you record the screen with microphone sound. If you want to record the screen with system sound, try another tool like Free AWZ Screen Recorder. It is a free and easy-to-use recording tool for Windows users. Click the download button to get the program.
Next, I’ll show you how to record screen with PowerPoint and AWZ Screen Recorder. Keep reading to get the detailed steps.
Step-by-step Guide to Record Screen with PowerPoint with Audio
Let’s start by learning how to record screen using PowerPoint. You will know how to record the screen with or without audio, edit the recording, insert the recording into the presentation, and save the recording as a separate file.
How to Record Screen Using PowerPoint
1. Open PowerPoint and prepare the content you want to record.
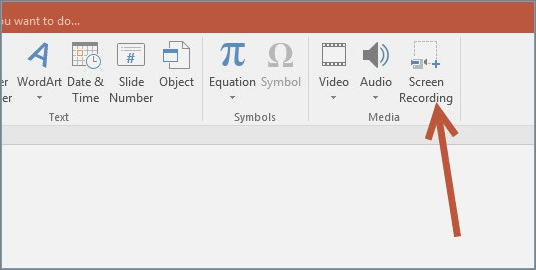
2. Click Insert from the menu bar. Choose Screen Recording in the Media box.
3. When you see the Control Dock, click Select Area. Then, select the area you want to record. To choose the entire screen, press Windows + Shift + F.
4. By default, PowerPoint records the screen with the microphone and mouse cursor. If you don't want that, please click Audio and Record Pointer to turn them off.

5. Click the Record button to start recording. If necessary, click the Pause button to stop recording temporarily.
6. Finally, click the Stop button.
Want to record yourself presenting a PowerPoint? This article will guide you through the recording:
How to Video Record Yourself Presenting a PowerPoint: Windows/Mac/Phone
Learn easy guides on how to video record yourself presenting a PowerPoint. Check the methods for a Windows, Mac and phone using PowerPoint or other recorders.
READ MORE >How to Edit Recording Video in PowerPoint
Once recorded, the video will automatically be added to the current slide. You can edit the video as needed, trim it, adjust its appearance, and set the playback settings.
Trim the recording
1. Right-click the video. Choose the Trim option.
2. Click the Play button to check where you want to make the cut.
3. After that, drag the green and red bars to determine the starting and ending positions.
4. Click OK to save the change.

Adjust the video style
1. Right-click the video.
2. Choose the Style option. You can also select the video and choose the Video Format option.
3. Now, you can set the video's shape, border, and effects.
Change the playback mode
1. Right-click the video and select Start.
2. Select a playback option according to your preference:
- In Click Sequence
- Automatically
- When Clicked On
How to Save Video Recording to Computer
Do you want to save the recording for other purposes? No problems! The steps are as follows.
1. Right-click the video.
2. Choose Save Media as.
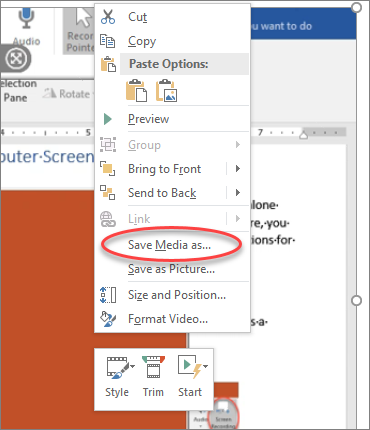
3. Select a location and give the file a name.
4. Click Save to confirm.
As you can see, using PowerPoint to record the screen is very simple. However, it is not a professional video recorder and lacks advanced features. If you are unsatisfied with the video you recorded using PowerPoint, you can use a professional recording tool. You can go to the following section to learn more.
Another Free Way to Record Screen with Audio
PowerPoint's recording feature is easy to use but lacks advanced features. In addition, if you want to record the system audio, PowerPoint is helpless. Luckily, there are many other free professional audio recorders, such as AWZ Screen Recorder.
✅ You can record anything with or without audio. It supports recording the system audio and microphone.
✅ It will be a good helper if you want to record yourself presenting a PowerPoint because it can record the screen and webcam simultaneously.
✅ It offers 10+ video formats and allows you to adjust the frame rate and quality. During the recording, you can use annotation tools to draw anything.
Here are the steps to use AWZ Screen Recorder to record screen:
1. Download, install, and launch the program.
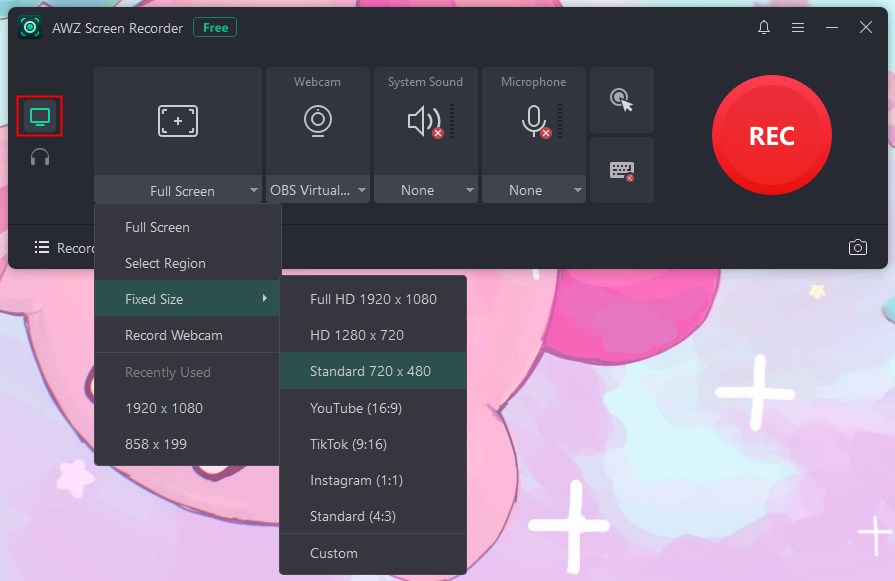
2. Go to Record Screen. Click Full Screen to select the recording area.
3. Enable the webcam and turn on audio recording as needed.
4. Click REC to start.
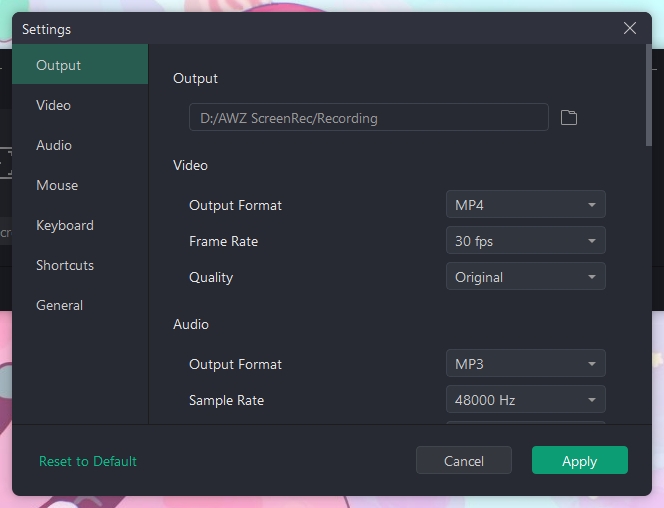
Before the recording, you can go to Settings to adjust the format, quality, mouse, and keyboard.
Final Words
That’s all about how to record screen with PowerPoint. You must have mastered the skills of PowerPoint screen recording now. In addition to PowerPoint, AWZ Screen Recorder is also a good choice, especially when you need more advanced features. Hope this AWZware guide is helpful.
Record Screen with PowerPoint FAQs
Q: Why can't I screen record on PowerPoint?
Many reasons can cause the problem, such as permission problems, low version, software conflicts, etc. Check this article to learn more and find the solution: Fix PowerPoint Screen Recording Not Working.
Q: How do you record yourself and show a PowerPoint at the same time?
- In PowerPoint, choose Slide Show.
- Click the Record Slide Show option. Choose to record from the beginning or from the current slide.
- Select the camera and microphone from the top.
- Click the Record button to start.
Q: Why does PPT screen recording have no sound?
The microphone is not set up correctly, or there is a problem with the audio driver. Check this guide to get the solution: PowerPoint Not Recording Audio.


