Is VLC A Good Choice for Webcam Recording?
VLC is free with no hidden fees, ads, or subscriptions. Therefore, many people choose to record screen with VLC. It can also be your helper when you want to record webcam. However, what you need to know is that VLC also has significant drawbacks.
- You can't use VLC to record both desktop and webcam at the same time.
- It lacks editing tools, so you can't remove unwanted parts after the recording.
While VLC Media Player can be used for webcam recording and offers certain advantages such as cost-effectiveness, it may not be the best choice if you need more advanced recording features. After all, VLC is not just built for recording.
Next, we'll show you how to record webcam with VLC. In addition, we'll introduce a professional webcam recorder that will help you to complete the recording quickly. Let’s get it on!
How to Record Video from Webcam with VLC
The process of recording webcam with VLC is not complicated. Simply turn on the recording option and tell VLC to record the webcam. Below, we will explain how to record webcam with VLC on PC and Mac respectively.
If you haven't already VLC installed, you can get it by going to the Microsoft Store or its official website (https://www.videolan.org/vlc/index.html).
Record Webcam with VLC on PC
By default, the main interface of VLC doesn't show the option for screen recording. You need to turn it on manually. Here are the detailed steps to record webcam with VLC on a Windows PC.
Step 1. Turn on Recording Option
Open VLC > Click View from the menu bar > Select Advanced Controls.

Step 2. Adjust Recording Settings
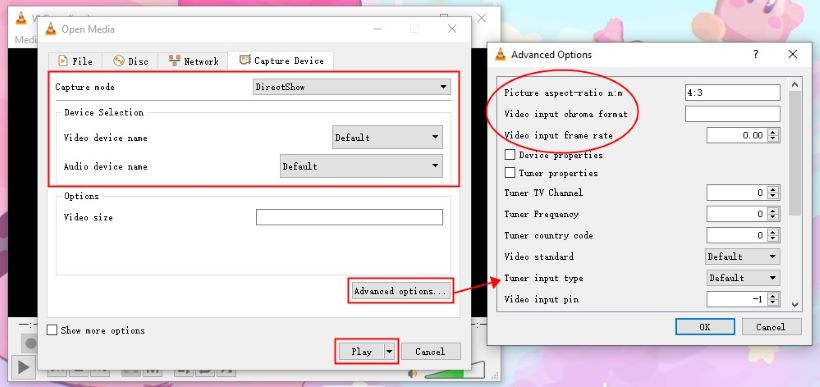
- Click Media in the top left corner > Choose Open Capture Device... option.

- Select the Capture Mode: Make sure DirectShow option is selected.
- Choose Video and Audio Devices: Choose your webcam next to Video device name; Choose the audio input device next to Audio device name.
- If needed, click Advanced options to adjust the picture aspect ratio, frame rate, or other settings. This step is optional. Usually, 30fps is enough to capture a high-quality video.
- Go to the Play dropdown at the bottom and select Convert.
Step 3. Record Webcam
- Select the format: In the Convert window, under Profile, choose the video format, like MP4.
- Click Browse to select a destination to save the recording.
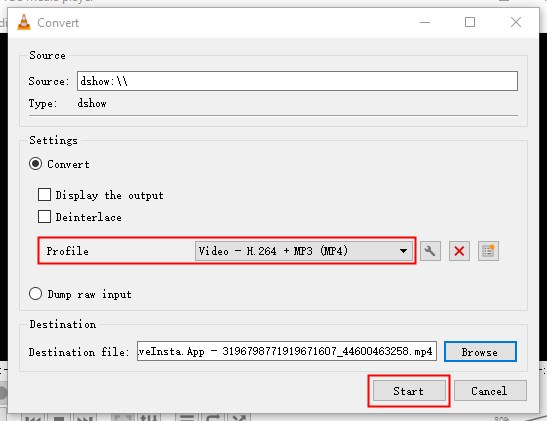
- Start Recording: After setting everything up, click Start to begin recording from your webcam.
Record Webcam with VLC on Mac
If you are using a Mac computer, you can follow the steps below to record webcam with VLC.
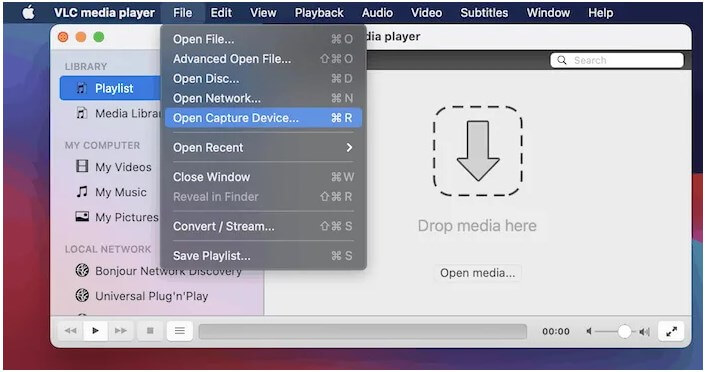
Step 1. Choose Open Capture Device
Run VLC on your computer > Click File from the menu bar > Choose Open Capture Device...
Step 2. Configure Capture Settings
- Click Capture and choose Input Devices.
- Select your webcam under Video and choose your microphone under Audio.
- Click Settings to access more advanced settings. You adjust the destination folder and the video format.

Step 3. Start Recording
If everything is OK, click Open to start the recording.
Another Easier Way to Record Video from Webcam
VLC is primarily a media player, so its recording capabilities are somewhat basic compared to dedicated webcam recording software. In short, it is suitable for simple and quick recordings. On the other hand, its workflow is a bit complex.
Well, VLC is not the only tool that can record your webcam. If you require higher-quality recordings, more features, and greater control, investing in professional webcam recording software would be a better choice. AWZ Screen Recorder is such a tool.
AWZ Screen Recorder is one powerful yet tiny recorder for Windows and macOS. Below are its key features of webcam recording:
⭐ Record various webcams
⭐ Record video from webcam with audio
⭐ Record any part of the webcam/screen
⭐ Customize the format of the video
⭐ Cut out unneeded parts after recording
⭐ Record the screen while recording the webcam
AWZ Screen Recorder is very easy to use. You can complete the recording in a few clicks. The steps are as follows:
Step 1. Download and Launch the Tool
Click the button below to get AWZ Screen Recorder.
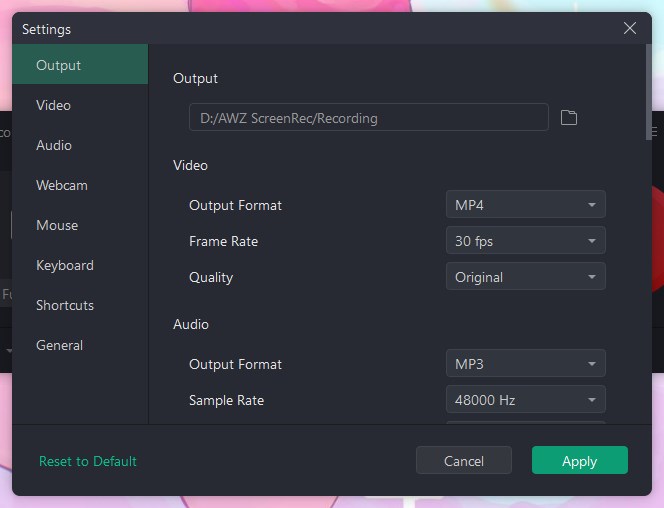
Step 2. Adjust Recording Settings
- Click the hamburger icon in the top right corner > Choose Settings.
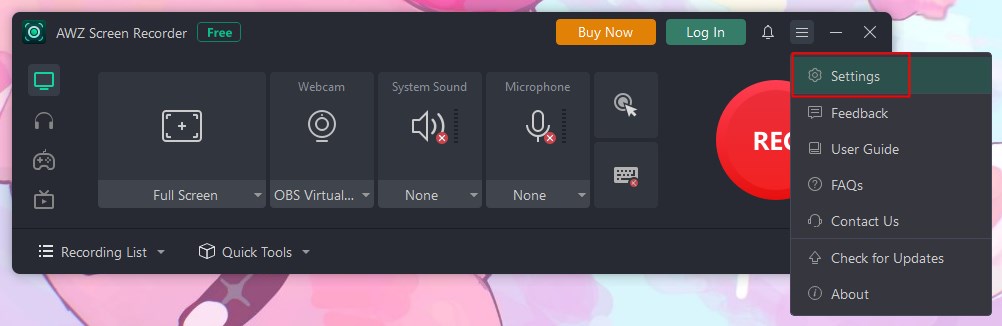
- Adjust the output format/location and the webcam location if needed.
Step 3. Start Recording Webcam
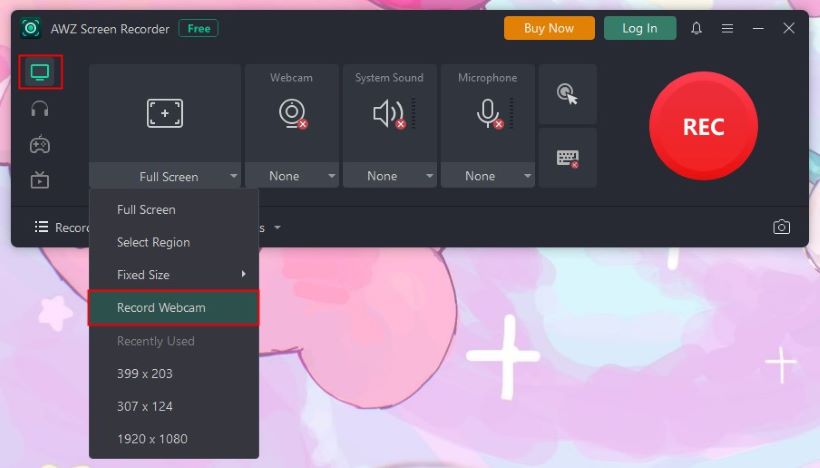
- Go to Record Screen > Select Record Webcam and choose your webcam.
- Turn on the system sound or microphone.
- Click REC button to start recording.
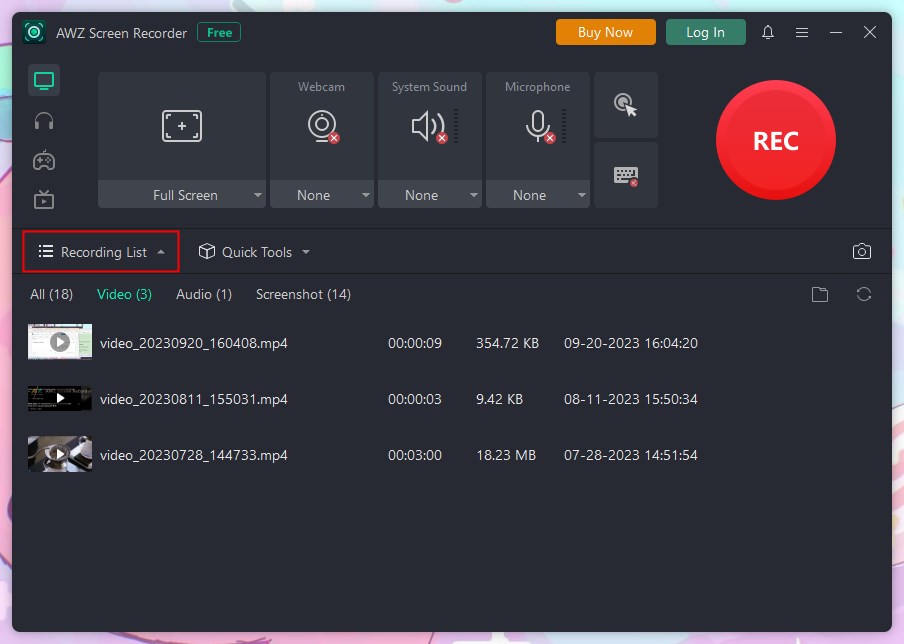
To end the recording, click the Stop button. After that, go to Recording List to find the recording. You can play, edit or share the video as needed.
Final Words
That’s all about how to record webcam with VLC. For basic webcam recording needs, it's a good option; however, for more advanced requirements, dedicated webcam recording software might be more suitable. In this case, you can turn to AWZ Screen Recorder. This tool is not only good at recording webcam but also helps you to record any activity on your screen.