Nowadays, the need for recording screens has become an emergency. No matter whether you want to save content, create tutorials, track progress, etc., a specialized screen recorder can help you finish all tasks without breaking a sweat. Luckily, you can always find an ideal screen recorder in this market. Free Cam is such a good choice among all the screencasting software. In this article, AWZware will offer you a comprehensive guide to introduce Free Cam to you. Let's get started!
Get to Know Free Cam
As its name suggests, Free Cam is a free tool for screen recording that enables you to easily create screencasts, edit recorded videos, and upload to YouTube without any watermark or time limits. By using Free Cam, you can make a recording of your entire screen, a selected area, or a single window no matter what software you’re running. If needed, you can also choose to record voice to make a more informative video, both microphone sounds and system audio are supported.
What’s more, besides offering an easy way to record screens, Free Cam also serves as a practical audio & video editor. With the help of Free Cam, you can turn draft videos into well-rounded videos effortlessly.
Moreover, after recording or editing videos in Free Cam, this screencasting tool offers a more convenient and efficient feature: share videos on YouTube in one click. With this function, you can upload and publish your edited videos to your YouTube account with ease. Also, you can save the video directly of HD quality on your desktop for later use.
Features and Benefits
In this part, we’ll walk you through the key features of Free Cam one by one, helping you get an all-around impression of Free Cam.
Screen Recording: Capture any part of your screen or specific application windows.
Benefit: Ideal for creating software tutorials, demos, or recording gameplay.
Webcam Recording: Simultaneously record your webcam feed along with your screen.
Benefit: Perfect for creating engaging video presentations or vlogs.
Audio Recording: Capture system sound, microphone input, or both.
Benefit: Ensure high-quality audio in your recordings.
Annotation Tools: Add text, shapes, arrows, and highlights to emphasize points in your videos.
Benefit: Make your tutorials and presentations more engaging and informative.
Video Effects: Apply various effects to enhance the visual appeal of your recordings.
Benefit: Give your videos a professional and captivating look.
Privacy and Security: Control who can access your recordings.
Benefit: Ensure that sensitive content remains secure.
Free Cam's rich feature set and corresponding benefits make it an ideal solution for a variety of users, from content creators and educators to professionals and gamers. Whether you're looking to record software tutorials, create engaging video presentations, or capture memorable gaming moments, Free Cam has the tools you need to succeed.
Getting Started with Free Cam
Before getting started with Free Cam, let’s specify its compatibility.
System requirements for Free Cam:
| Hardware | |
| Computer and processor | Intel/AMD 1 GHz or faster processor |
| Memory | 4 GB RAM or higher |
| Hard disk | 5 GB available disk space (to record a 30-minute screencast) |
| Display | 1024x768 or higher resolution monitor |
| Video Card | 512 MB of VRAM |
| Sound | Sound card and microphone (for recording narration) |
| Software | |
| Operating System | Microsoft Windows 10/8/7/Vista/XP(SP3) (32- and 64-bit editions) |
How to download and install Free Cam:
- Open your browser and go to the Free Cam’s official website.
- Enter your email address and hit the blue Download button. The download will begin automatically.
- Launch the installer file and click Agree after reading the license agreement.
- Tap Install.
Free Cam Interface
Designed to make screen recording and video editing a breeze, the interface of Free Cam is intuitive and user-friendly. It does its core jobs fine, making it easy for fresh users to start recording and modifying. On the top navigation bar of Free Cam, only three tabs are available: Settings, Home, and Help. When unfolding the Home tab, it’s straightforward to choose to start a new recording, edit videos, save as, and upload to YouTube. You will not need a detailed guide to use Free Cam like a pro!
Recording with Free Cam
To start a new recording in Free Cam, you need to finish the installation for sure. After that, follow the steps below to learn how to record the screen on your Windows PC:
Step 1. Launch Free Cam on your computer.
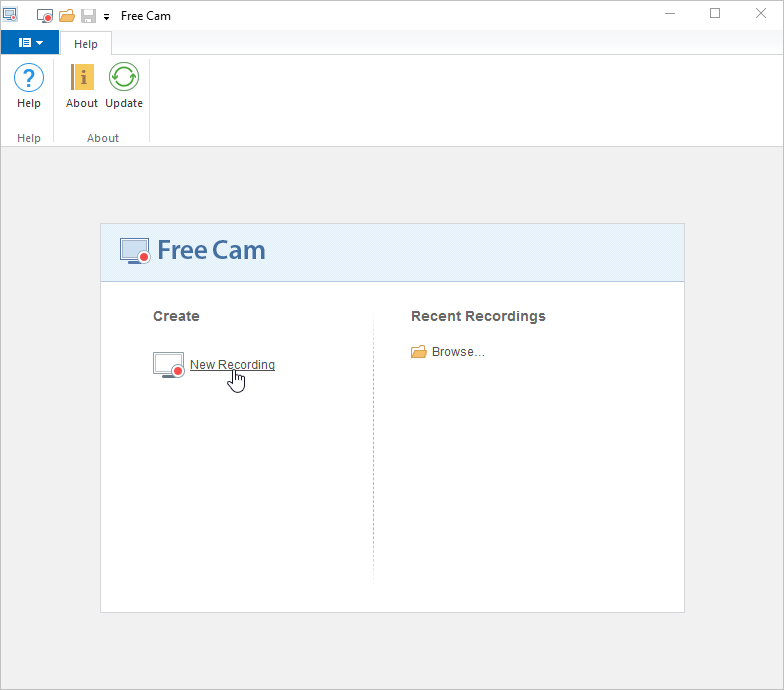
Step 2. You’ll see a pop-up window. Click New Recording in the opened window.
Step 3. Select the area you want to record from the menu:
- Video 16:9
- Video 4:3
- Fullscreen (even for multiple monitors)
- Custom area
- Particular application
Step 4. Move or resize the recording area as per your requirements.
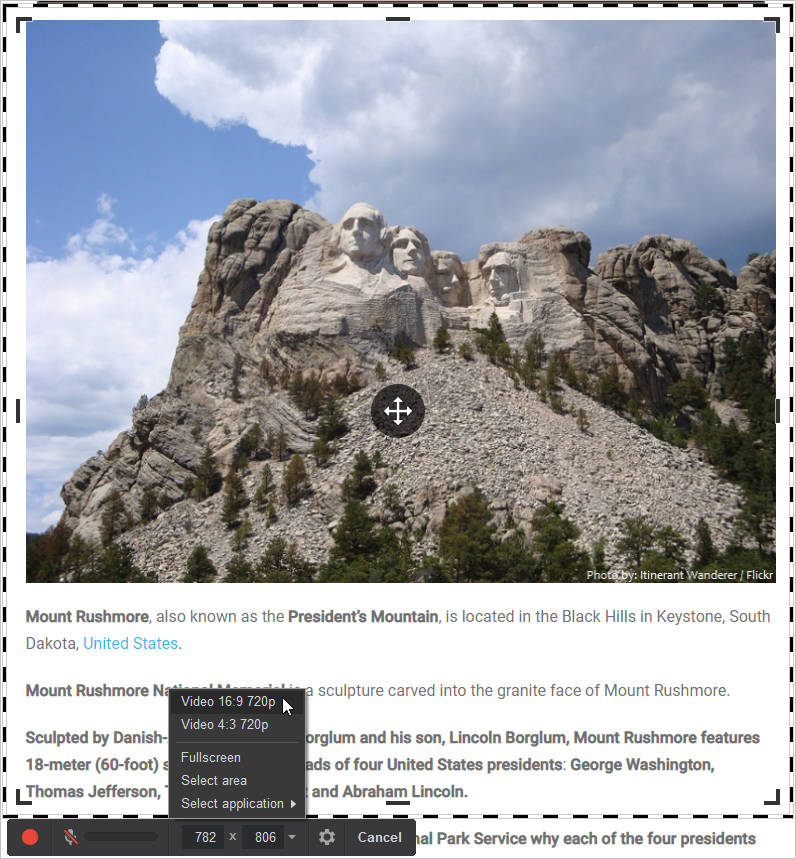
Step 5. Tap the red button on the left side of the toolbar to start recording.
Step 6. Stop recording by clicking Done or pressing the Esc key on your keyboard.
If you need to record your voice while screen recording, make sure to set up your microphone before recording, which is accessible via the Free Cam Settings. Try to stay in a quiet place and produce a video in high quality.
Editing Your Recordings
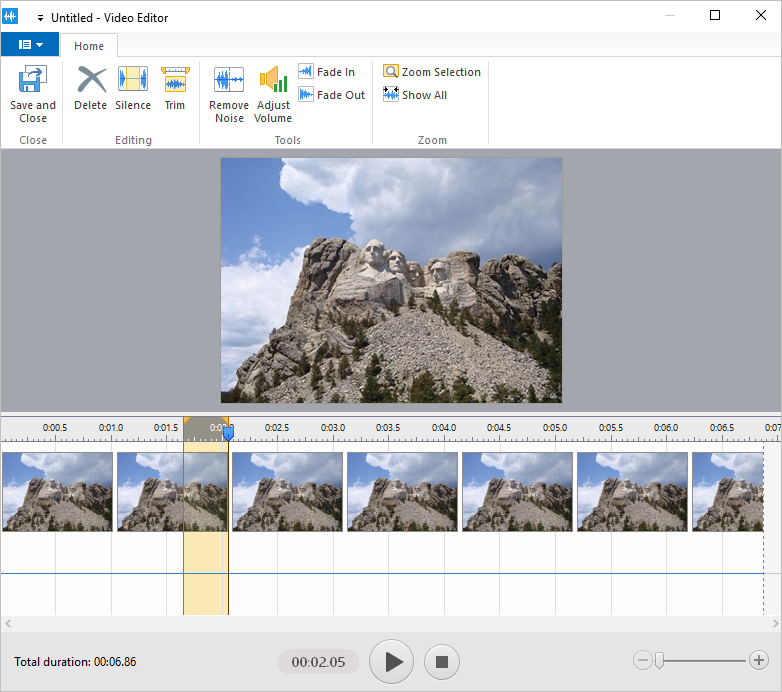
When editing your recordings with Free Cam, you’re able to perform functions like deleting selections of a video, silencing a part of a video, trimming clips, removing noise, adjusting volume, setting fade effects, and zooming in and out of the timeline.
By tapping Edit, you’ll enter Free Cam’s video editing interface, and all the functionalities we’ve mentioned above are displayed on the top pane. The main interface will show you your videos, and the bottom of the interface is the operation area. You can drag the line with your mouse to adjust the size of different areas.
Exporting and Sharing Your Videos
Export videos: After recording, tap Save as Video (press Ctrl + D) can help save this screen recording to your disk in the WMV format. Alternatively, you can also save this recording as a project file (a file with a .screenrec suffix) by opening the application menu and selecting the Save Project option.
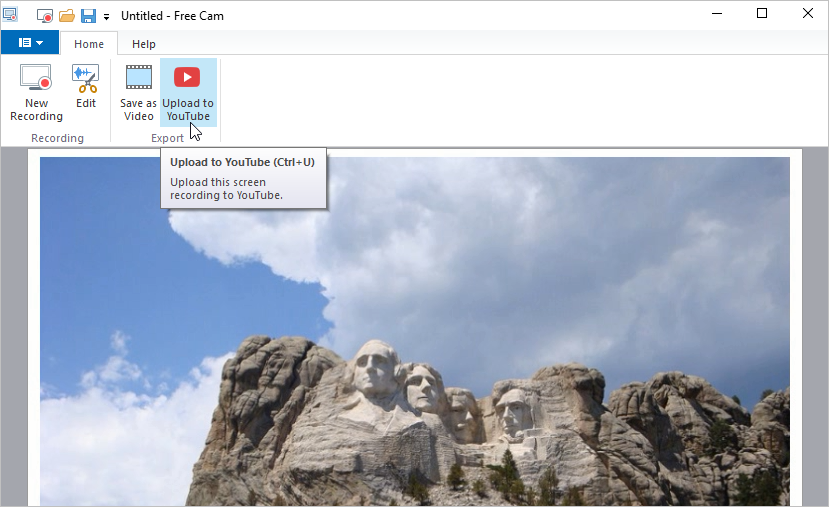
Share videos: If you want to publish your screen recording to YouTube, simply click Upload to YouTube in the Video Preview window. Then sign in to your YouTube account enter the title and description of your video, select a category, and set up the access permissions. Finally, click OK to upload this video to YouTube.
Video and Audio Quality
Free Cam has a video recording quality limit of 760p no matter whether you need to save the recordings to your desktop or upload them on YouTube channels. Though this is a decent video quality for lots of users, it may disappoint you if you need HD videos.

The 8 Best Tools for YouTube Video Cut and Download
Do you know the best YouTube video cut and download tools? Learn how to cut and download part of a YouTube video with 8 efficient YouTube video cutters.
READ MORE >Alternatives to Free Cam
Admittedly, Free Cam has an excellent performance on screencasting and video editing, and it offers 100% free services, but it does lack some advanced and essential functionalities. Meanwhile, its pro version – Cam Pro charges $227 per year, which is much more expensive than many other screen recorders on this market. So, let us introduce you to a versatile screen recording and video editing software named AWZ Screen Recorder.
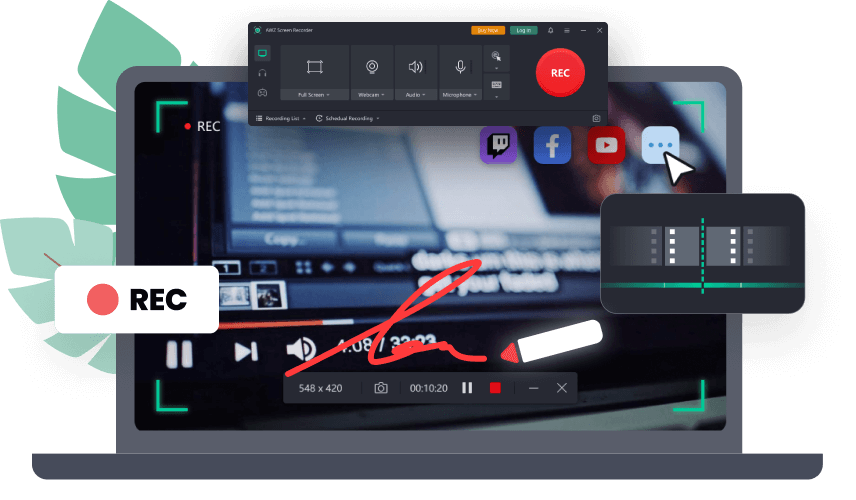
AWZ Screen Recorder offers a wide range of features designed to make your recording and editing tasks easier and more efficient. It offers four recording modes: Record Screen, Record Audio, Record Game, and Record Streaming Video, meeting all your requirements in daily life and work. In addition, AWZ Screen Recorder supports all popular formats, such as:
| Video | MP4, WMV, AVI, MKV, MOV, FLV, MPEG, ASF, TS |
| Audio | MP3, WAV, AAC, MMA, FLAC, OGG, MP2, M4A, AC3 |
Moreover, you can also customize the webcam position, apply different mouse effects, display a keyboard on your screen, adjust shortcuts, etc., all becomes effortless.
Steps for utilizing AWZ Screen Recorder are available below:
Step 1. Download AWZ Screen Recorder for your Windows PC or Mac by clicking the following download button.
For Windows Users:
For Mac Users:
Free Download AWZ Screen Recorder for macOS
Step 2. Install this screen recorder on your computer. You’re free to choose to sign in or not.
Step 3. Select a recording mode and start recording.
Conclusion
This blog post offers you an all-around Free Cam review from all the important aspects of the screencasting software. After reading this article, you can know what Free Cam is, its main features, and how to download & use it. It would be pretty easy for you to start using this screen recording tool. In addition, we’ve also introduced you to AWZ Screen Recorder as a worthy alternative to Free Cam, empowering you with more advanced features but affordable prices. Just download this program and record your screen as well as make professional-looking videos now!


