In this post, AWZware demonstrates two methods to utilize Audacity to trim audio files. You can either delete parts of audio in Audacity or cut one audio track into multiple clips in a batch to improve efficiency.
How to Cut Audio in Audacity into One Track
Audacity allows you to cut any chosen clip from a track while retaining other parts. Being a free and open-source program, Audacity trims audio with efficient and advanced tools. It enables you to customize the boundaries of selected clips by putting a pin or entering the exact time range.
The following guide shows how to cut audio in Audacity into one track:
Step 1: Add your audio to Audacity
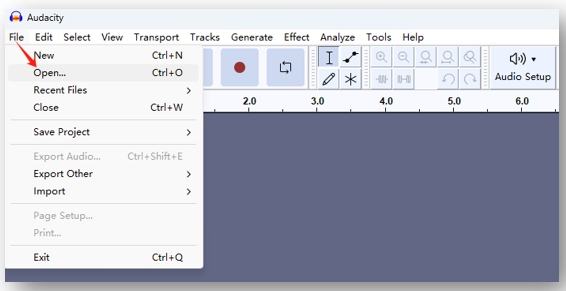
Open the audio editing solution on your computer. Click “File” and choose “Open” from the drop-down list. Select the target audio and press “Open” to import it.
Step 2: Select the section that needs to be cut out
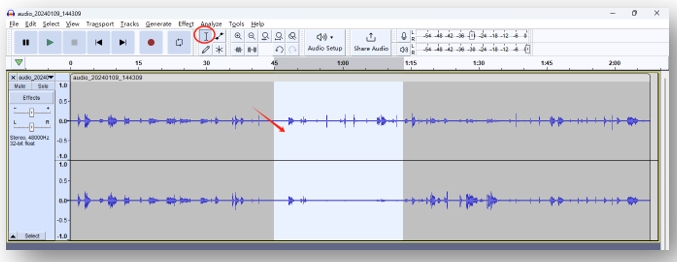
Tap “Selection Tool” from the top toolbar. Click on the track and drag your mouse to highlight the area you need to delete.
Step 3: Use Audacity to cut the audio
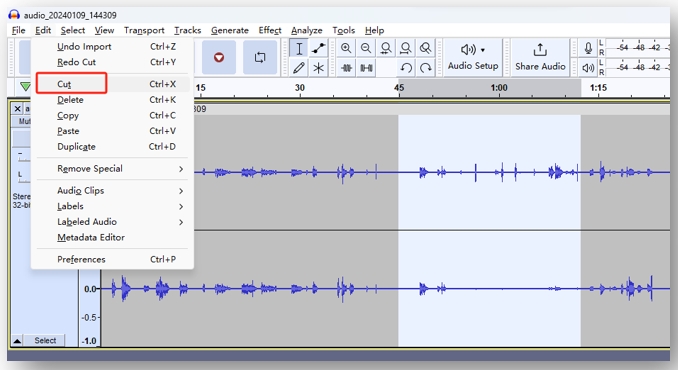
Go over to “Edit” and select the Cut option. It will delete parts of the audio in Audacity. Hit “File” again and click “Save Project” to export the edited file.
If you just want to reduce the size of an audio file, compressing the audio can be another option while preserving the integrity of the file:

How to Compress a Video | 5 Easy Ways to Reduce Video File Size
Do you want to know how to compress a video to reduce the file size? Find out the answer in this article with 5 practical ways to compress videos at any time.
READ MORE >How to Cut Audio in Audacity into Multiple Tracks
Audacity can cut audio into multiple tracks at once. When you record a long music playlist or meeting, it is necessary to split the audio into multiple clips and save them as separate files. This makes it easier for organizations and you can enjoy the song offline in the order you like.
Read on how to cut audio in Audacity into multiple tracks at once:
Step 1: Split the track
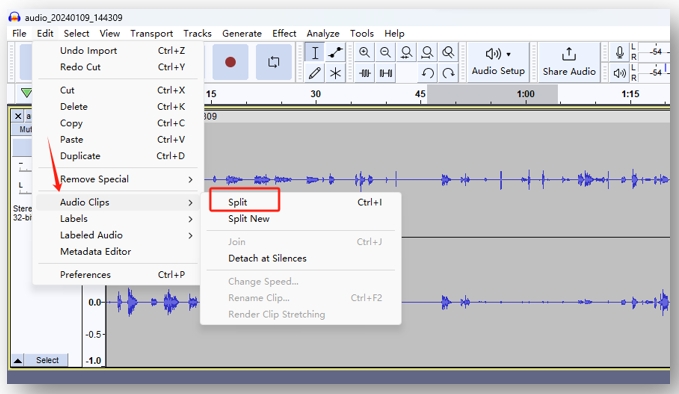
Click on the track to select where you want to split for the first section. Tap “Edit” and choose “Audio Clips”. Hit “Split” to enable the splitting tool. Choose another section boundary and right-click on it. Select “Split Clip” to separate the track into multiple clips.
Step 2: Lable each clip respectively
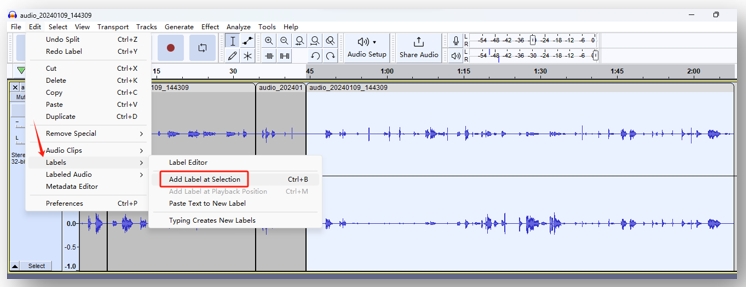
Hit the default name of the clip you want to label to select it. Press “Edit” and tap the Labels option. Click “Add Lable at Selection” to label it. Repeat the action for the rest of the clips.
Step 3: Cut the audio with Audacity into multiple clips
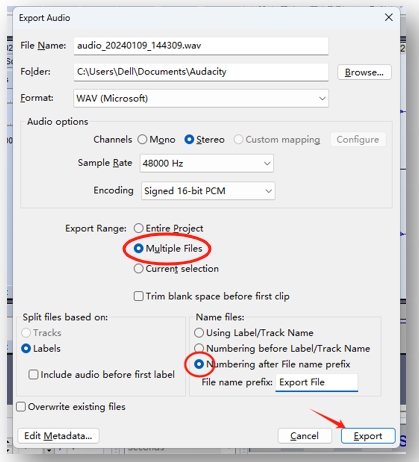
Choose “File” and hit “Export Audio”. Set the “Export Range” as “Multiple Files”. Under the Name files tab, select “Numbering after File name prefix” and enter the file name. Finally, press “Export” to split the audio into multiple tracks.
There are several discussions about the Audacity security. If you are concerned about the safety of your computer and personal information, using an alternative to Audacity to trim audio is recommended.
How to Cut Audio in Audacity Alternative
AWZ Screen Recorder is a great alternative that assists you in deleting unnecessary or unwanted parts. It streamlines the art of audio editing. The intuitive user interface promises easy navigation, which means you have no learning curve to cut audio with the Audacity alternative. The software maintains the original quality of the audio, enabling you to cut out the beginning or the end to save the essential part.
Additionally, one highlight makes AWZ Screen Recorder stand out: it offers free audio and video editing software without applying watermarks. Besides, multiple audio formats are accepted, such as MP3, WAV, AAC, and OGG.
For how to cut audio in Audacity alternative, please follow the easy steps below:
Step 1: Open the audio-cutting tool
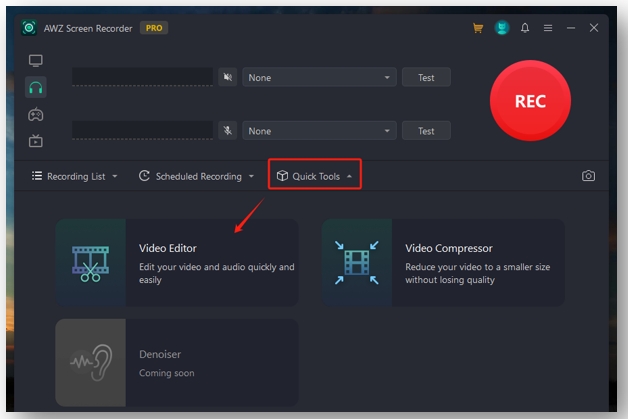
When AWZ Screen Recorder is launched, tap “Quick Tools” and go to “Video Editor”. The audio-editing feature will be enabled.
Step 2: Import the audio file
In the pop-up window, drag and drop your audio file to the workspace to import it. Alternatively, click on the interactive area and you can select the file from your folder.
Step 3: Use the alternative to Audacity to trim the audio
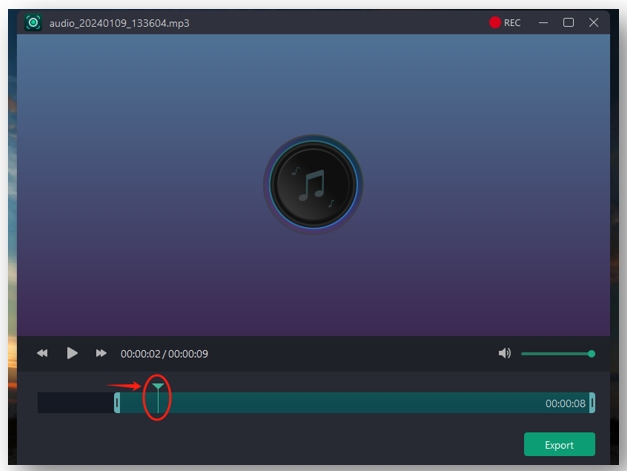
Drag and drop the pin in the timeline to specify where you want to start cutting. Then, move the left edge of the track to align the pin. Repeat the same actions to decide where you want to stop trimming. Hit “Export” to delete parts of the audio in the Audacity alternative.
Bottom Line
It causes hassles for beginners to delete unwanted clips from an audio track with Audacity. With this article, the problem is solved! The step-by-step guide on how to cut audio in Audacity walks you around the best solution.
For users who are worried about the security issue of cutting audio in Audacity, AWZ Screen Recorder is a safe alternative to edit audio files.