Is OBS A Good Choice for Recording Skype?
Skype has a built-in recording tool that helps you record your calls. It will save the recording to the cloud for viewing and downloading. However, this feature has apparent drawbacks; for example, it will notify everyone that you are recording. Fortunately, you can record Skype calls using other tools such as OBS Studio.
Is OBS a good choice for recording Skype calls? Well, it depends on what you want to accomplish. OBS can record Skype calls. You can record audio and video calls. However, it should be noted that the audio recording will be saved in video format. That’s to say, you'll get a blank video containing the recording.
In case OBS doesn't work how you want, we'll also cover another way to record Skype audio. You can keep reading this guide provided by AWZware to learn how to record Skype audio with OBS and other tools.
How to Record Skype Audio with OBS
Let’s start to learn how to record Skype audio with OBS. If you haven't installed the program yet, go to https://obsproject.com/download to get it. Only when the settings are correct will you get the desired recording. Otherwise, you may find that the other person's voice is missing. Just follow the steps!
Step 1. Adjusting Recording settings
First, you need to let OBS know what you want to record. In the Sources box, click the + icon > Choose Audio Output Capture or Display Capture.
- When you choose Audio Output Capture, it will record the audio from Skype. If you also want to record your voice, then you should also add Audio Input Capture.
- When you choose Display Capture, it will try to record the whole screen with audio. You can select this option to record a Skype video call. You can also click the eye symbol to turn off the video source and record only the audio.
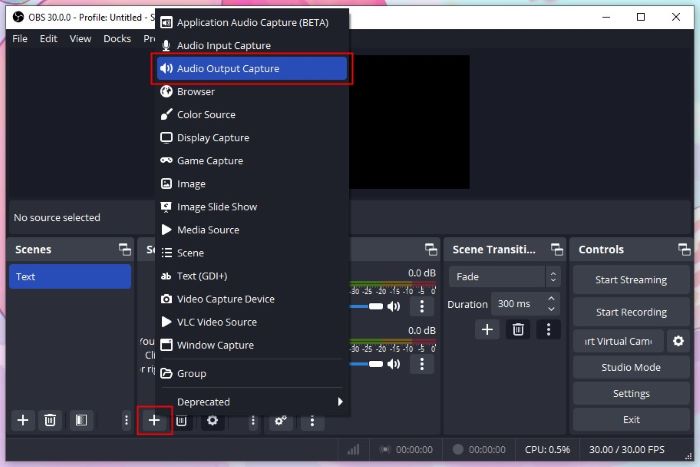
Here, we choose Audio Output Capture. Next, name the recording and choose the audio output device. It can be the speaker or the headphones. Please make sure it is the device that Skype uses.
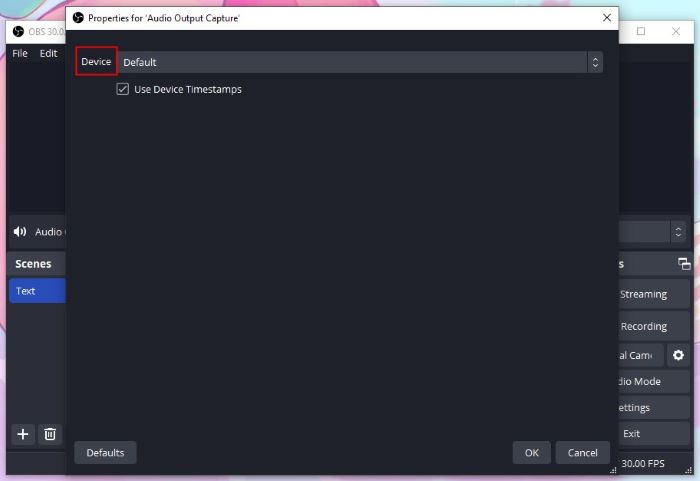
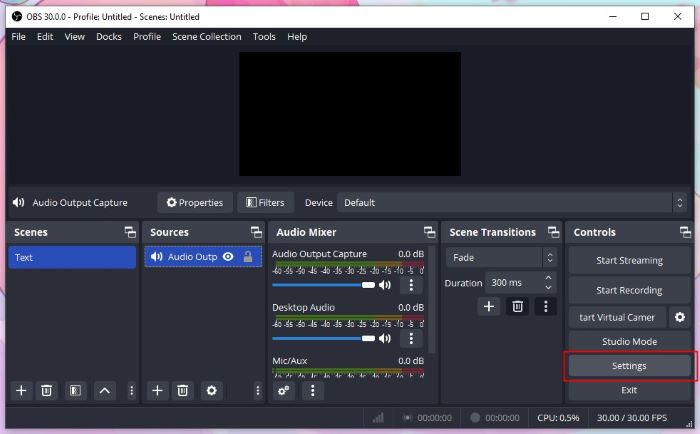
If needed, click Settings to adjust output format, recording path, quality, etc.
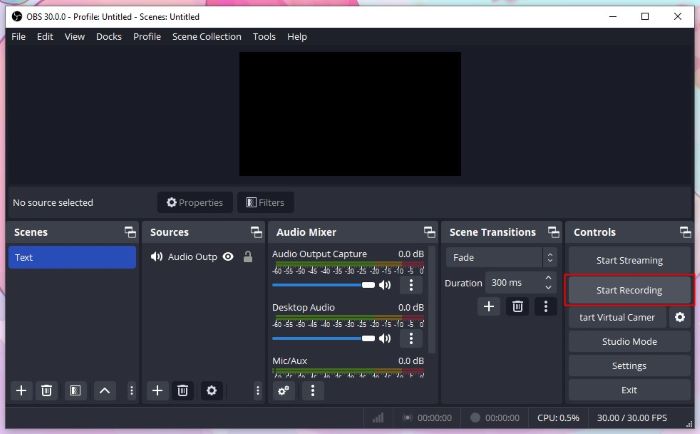
Step 2. Record Skype Calls
When ready, click the Start Recording button to record Skype calls.
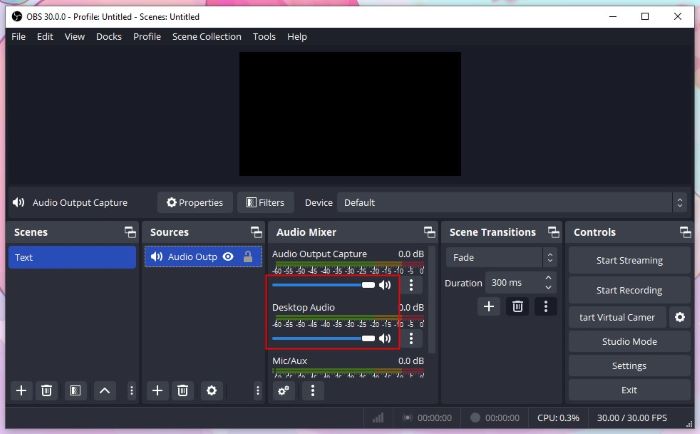
You can adjust the volume with the blue slider. When you click the loudspeaker icon, it will mute the channel.
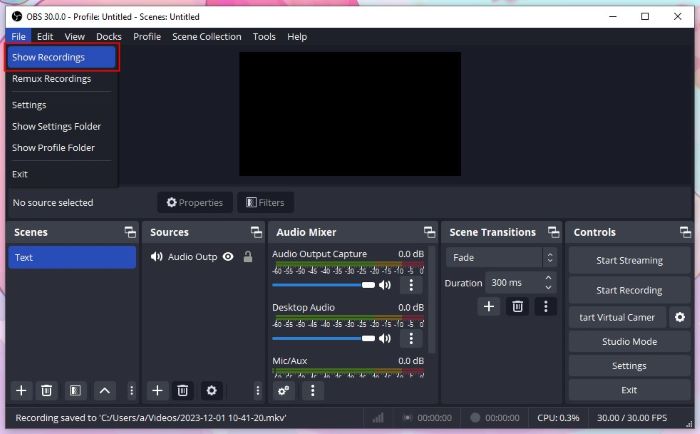
Step 3. Stop and Check the Recording
When you want to end the recording, click the Stop Recording and the recording will be saved to your computer. You can click File and choose Show Recordings to see the audio recording.
Above is information on how to record Skype calls with OBS. After that, you can convert the video to an audio file. This guide will tell you how to do the conversion:

Convert Video to MP3 on Windows, Mac, iPhone, Android | Free
This guide will show you how to convert video to MP3 on Windows, Mac, iPhone, and Android phone, including the method to convert video to MP3 online.
READ MORE >Another Easy Way to Record Skype Audio
Now you know how to record Skype audio with OBS. You can get the audio from Skype audio or video calls. However, what you get is a video file instead of an audio file. This is how OBS works. If this is not what you want, you can use other recording tools.
OBS is not the only tool that can help you record Skype calls. Another open-source source app called Audacity is also a good choice. However, this software also requires a learning curve. For the detailed steps, you can check this guide:
Record Skype Calls with Audacity | Step-by-Step Guide
This guide will show you how to record Skype calls with Audacity. You will also learn about some common problems and the solutions.
READ MORE >Actually, not all recording software has a complicated workflow. If you want a tool with a user-friendly interface and an intuitive workflow, then try AWZ Screen Recorder. Within a few clicks, you can get the Skype audio you want.
⭐ Record audio from the other party or from you, or both.
⭐ Save Skype audio in MP3, WAV, AAC, WMA, FLAC, OGG, etc.
⭐ Get a high-quality audio file with the noise-reduction function.
You can click the download button below to get the tool and follow the steps below to record Skype calls.
For Win:
For macOS:
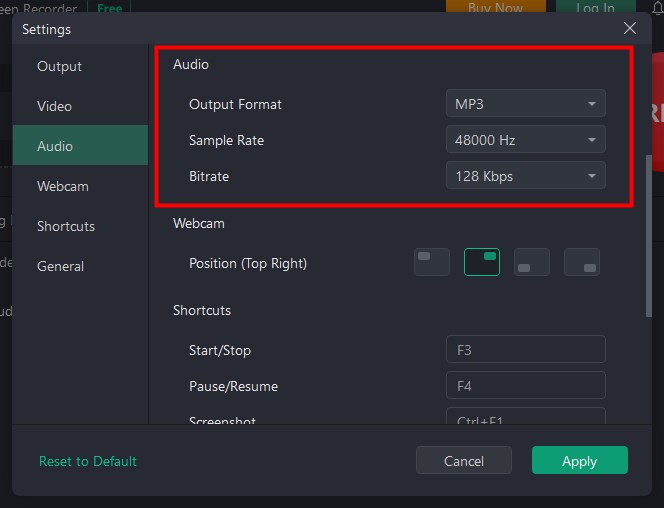
1. Open AWZ Screen Recorder > Click the hamburger icon > Choose Settings and adjust the settings as per your needs.
2. Choose Record Audio > Turn on the channel > Select the recording device.
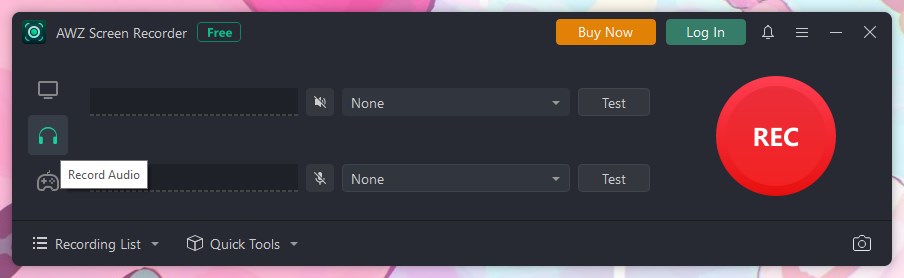
3. Click the REC button to start recording.
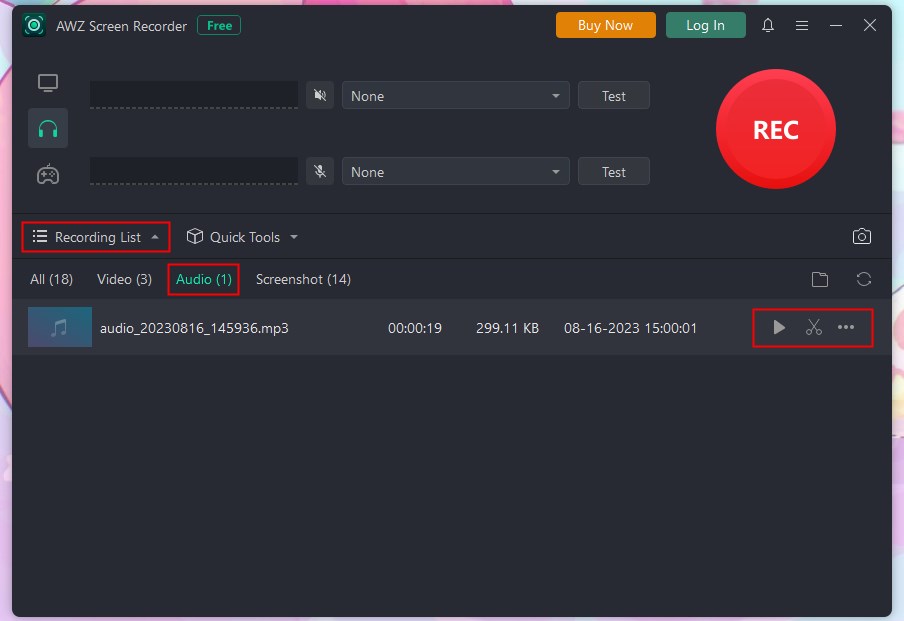
4. To end the recording, click the Stop button > After that, you can go to Recording List to play, edit or share the audio.
As you can see, AWZ Screen Recorder is easy to use. When you want to Skype videos with audio, simply choose Record Screen and start the recording.
Final Words
That’s all about how to record Skype audio with OBS. When you want to record Skype at no cost, OBS Studio is a good choice. But if you don't like how it works, you can use AWZ Screen Recorder to record Skype for you in a few clicks. I hope you find this guide helpful and get the audio you want!