Install AWZ Mac Screen Recorder and explore simple methods for trimming videos on your MacBook:
How to Shorten a Video on iPhone Free in Photos App
⭐ The default image/video library in your iPhone
⭐ Comprehensive and easy-to-use editing tools
⭐ Integrates with cloud services for long-turn archive
The Photos app is not only a home for all your photos and videos but also an excellent tool for beautifying and editing images/videos. With the help of the Photos app, you can edit videos by:
- Cut the beginning/ending part of the video
- Crop a video to meet specific size requirements
- Apply various filters to videos
- Adjust video settings such as exposure, highlights, contrast, brightness, black point, saturation, etc.
- Flip a video vertically or horizontally
- Straighten videos on iPhone
Follow the step-by-step guide below to learn how you can cut out parts of a video on an iPhone for free:
Step 1. Open the Photos app and locate the video you want to trim.
Step 2. Click Edit in the top right corner of your phone.
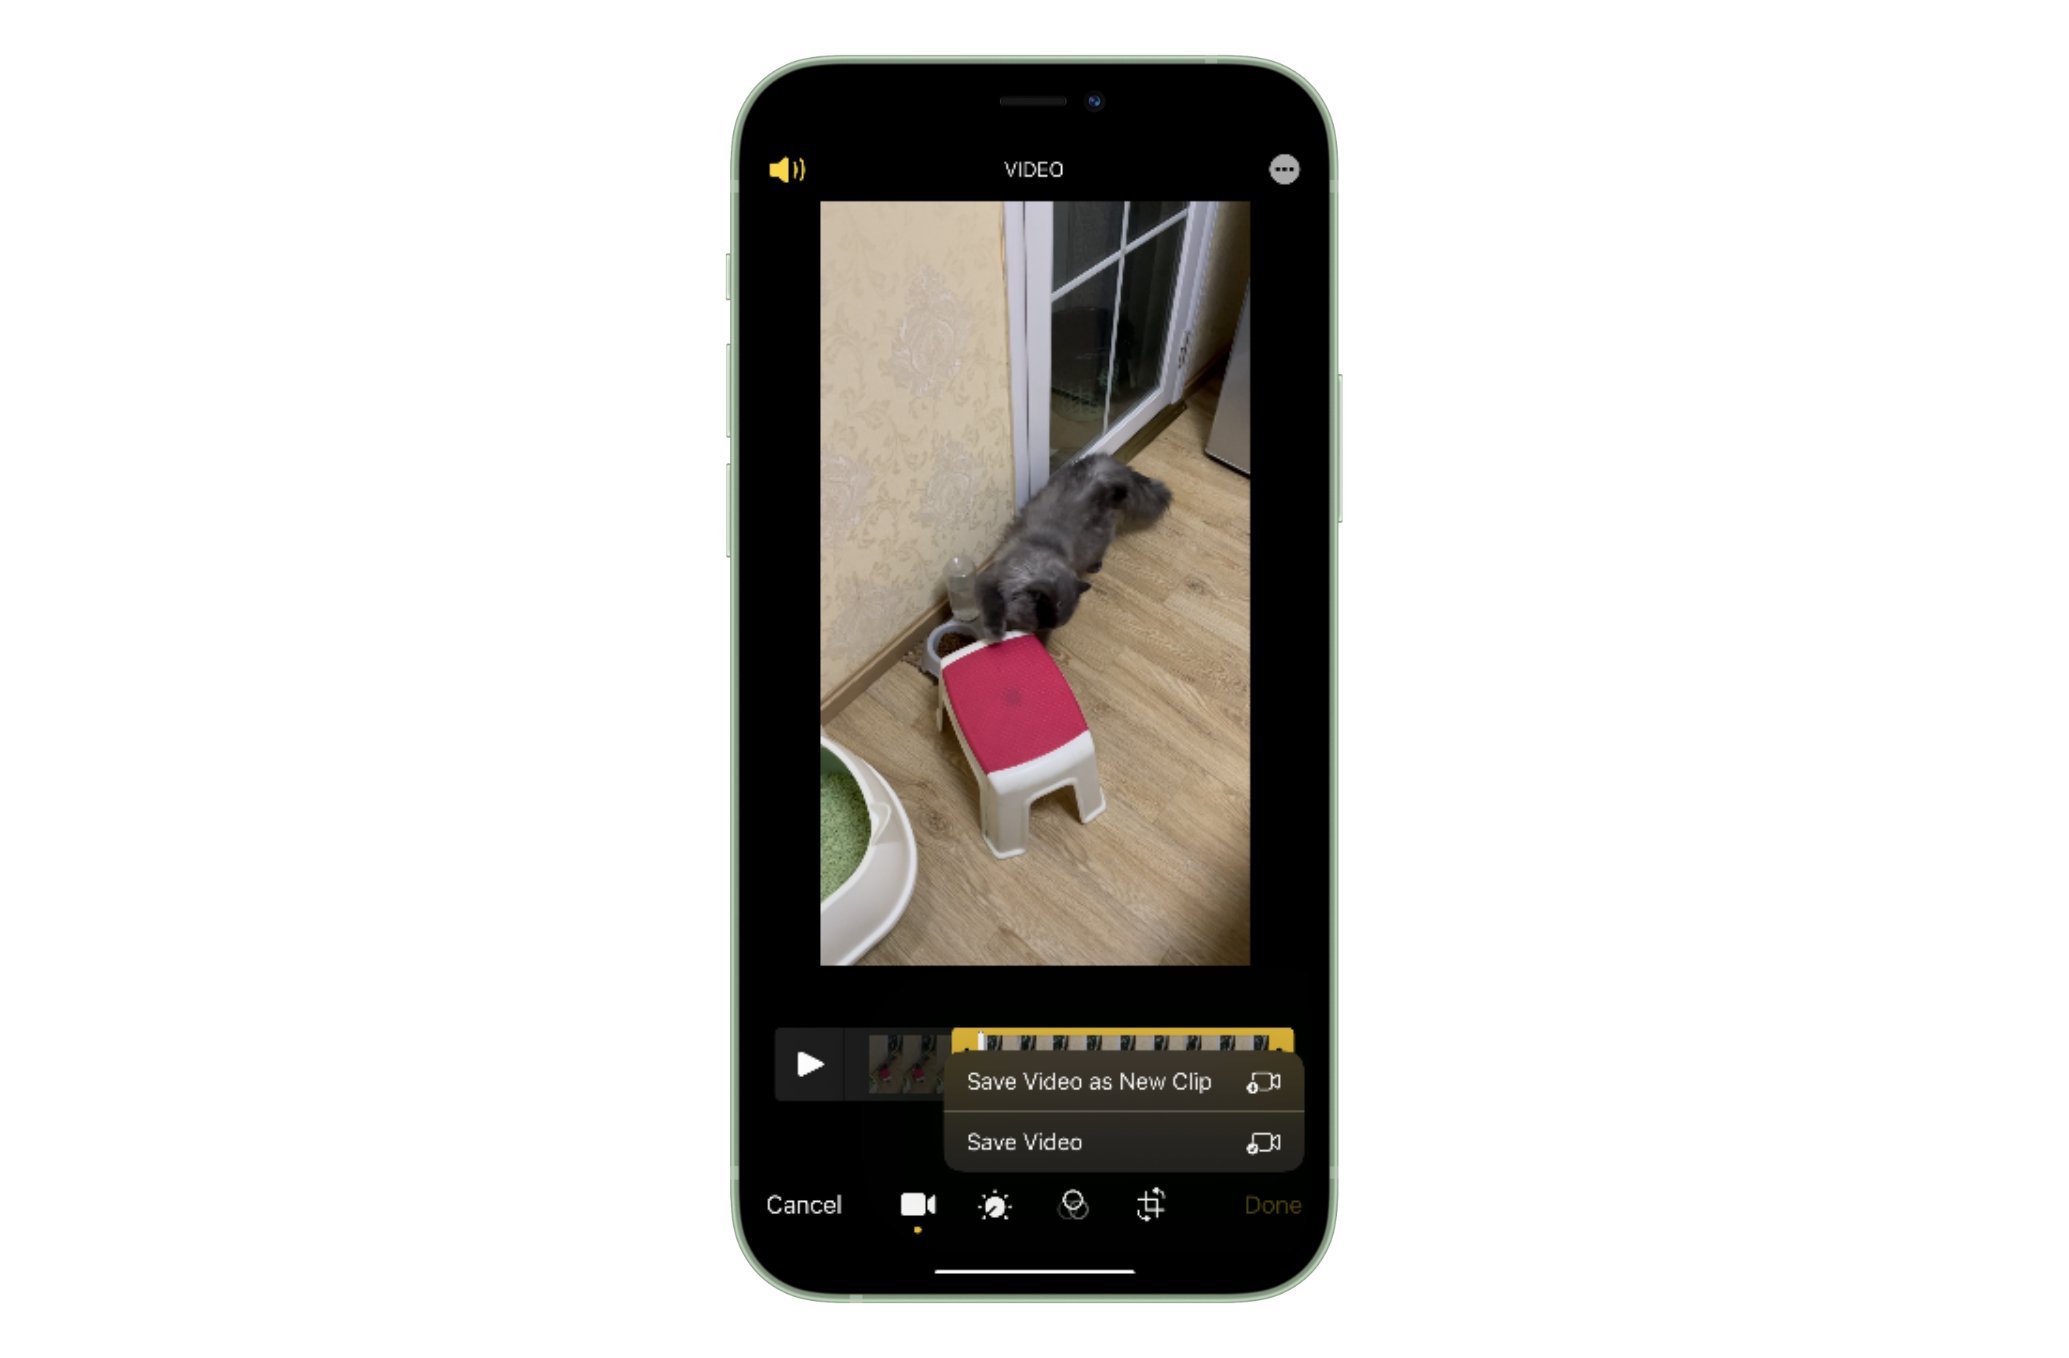
Step 3. Below your video, there will be a timeline, which allows you to customize your video's start/end point.

Step 4. Click Done to confirm your change.
When confirming your changes, there are two options to save your video clip: Save Video as New Clip (it will not overwrite the original video file) and Save Video (the original video will be replaced by the new clip.)
It’s easy to shorten videos on your iPhone by following these steps. However, the Photos app also faces some limits:
cannot trim the middle part of a video
cannot process videos that last less than one second
How to Undo a Trim on iPhone
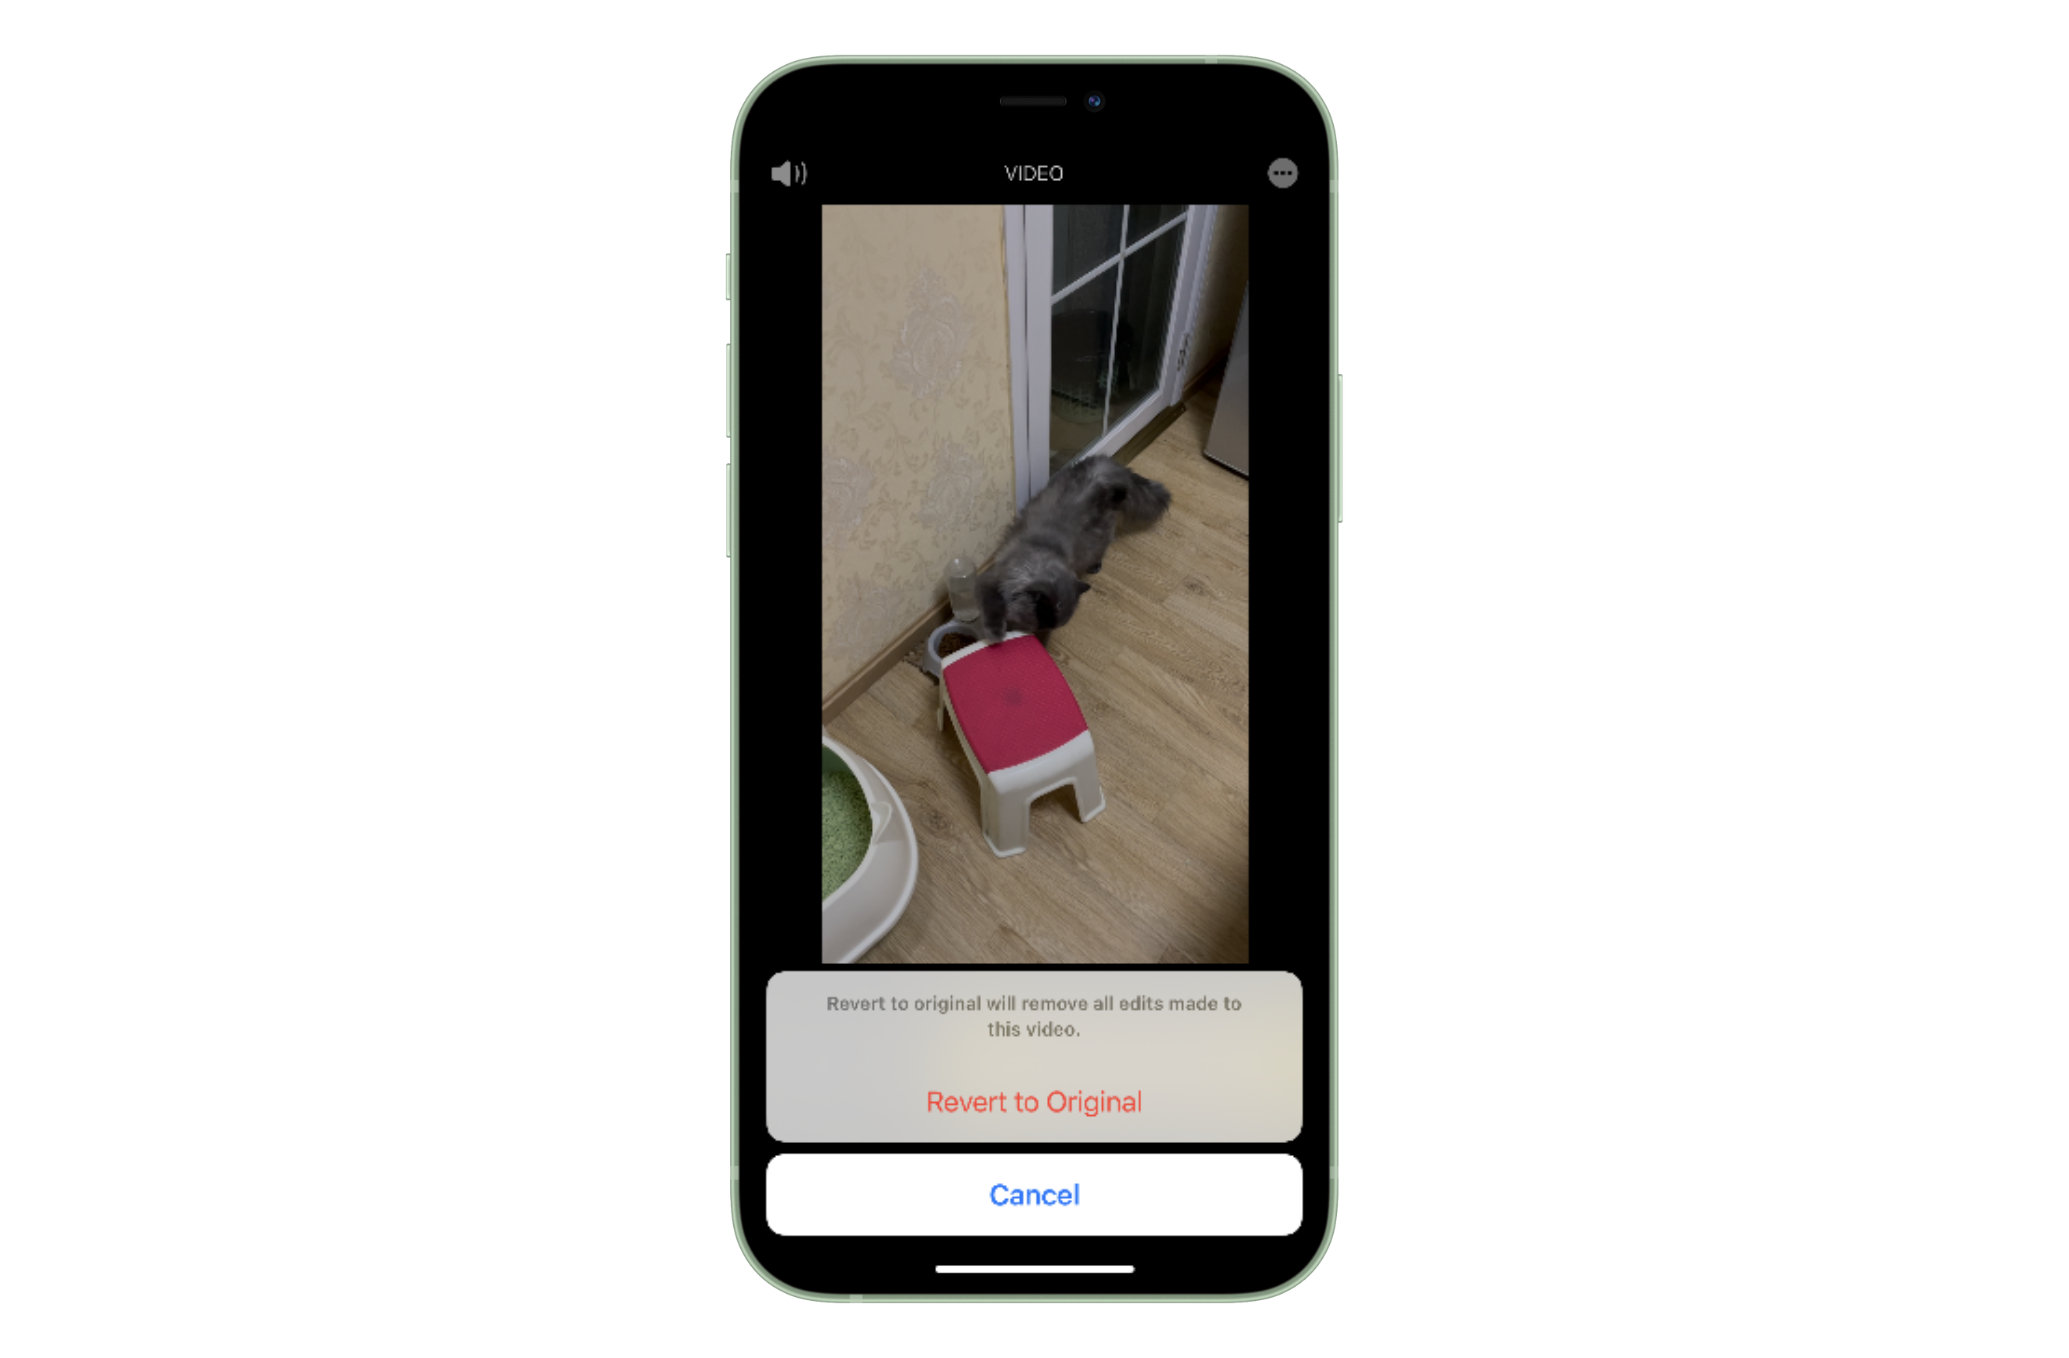
If you overwrote the video clip, the Photos app offers a direct way to remove all the edits made to the video: click Edit and select Revert > Revert to Original.
How to Cut Parts of a Video on iPhone with iMovie
⭐ A free video editing app for iPhone, iPad, and Mac
⭐ Advanced video editing tools for making beautiful movies
⭐ Intuitive and streamlined interface makes it user-friendly
Another free option to cut parts of a video on an iPhone is using iMovie. As its name suggests, iMovie is designed for making movies, which can turn videos into Hollywood-style movies with ease. Compared to the Photos app, iMovie provides more powerful and advanced editing tools, including:
- Create a video automatically from selected videos or images
- Trim videos as you want and rearrange clips
- Add titles, transitions, and background music to videos
- Create video trailers with prepared templates
- Change the playing speed of a video
- Insert background to videos
- Duplicate or delete selected clips
How to freely trim the middle of a video on iPhone 12:
Step 1. Open iMovie and import the video clip you want to cut.
Step 2. Tap the video clip, and you’ll see a yellow highlight.
Step 3. Drag the timeline to the point where you need to cut.
Step 4. Edit the video clip with the four options: Split, Detach, Duplicate, and Delete.
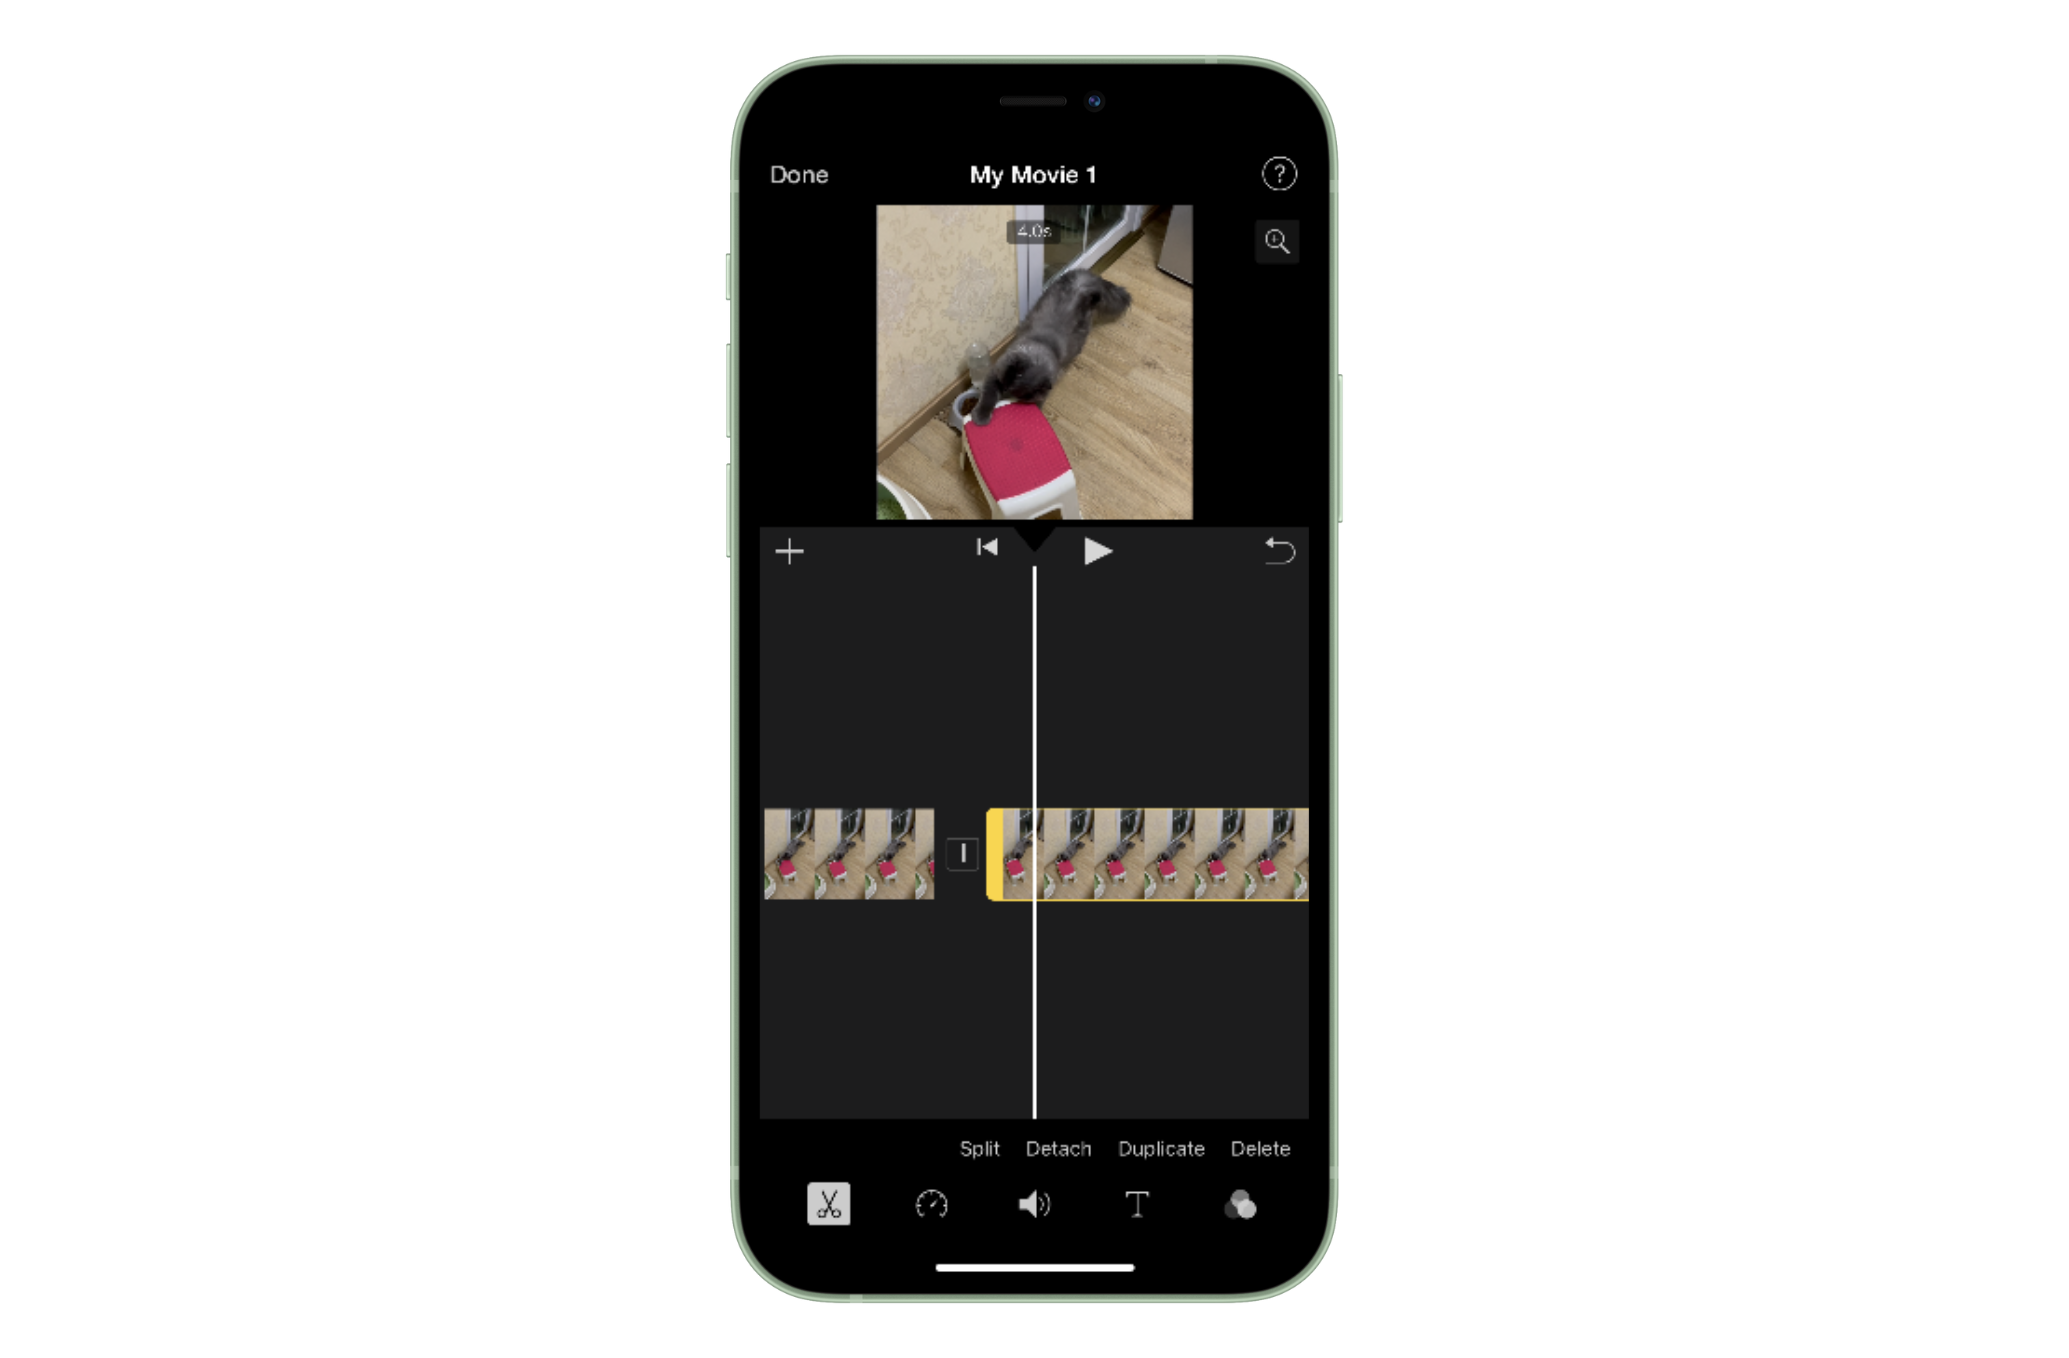
Step 5. Confirm your edit by tapping Done.
Bonus: How to Turn Video into Slow Motion iPhone
Slow motion is a widely used effect in filmmaking. When a movie applies the slow-motion effect, it appears as if time has been slowed down. To make a slow-motion video, you can use the Camera app straightforwardly, which offers a direct SLO-MO option. However, if I have a normal video, can I convert it to slow motion?
Before we dive in, be clear that a normal video will be strange when converted to slow motion because of technology issues. Here’s an explanation from Lawrence Finch, a pro user in the Apple community:
“Slow motion requires recording at a higher frame rate than normal, then playing it back at a normal setting. You can't do the reverse; if you try to view a normal video in slow motion it will be very jerky, as the frames will jump from one to another, so it will appear as a succession of still images rather than a continuous video.”
Nevertheless, there’s still a walkaround to apply the slow motion effect to a normal video by using iMovie. As we’ve listed above, iMovie can help change the playing speed of a video, whether you want to make it faster or slower. Here’s the step:
Step 1. Open a video clip in iMovie.
Step 2. Tap the clock icon in the bottom toolbar. Drag the white dot to the left side (close to the turtle icon).
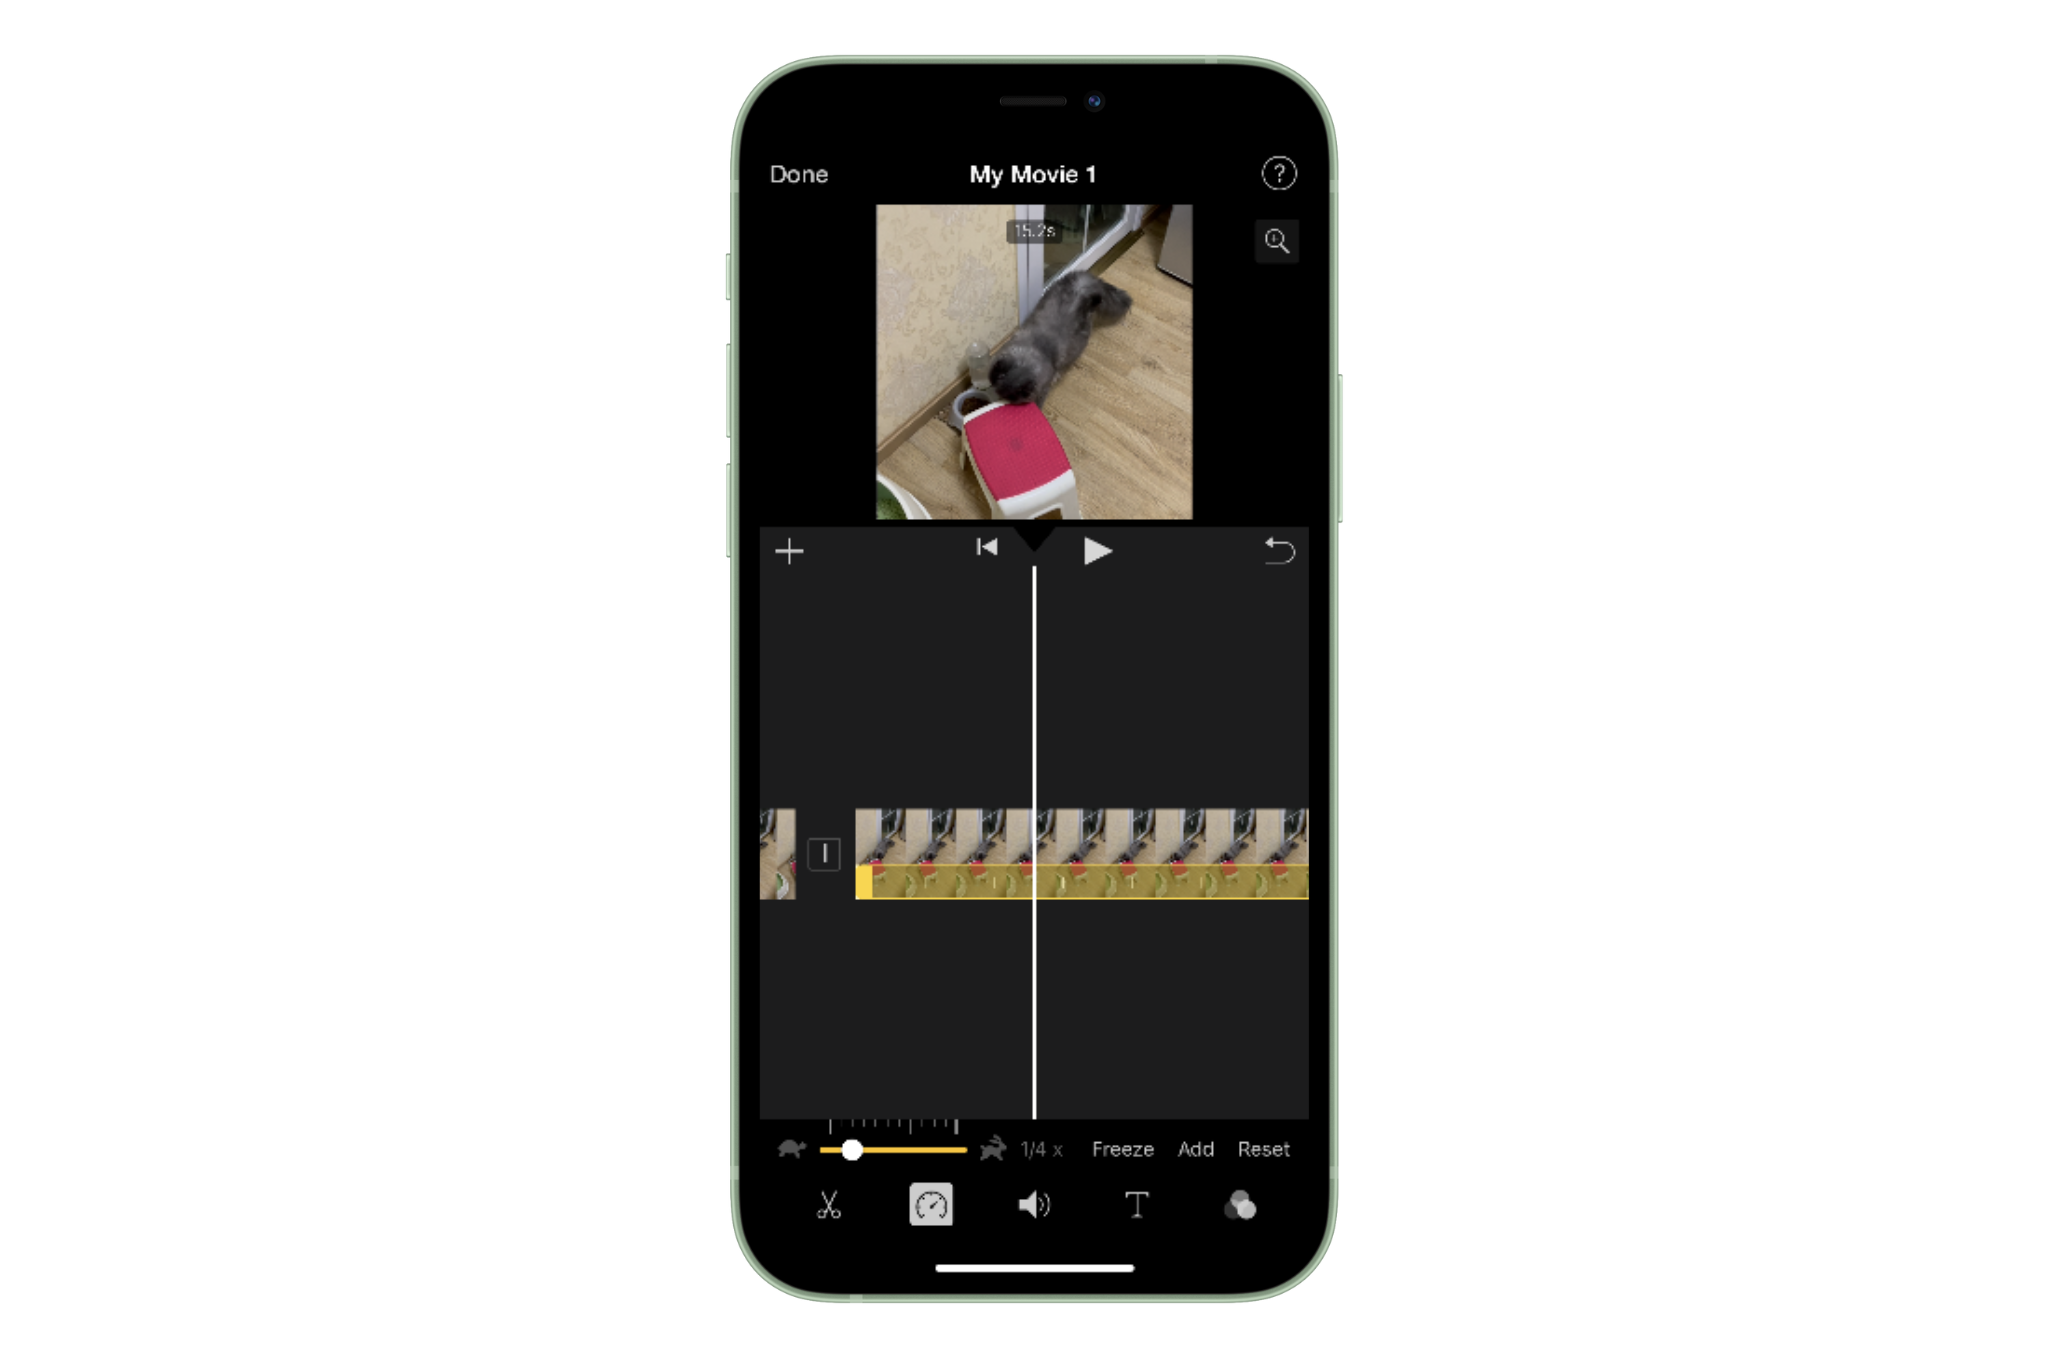
Step 3. Tap Done to process.
By slowing the speed of a video, you also make a normal video slow motion successfully.
How to Trim Videos on Mac/Windows
After mastering the skills of shortening videos on the iPhone, spend one more minute learning a simple method to trim videos on Windows and Mac! If you often need to record screens and make teaching videos on a Mac or Windows, this section is for you!
We know a powerful screen capture tool named AWZ Screen Recorder, which offers users one-stop solutions to record and edit video/audio files with a single tap. More importantly, the video editor tool is open to all users without requiring a subscription plan. Click the following download button and install AWZ Screen Recorder now!
For Windows Users:
For Mac Users:
Steps for trimming videos on a MacBook using AWZ Screen Recorder:
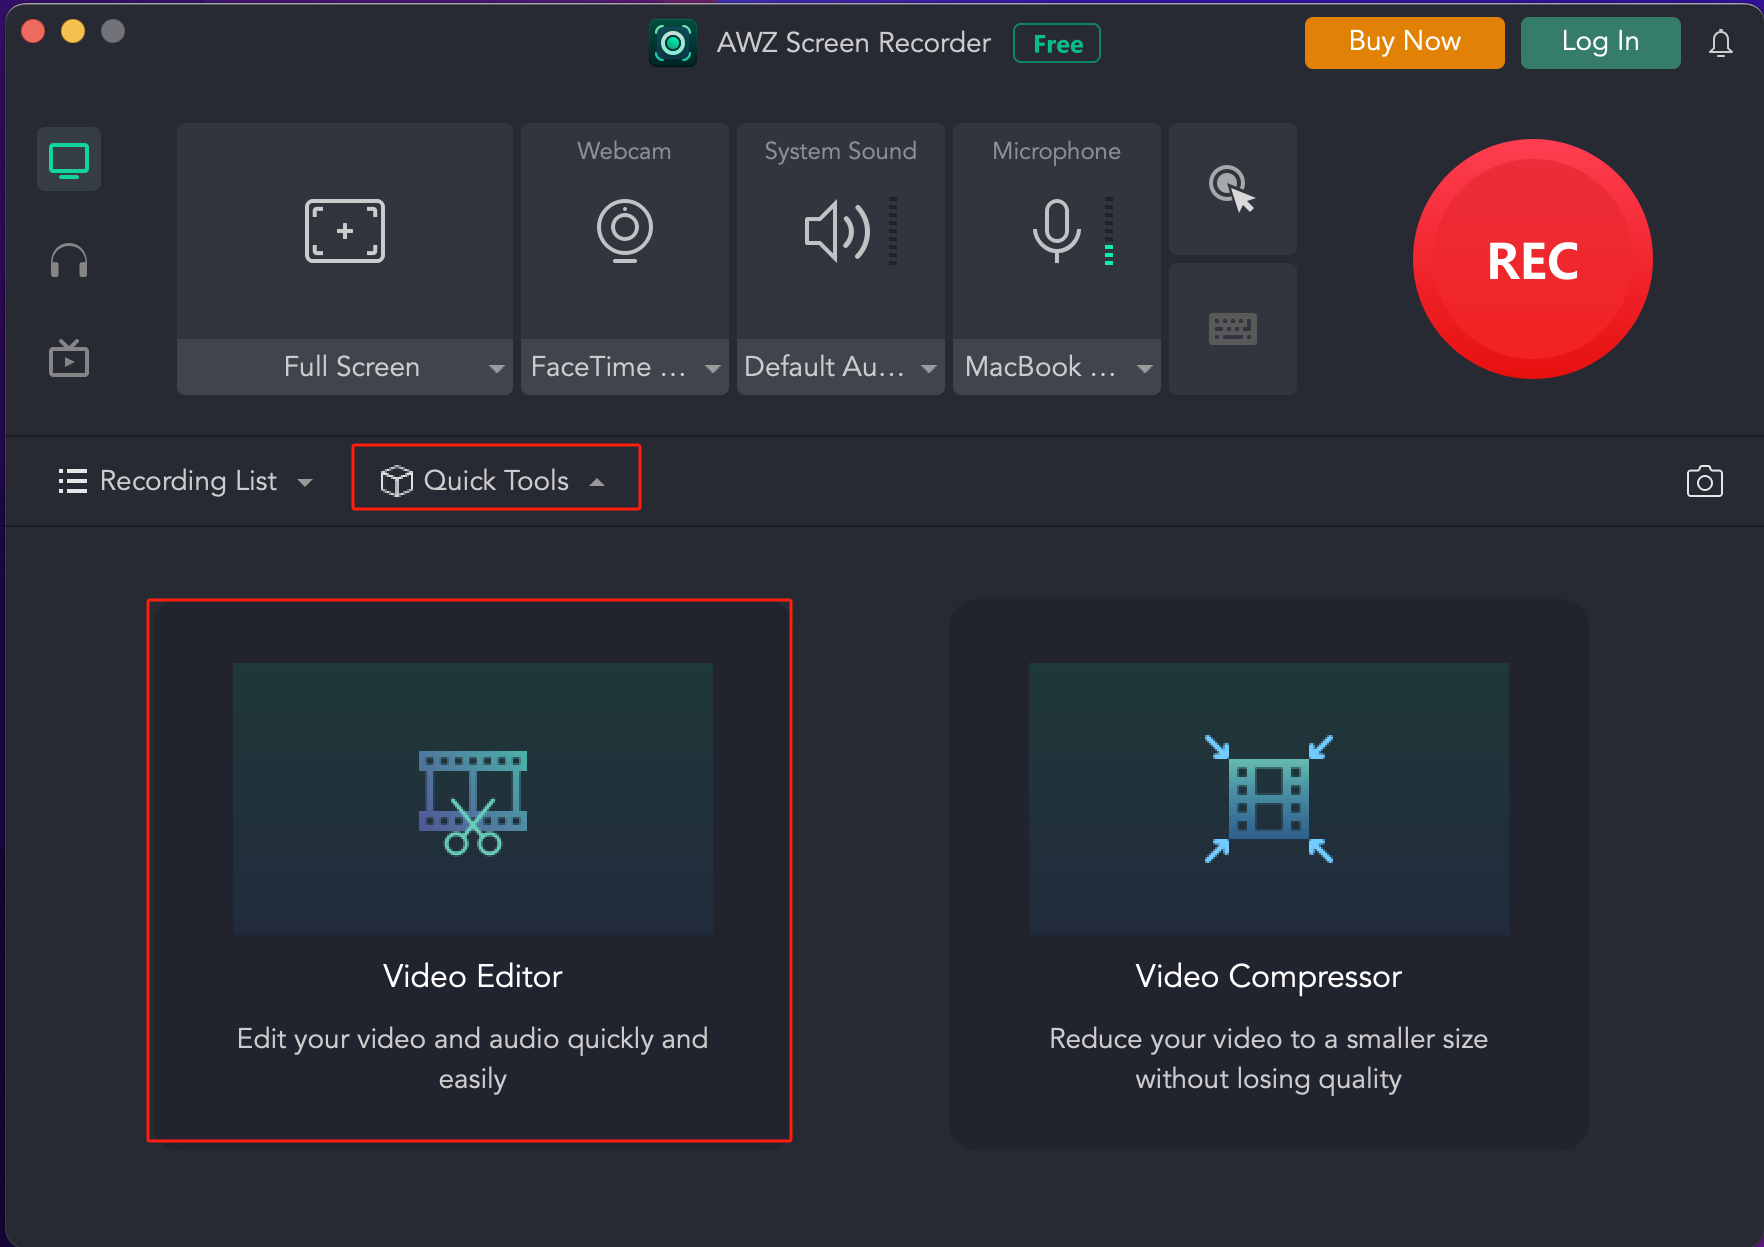
Step 1. Download AWZ Mac Screen Recorder and launch it after installation.
Step 2. Click Quick Tools and select Video Editor.
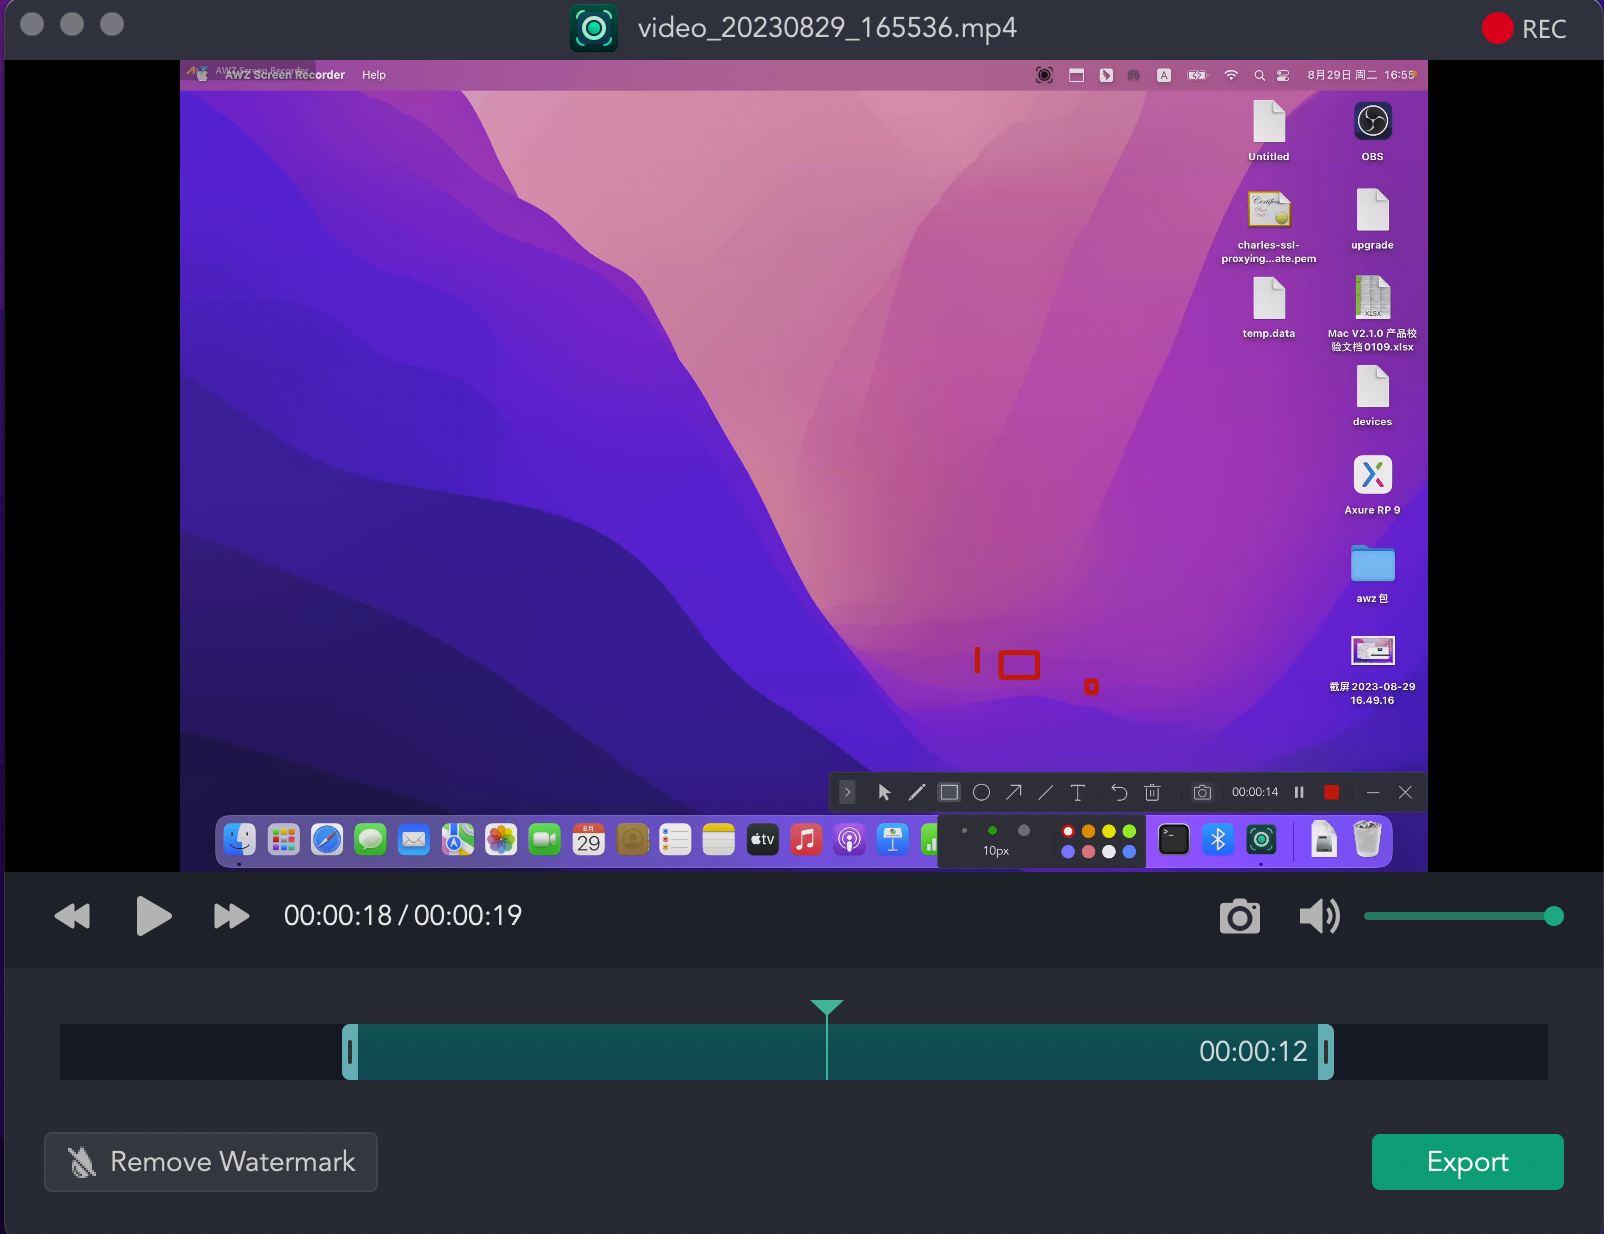
Step 3. Open the video file you need to cut.
Step 4. Drag the timeline and keep the part you need. Then, click Export to save your changes.
Conclusion
That’s all about how to trim video on iPhone. In this comprehensive guide, we’ve offered you two free methods to cut any part of a video on your iPhone. No downloading or registration. With their help, you can effortlessly edit a video and make a first-rate movie with just an iPhone! Also, remember to try AWZ Screen Recorder if you need to edit videos and capture screens on your Mac!