When it comes to video calling, FaceTime is one of the most popular choices for Apple users. However, sometimes you may want to capture your FaceTime calls for various reasons, such as recording an important conversation or keeping a memory. While there are many screen recording tools available, recording FaceTime calls with audio can be a bit tricky. In this blog post, we'll show you how to screen record FaceTime with audio and share some tips to ensure a smooth recording experience. So, let's get started!
How to Screen Record FaceTime with Audio on Apple Products
Since FaceTime is available on iPhone, iPad, and Mac, we will show you specific recording steps on different platforms. Let’s start with iPhone.
Record FaceTime with Audio on an iPhone, iPad
It’s pretty easy to screen record on iPhone and iPad because iOS 11 and newer versions added a built-in screen recording function, with which you can screen record any app on an iPhone without breaking a sweat.
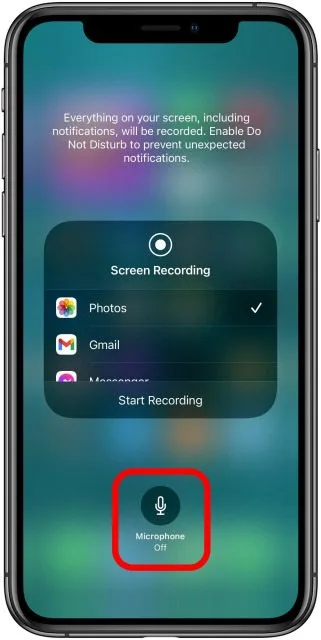
When having FaceTime on an iPhone or iPad, simply pull up the Control Center and tap the Screen Recording icon to record a FaceTime call. It will record all activities on your iPhone with audio by default. If you want to record with the Microphone voice, long press the Screen Recording icon and tap the Microphone button.
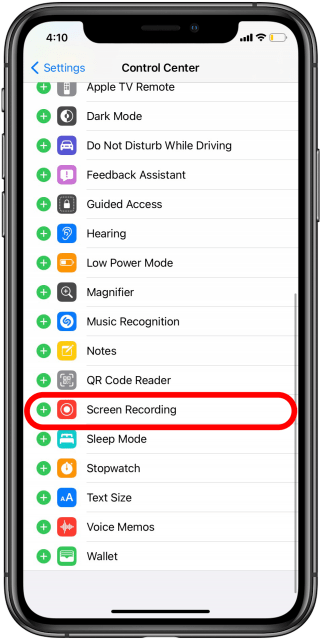
If you don’t find the screen recording function in the Control Center, you need to first add it manually in Settings. Go to Settings > Control Center, find Screen Recording, and click the green plus icon next to it.
Record FaceTime with Audio on Your Mac
On macOS, the steps may greatly vary from that on an iPhone/iPad. The good news is that there’s also a built-in recording function on macOS that you can use directly.
Here’s how to record FaceTime with audio on macOS:
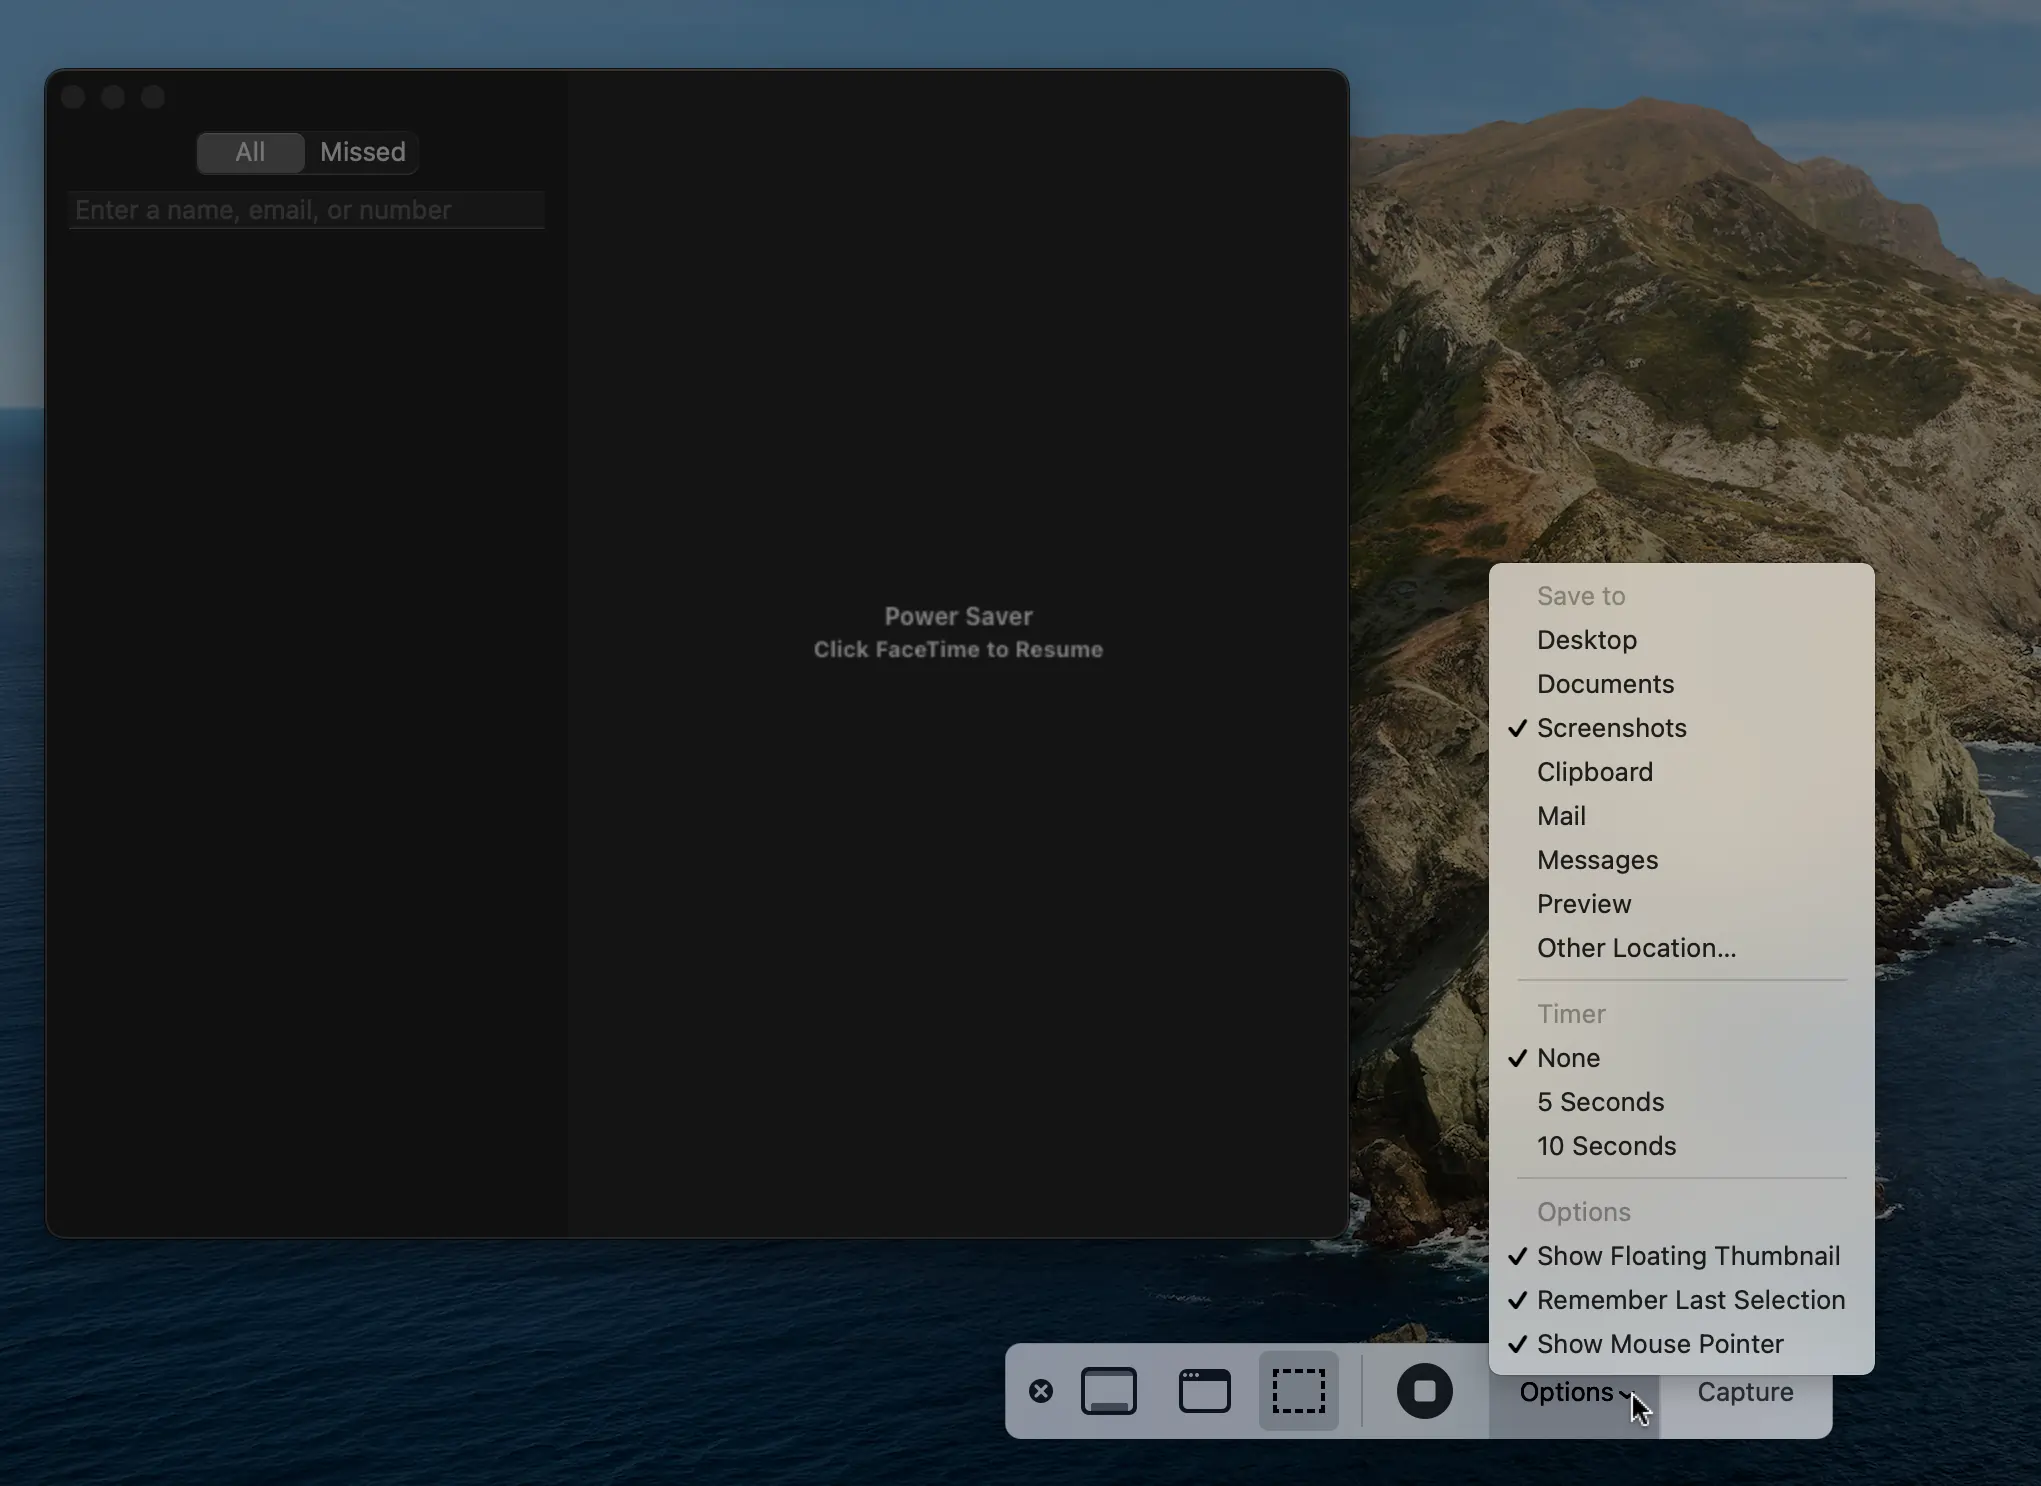
Step 1. Run FaceTime and press Command + Shift + 5.
Step 2. Select a location to save your recordings and choose the FaceTime screen area with your mouse.
Step 3. Click the record icon to get a video recording file of your FaceTime call.
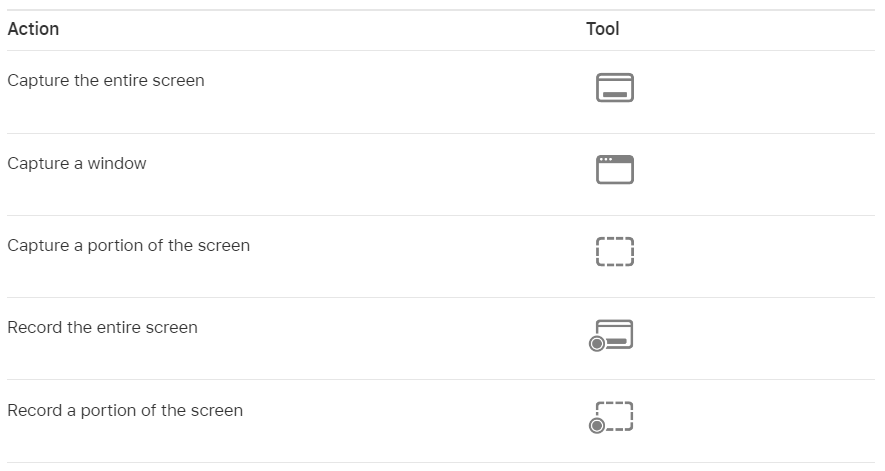
To screen record on Mac with its built-in feature, it offers five recording tools before recording, and these tools can help choose a specific window directly. To make you understand, check the following image:
How to Screen Record FaceTime with Audio on Windows
If an Apple user creates and shares a FaceTime video link with a Windows or Android user, he/she can also join in the FaceTime video call easily. Therefore, learning how to screen record FaceTime on Windows is also helpful.
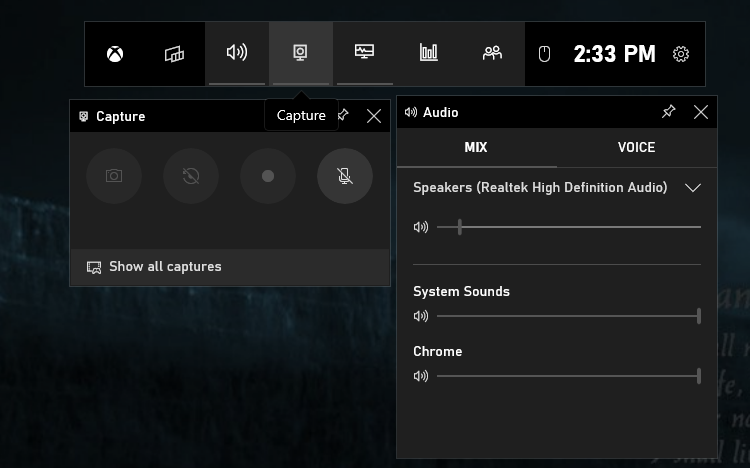
For people who’re running a Windows operating system, recording FaceTime or other apps also has a shortcut method: Xbox Game Bar. Xbox Game Bar is a gaming overlay integrated into Windows, with which you can screen record or capture any events on a PC.
When joining a FaceTime video call on a Windows PC and requiring recording, you can use Xbox Game Bar and get the video recorded in seconds. Simply press the Windows logo and the G key simultaneously. Then click the screen recording icon in the Capture box.
Screen Record FaceTime Using Third-Party Tools
The former two parts mainly introduce you to built-in features. Though they are the easiest way to do a screen recording, you have to admit that they are also relatively limited. For people who are seeking advanced features and even want to edit the recording files, you'd better install a dedicated screen recorder on your device.
Videosolo Screen Recorder is a powerful screen recorder that is available on both Windows and macOS. With its help, recording online meetings, conferences, lessons, and games with audio or webcam would be a piece of cake. Videosolo can also mirror and record iOS and Android screens with HD quality. And it also provides many editing tools to help you trim, compress, merge, and convert videos.
How to record FaceTime with audio using Videosolo Screen Recorder on Mac:
- Download Videosolo Screen Recorder on your macOS.
- Choose Video Recorder and leave the System sound, Camera, and Microphone boxes checked. Then select Custom to include the FaceTime window.
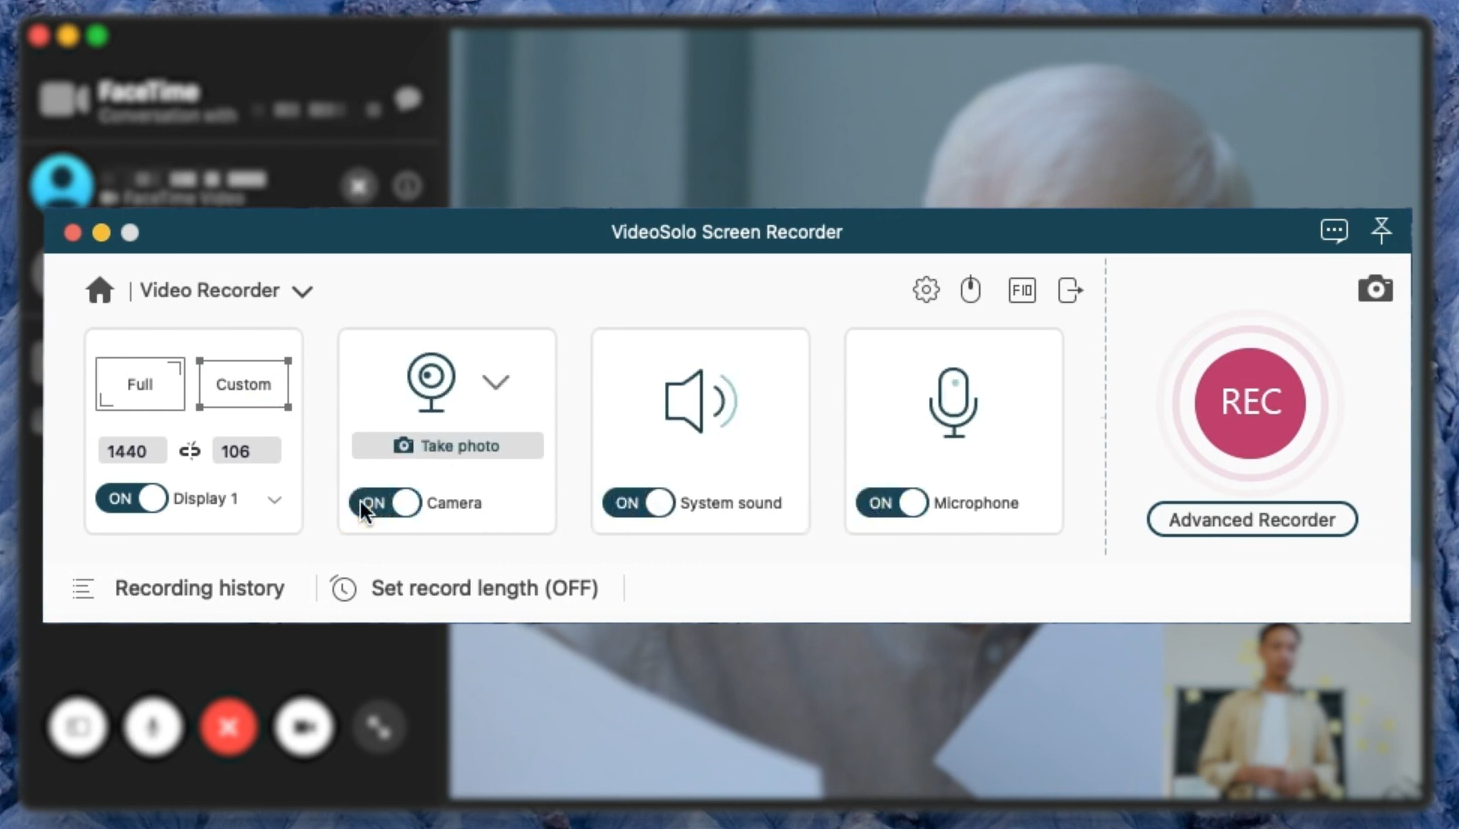
3. Wait for the countdown ended, and it will start recording your FaceTime video with audio automatically.
The Bottom Line
FaceTime is a popular video calling program that is free and safe. For all kinds of reasons, you may need to screen record FaceTime with audio, such as having important online meetings, video calling your beloved one, etc. After reading this blog, record your FaceTime video can be finished in seconds. For more screen recording tips, follow the latest news from the AWZware website and share this article if you find it helpful!