Knowing how to record laptop screen with audio is an essential skill for users to capture movies or online conferences and courses on their device. But how to record a screen with audio on a laptop? This article will offer you an answer! In this post, four methods will be introduced to help you record a Windows/Mac screen with high-quality audio. Let’s read on.
How to Record Laptop Screen with Audio Windows 10/11
Let’s begin with the Windows operating system. This section will introduce you to two reliable screen recorders for Windows operating systems, letting you effortlessly capture screens and audio on your laptop.
AWZ Screen Recorder
AWZ Screen Recorder emerges as a standout solution for recording screens on Windows operating systems. It's fully compatible with Windows 11/10/8.1/8/7. Boasting a clean and navigable interface, the AWZ Screen Recorder offers a smooth and comfortable experience. In addition, this screen recorder has a lightweight file size, which saves much storage space while guaranteeing stable performance as well.
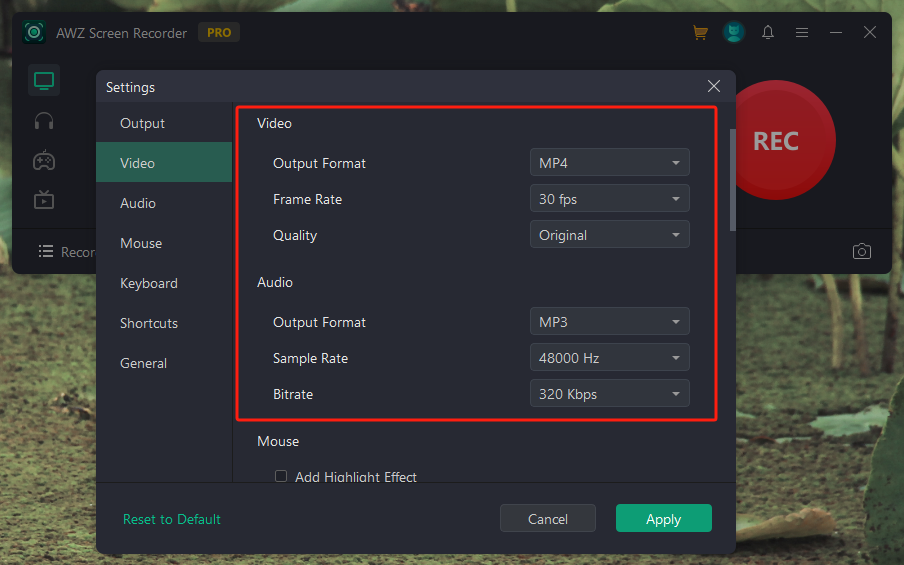
When recording screens in AWZ Screen Recorder, you can customize audio/video settings according to your requirements, including output formats, resolutions, definitions, etc.
Here’s how you can record a Windows laptop screen and audio using AWZ Screen Recorder:
Step 1. Free download AWZ Screen Recorder on your laptop. Then, install and launch it.
Step 2. Click on the hamburger icon to open the Settings window. In the Video and Audio sections, adjust related output settings.
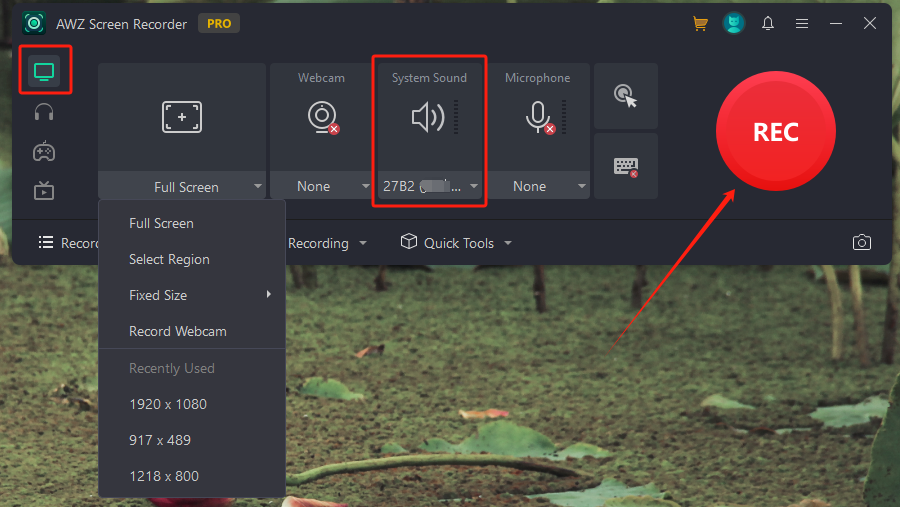
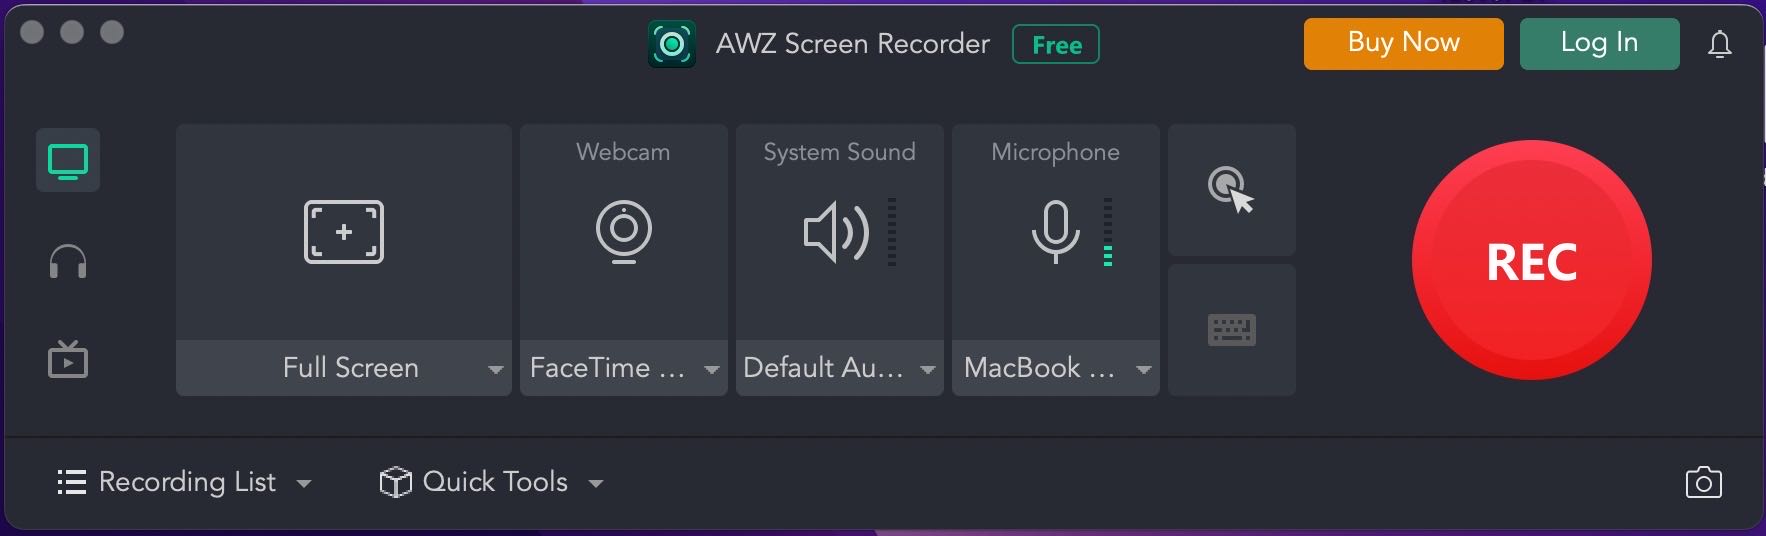
Step 3. Back to the homepage and select the Record Screen mode. Then, choose the sound source.
Step 4. Select a screen recording mode from the drop-down menu.
Step 5. Tap the red REC button to begin recording.
When recording, a small toolbar will appear, allowing you to annotate the screen, take screenshots, pause, restart, and end the recording with a single tap.
After recording, AWZ Screen Recorder allows you to edit recordings within the program. Features such as compressing videos, cutting video/audio files, eliminating background noise in the recording, etc., are all available in this software.
Windows Snipping Tool
If your laptop is running the Windows 11 system. There's a built-in feature - Snipping Tool that allows you to record screens and audio at any time.
You may have known a lot about the Snipping Tool, which is frequently used for taking screenshots on Windows. Luckily, it has been updated recently, allowing you to simultaneously record videos with system sound and microphone voice.
Steps for recording a Windows 11 laptop screen and voice:
1. Prepare the screen you wish to record.
2. Press the Windows logo and Shift and S on your keyboard.
3. Choose the screen recording mode and draw the area you wish to record.
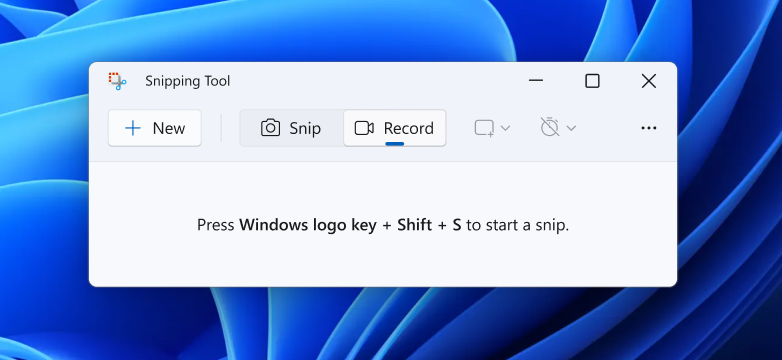
4. Click on the audio icon to turn it on/off according to your needs.
5. Tap the Start icon to begin recording your laptop.
Built-in tools are easy to use and can be accessed in seconds, making it a popular choice. However, it lacks advanced editing and recording features that are available in a professional screencasting tool.
How to Record Laptop Screen with Audio Mac
MacBook users also enjoy built-in and third-party choices that meet different requirements. This section also offers you a comprehensive guide on recording MacBook laptop screens as well as audio. Let’s dive in.
AWZ Mac Screen Recorder
AWZ Screen Recorder also has a Mac version that lets you effortlessly record high-quality videos and audio on macOS 13 and later. Likewise, you can also select various output settings before recording in the Settings window. If you need to edit recordings further, you can find a way out in this tool.
The content below shows you how to record a MacBook laptop screen with audio by using AWZ Screen Recorder:
Step 1. Click the following button to download and install AWZ Mac Screen Recorder.
Download AWZ Screen Recorder for Mac
Step 2. Go to the Settings window to customize output settings for your recordings.
Step 3. Choose the Record Screen mode from the left pane.
Step 4. Select an audio source and a screen recording mode.
Step 5. Adjust the area you wish to record and tap the REC button.
Screenshot Toolbar
As we’ve mentioned above, the Windows default screenshot feature supports screen recording. Similarly, Mac (macOS Mojave or later) users can also record their laptop screens with audio by using the Screenshot toolbar. Here’s how:
1. Press Shift + Command + 5 together to activate the Screenshot toolbar.
2. Choose a recording mode and click on Record.
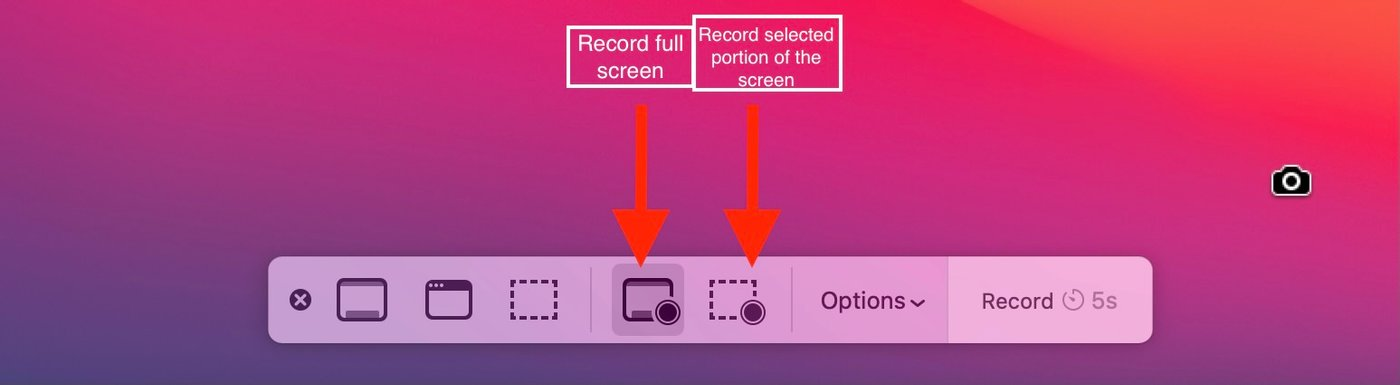
It will start recording your screen and system sound immediately.
The Bottom Line
This article explains how to record a laptop screen with audio. Whether you're a Windows or Mac user, this article can help. We've provided two methods for each system. Feel free to choose the one that best suits your needs.