You may also need to record yourself and your screen at the same time on Mac. You probably want a third-party handy app as an alternative to ease your work. To cope with the possible cases, this AWZware’s post teaches how to record yourself on a Mac in three ways.
How to Record Yourself on Mac with AWZ Screen Recorder
AWZ Mac Screen Recorder is your ideal software to record yourself on Mac and Windows. It is tiny, fast and powerful and enables you to record videos of yourself only or record your screen and yourself. The comprehensive audio, screen and webcam recorder provides about 20 output formats, such as MP4, MOV, MKV, MP3, etc. It lets you select your preferred video resolution and quality.
Here is the guide on how to record yourself on Mac with AWZ Screen Recorder.
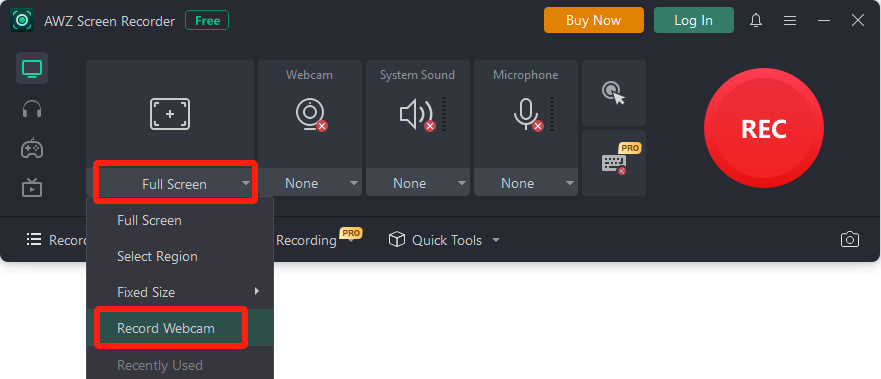
Step 1: Launch the recording software, and click the Full Screen button to choose Record Webcam;
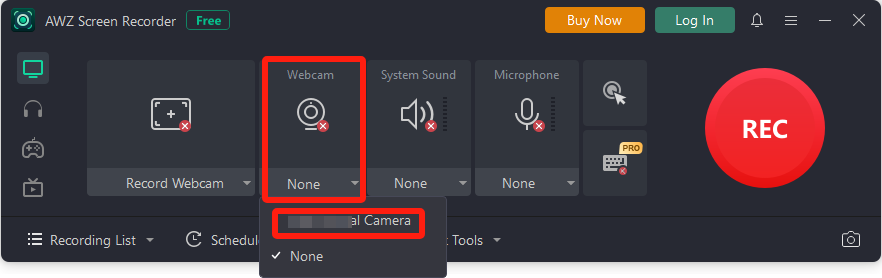
Step 2: Tap the Webcam drop-down menu to select the inbuilt or external webcam;
Step 3: Click REC and the video recording of your face starts with a floating bar appearing;

Step 4: Hit the red square button to stop recording.
Not only can screen record and record yourself on Mac, AWZ Screen Recorder can also trim and compress a video. After recording, the file is saved to the software’s folder and you can directly play it from the Recording List in the app. The software allows you to instantly share recordings to social media sites, Dropbox and Google Drive. Remember to allow permission to access your camera before you record yourself using a Mac.
Download AWZ Screen Recorder to video record yourself presenting a PowerPoint, playing a game or doing anything else on Mac for free!
Get AWZ Screen Recorder for Mac to Record Yourself
How to Record Yourself on a Mac Using QuickTime Player
Wish to record yourself on Mac without software download or installation? Resort to QuickTime Player, the native media player and basic video editor that lets you record yourself and screen with audio. The program lets you rotate and trim a video. When a recording starts, you have the controls to adjust the volume and more options.
Follow the below steps to record yourself on Mac.
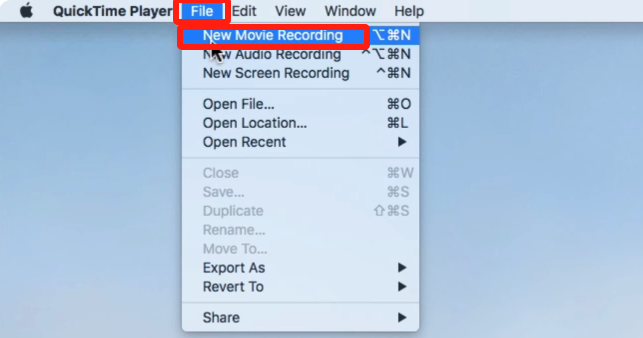
Step 1: Open the recording software and go to File > New Movie Recording;
Step 2: Click the recording drop-down menu in the new window to select your camera;
Step 3: Choose your microphone and quality setting;
Step 4: Tap the Record button to record a video of yourself on the Mac computer, and stop the recording by clicking Record again.
![How to Screen Record on Mac with Audio in 3 Ways [Simple Steps]](https://img.swifdoo.com/image/how-to-screen-record-on-mac-with-audio.jpg)
How to Screen Record on Mac with Audio in 3 Ways [Simple Steps]
Wonder how to screen record on Mac with audio without a hassle? This article covers three ways and screen recorders to help along with steps to record.
READ MORE >Record Yourself on Mac by iMovie
Another best way to record yourself on Mac is to take advantage of the preinstalled iMove application. The software lets you create trailers and movies and view, edit, and share them. It can also add music and effects to videos.
Take a look at the method to record a video on a Mac by iMove.
Step 1: Open the application and create a new movie project;
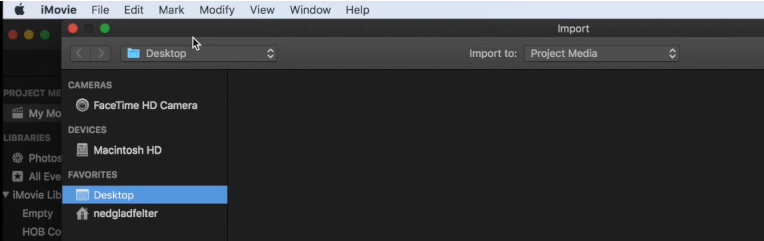
Step 2: Click My Movie on the left side and tap the Import video icon;
Step 3: Choose FaceTime HD Camera, and hit the Start recording button;
Step 4: Use your webcam to record yourself on Mac, then close the Import window to finish your recording.
While Mac enables you to record yourself as a video without paying anything, it has limited features. If you would like to draw and add text on the screen while recording or customize the video output, look no further than AWZ Screen Recorder.
Record Yourself for Free on Mac with AWZ Screen Recorder
Conclusion
Now, it’s common to record yourself talking on your Mac to take a video. It allows you to check your performance the way others will see. You can also make short videos to post. Learn how to record yourself on Mac laptops or desktop PCs in just minutes by reading this article. The step-by-step guides are explained in an absolutely reader-friendly way.
FAQs
How do I record my screen with audio in QuickTime?
If you also hope to record your screen with webcam or audio simultaneously, choose File > New Movie Recording to enable the webcam option according to the aforementioned content. Then Go to File > New Screen Recording, tap the record button in the screen recording window and click to record the entire screen or drag to record a selected part of the screen. When everything is ok, click the stop button to end the recording.