In this article, AWZware elaborates on how to screen record on Macbook Pro with 4 applications. It is never a problem to do screen recording on your Mac with audio and camera.
How to Screen Record on Macbook Pro with AWZ Screen Recorder (Beginners’ Choice)
AWZ Screen Recorder is one of the best screen recorders for Macbook Pro. The intuitive user interface achieves a level of simplicity that allows you to record the screen on a Macbook Pro without a learning curve. Unlike the built-in video capturer which cannot record internal audio, this application can easily record audio from both the computer and your microphone without downloading a plug-in.
There is no time limit, which is optimal for recording long remote meetings or gameplay. Furthermore, free video editing tools are available to reduce the video file size or cut out unnecessary clips without applying a watermark. With one click, the edited video can be shared on YouTube, Vimeo, Google Drive, and other platforms.
Remember to click the download button below to install this screen recording solution on your computer. Now follow the steps below to learn how to screen record on Macbook Pro devices:
Screen Record on Macbook Pro in AWZ Screen Recorder
Step 1: Allow the software to access audio and webcam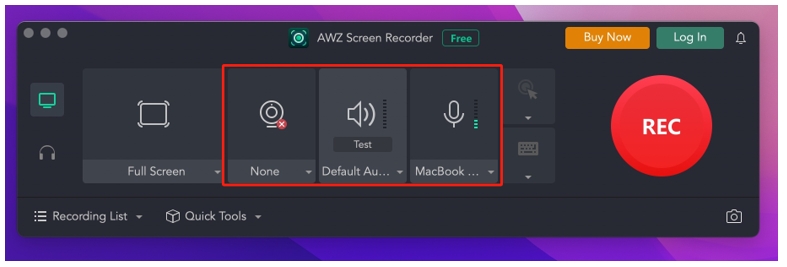
Run the program on your laptop. Click on the webinar, speaker, and microphone buttons respectively to accept the default webcam and audio devices as the video and audio sources.
Step 2: Adjust the recording settings
Go to “AWZ Screen Recorder” in the upper left and select “Preferences”. In the video and audio sections, you can change the output format, frame rate, image quality, bitrate, etc. Press “Apply” to save the changes.
Do Screen Recording on Macbook Pro in AWZ Screen Recorder
Step 3: Select the recording area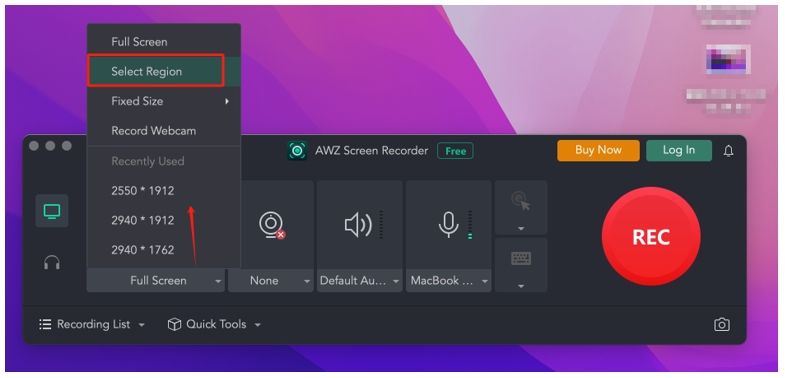
Click “Full Screen” and locate “Select Region”. Draw a rectangle to cover the area you want to record.
Step 4: Do a screen recording on the Macbook Pro
Hit “REC” to screen record on your Macbook Pro with sound and camera. Tap on the annotation icon to highlight, add shapes, or insert text boxes to emphasize the key information you want to transfer. Then press the Stop button to finish recording.
Step 5: Edit the video (optional)
Navigate to “Recording List” and hover the cursor on the new recording. Click on the scissor icon to enable the video cutter for PC and Mac. Drag the slider to cut out unnecessary beginning or ending clips. Hit “Export” to save the edit.
How to Screen Record on Macbook Pro with QuickTime Player
QuickTime Player is the preinstalled screen recorder for Macbook Pro. It enables you to do screen recording on any Mac device without a time limit. 3 resolution options are offered when capturing videos: 1080p, 720p, and 480p, and your recordings are outputted in the MOV format. However, as mentioned before, this innate software cannot record audio from a computer.
Screen Record on Macbook Pro in QuickTime Player Alternative
Take a look at how to screen record on a Macbook Pro in the built-in screen recording application:
Step 1: Open QuickTime Player on your Mac;
Step 2: Tap on the File button and select New Screen Recording;
Step 3: Click Record to do screen recording on the Macbook Pro.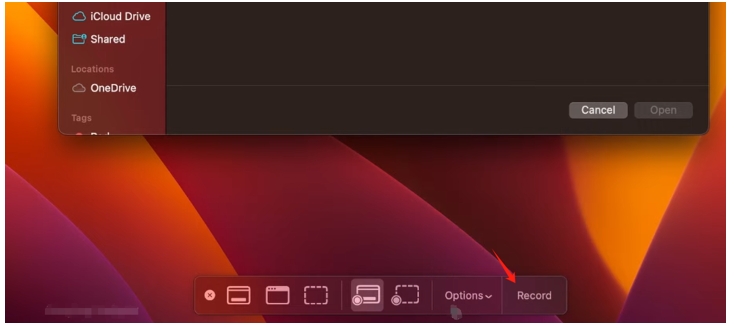
If you want to know how to screen record on Mac with audio from the computer, this post might be helpful:
![How to Screen Record on Mac with Audio in 3 Ways [Simple Steps]](https://img.swifdoo.com/image/how-to-screen-record-on-mac-with-audio.jpg)
How to Screen Record on Mac with Audio in 3 Ways [Simple Steps]
Wonder how to screen record on Mac with audio without a hassle? This article covers three ways and screen recorders to help along with steps to record.
READ MORE >How to Screen Record on Macbook Pro with Flixier
If you prefer an online video capturer for Macbook Pro devices, Flixier is one of the most popular web-based sites to record the screen on your Macbook Pro. Multiple recording options are available to help you decide how to capture the screen and webcam. After recording, the platform lets you edit the resolution, background color, and more elements before saving the video. A 10-minute video can be recorded for free per task, and registration is required.
Go over how to screen record on Macbook Pro with Flixier:
Step 1: Go over to the webpage of the screen recorder for Macbook Pro and hit Record Screen;
Step 2: Press Record and choose Screen or other recording mode you like;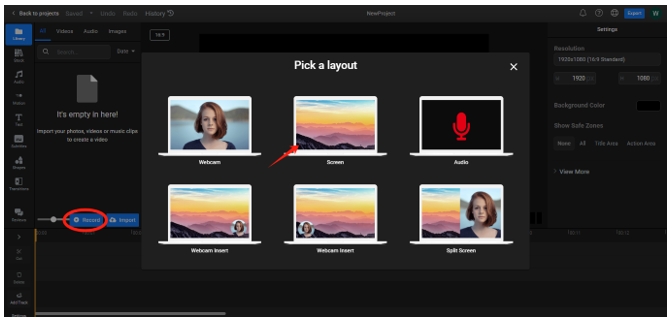
Step 3: In the pop-up window, select the window or tab you want to cover. Then click Share and allow it to access the audio to screen record on your Macbook Pro with sound.
How to Screen Record on Macbook Pro with Nimbus
Nimbus is a handy Chrome extension capable of doing screen recording on Macbook Pro and other Mac devices. It takes less storage space than desktop applications while letting you enjoy its services in one click without visiting an online website. The recorded video is saved in the WEBM format and allows you to convert the WEBM to MP4 before downloading it. Besides, customizable watermarks can be added to the recording to protect your copyright.
Here is the guide on how to screen record on your Macbook Pro with this Chrome extension:
Step 1: Open Chrome and navigate to the Extension icon. Click on the screen recorder for Macbook Pro;
Step 2: Choose Record Video from the drop-down list menu, turn on Record Mic Sound, and tap START RECORD;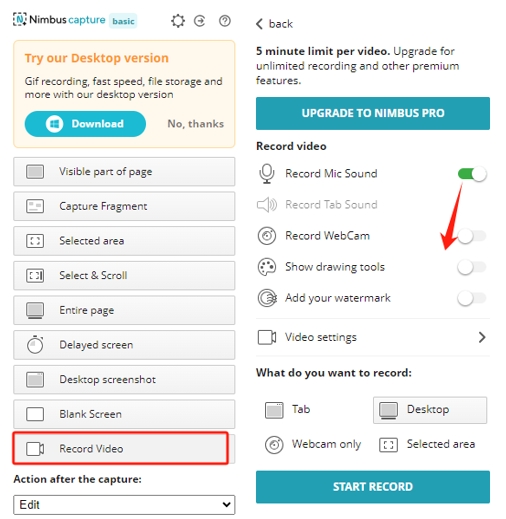
Step 3: Allow Nimbus to use your microphone and choose the Chrome tab or screen you want to record. Enable Also share system audio and click Share.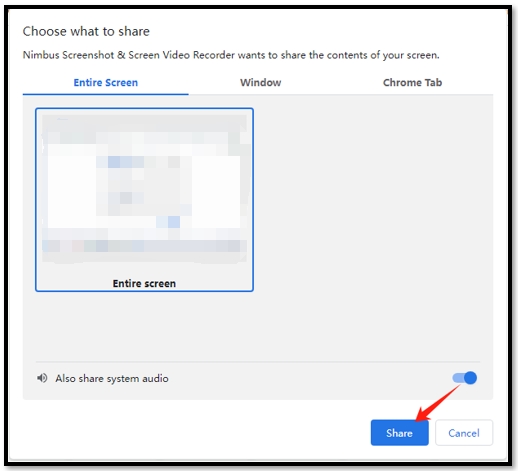
Conclusion
The 4 best methods are demonstrated in the article to help you learn how to screen record on Macbook Pro devices with sound and camera. Both offline and online applications are included to meet your needs.
For users who want to effortlessly record both system and microphone audio, AWZ Screen Recorder is an ideal choice to record your Macbook Pro with internal and external sound. No additional add-ons are required.