How to Start Screen Recording on a Mac
Before learning how to stop screen recording on a MacBook, let’s clarify how to start. Generally speaking, there are three methods to take a screen record on macOS: use the Screenshot toolbar, QuickTime Player, and a third-party screen recorder.
Check the following content to learn how you can record screen by using these three tools, respectively:
Method 1. Use the Screenshot Utility
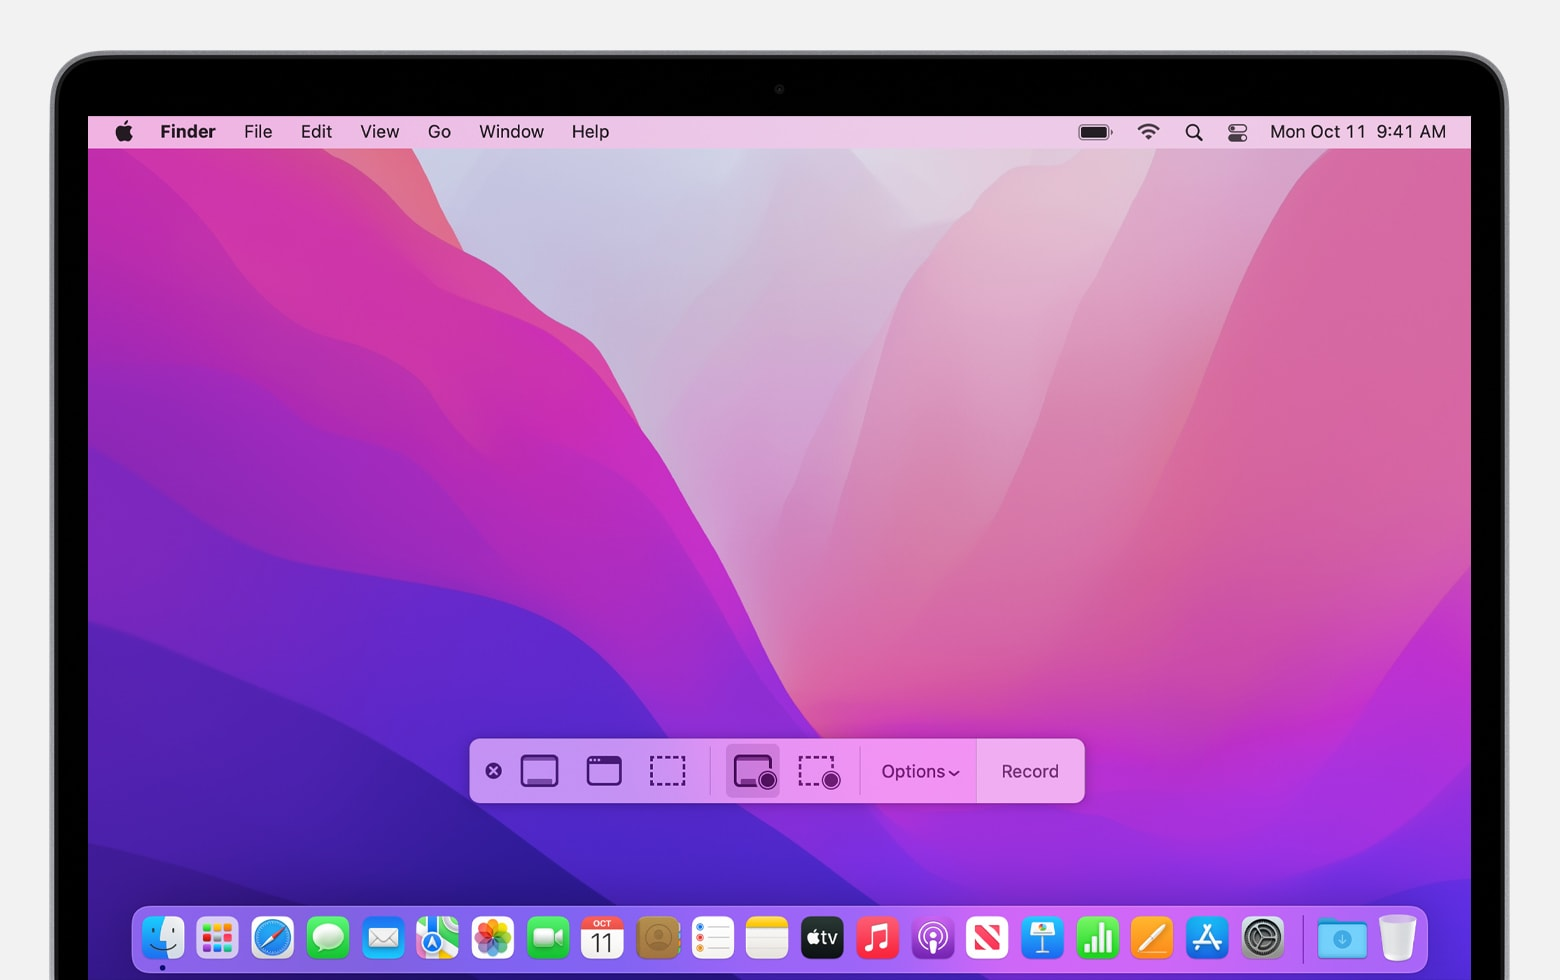
The Screenshot feature is mainly used for capturing images on your Mac. Luckily, it also offers a recording tool for you to make video recordings of the entire screen or a selected portion of it. Here’s a general guide:
Step 1. Press Shift + Command + 5 together.
Step 2. Select a recording mode between recording the entire screen and recording a selected portion of the screen.
Step 3. Hit the Record button to start recording.
Method 2. Use QuickTime Player
QuickTime Player is a built-in video-playing app on Mac, which is also used for editing videos, recording screens, etc. Compared to the Screenshot tool, QuickTime Player offers more advanced tools for recording and video editing. It enables you to effortlessly screen record on Mac with audio.
Steps for Mac recording with QuickTime Player:
Step 1. Launch QuickTime Player and select File > New Screen Recording.
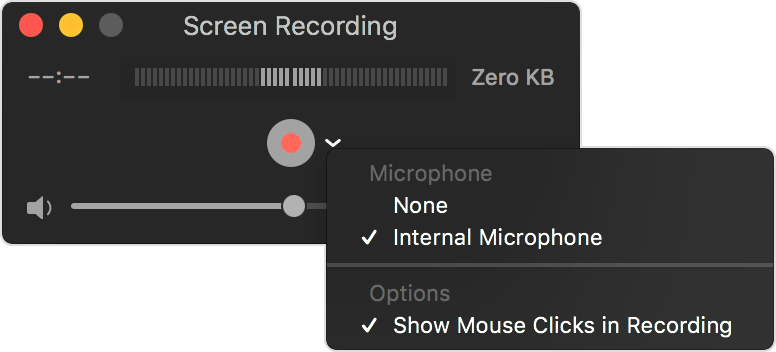
Step 2. Select the area where you want to record and start recording.
Method 3. Use a Third-Party Screen Recorder
Though built-in tools offer great convenience and are free of charge, they do have some limits for recording and editing. Therefore, to enjoy a better experience, another good option to capture your Mac screen is to use a dedicated screen recorder.
Taking AWZ Screen Recorder as an example, here’s how to record your Mac screen with this tool:
Step 1. Click the following download button to install AWZ Screen Recorder on your Mac. Then launch it.
Step 2. Select a recording mode from the left pane and choose the recording area.
Step 3. Tap the red REC button to get started.
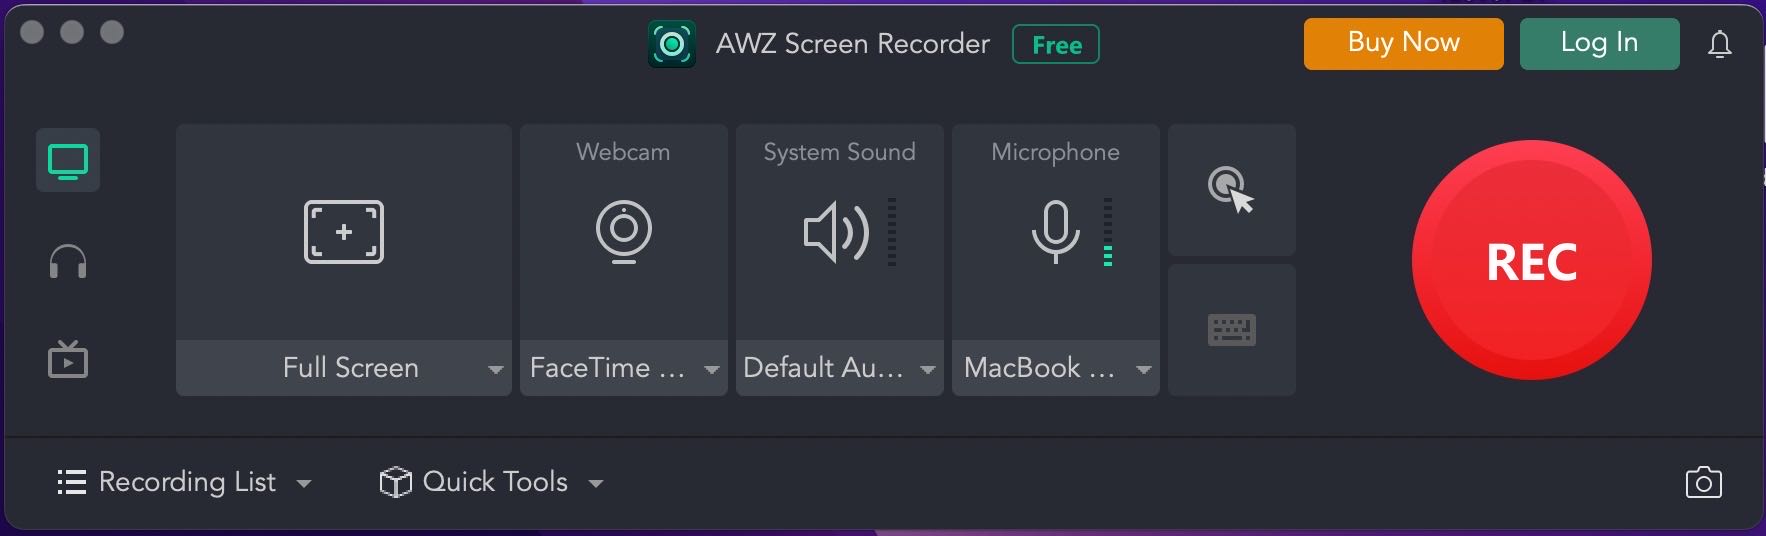
To guarantee a better output quality, go to Settings and adjust related parameters in Video & Audio. Remember to confirm your changes by clicking Apply.
How to Stop Screen Recording on a Mac
To learn how to stop screen recording on a Mac, the first thing you need to find out is what recording method you use. Different tools have distinct requirements. In this section, we’ll clarify all the possible situations and offer you clear answers to stop recording on your Mac. Let’s begin!
Answer 1. Stop Screenshot Utility Recording
If you’re screen recording your Mac with the Screenshot feature, the toolbar will be hidden while you’re recording, making it hard to access the stop recording button. In this situation, you have three ways to stop recording:
#1. Click on the Stop icon on the macOS menu bar.

#2. Press Cmd + Control + Esc together on your keyboard.
#3. Press Cmd + Shift +5 to call out the Screenshot toolbar and click on the Stop Recording icon.
Answer 2. Stop QuickTime Player Recording
Similarly, it seems like a hassle to stop QuickTime Player recording since you cannot find the toolbar while recording. However, it’s also easy to find a way out if you know more about QuickTime Player and Mac. When you’re recording with QuickTime Player, here’s how you can stop capturing:
# 1. Click on the Stop button in the menu bar.
# 2. Press Command + Control + Esc simultaneously.
Answer 3. Stop a Third-Party Recorder Recording
When you’re recording with a third-party tool, stop recording can be much easier. A dedicated screen recorder not only offers professional features for capturing activities on your computer but also streamlines the utilization process. What’s more, you’re also allowed to customize all the hotkeys you may use in daily life and work, enabling you to change the settings of a program based on your own usage habits.
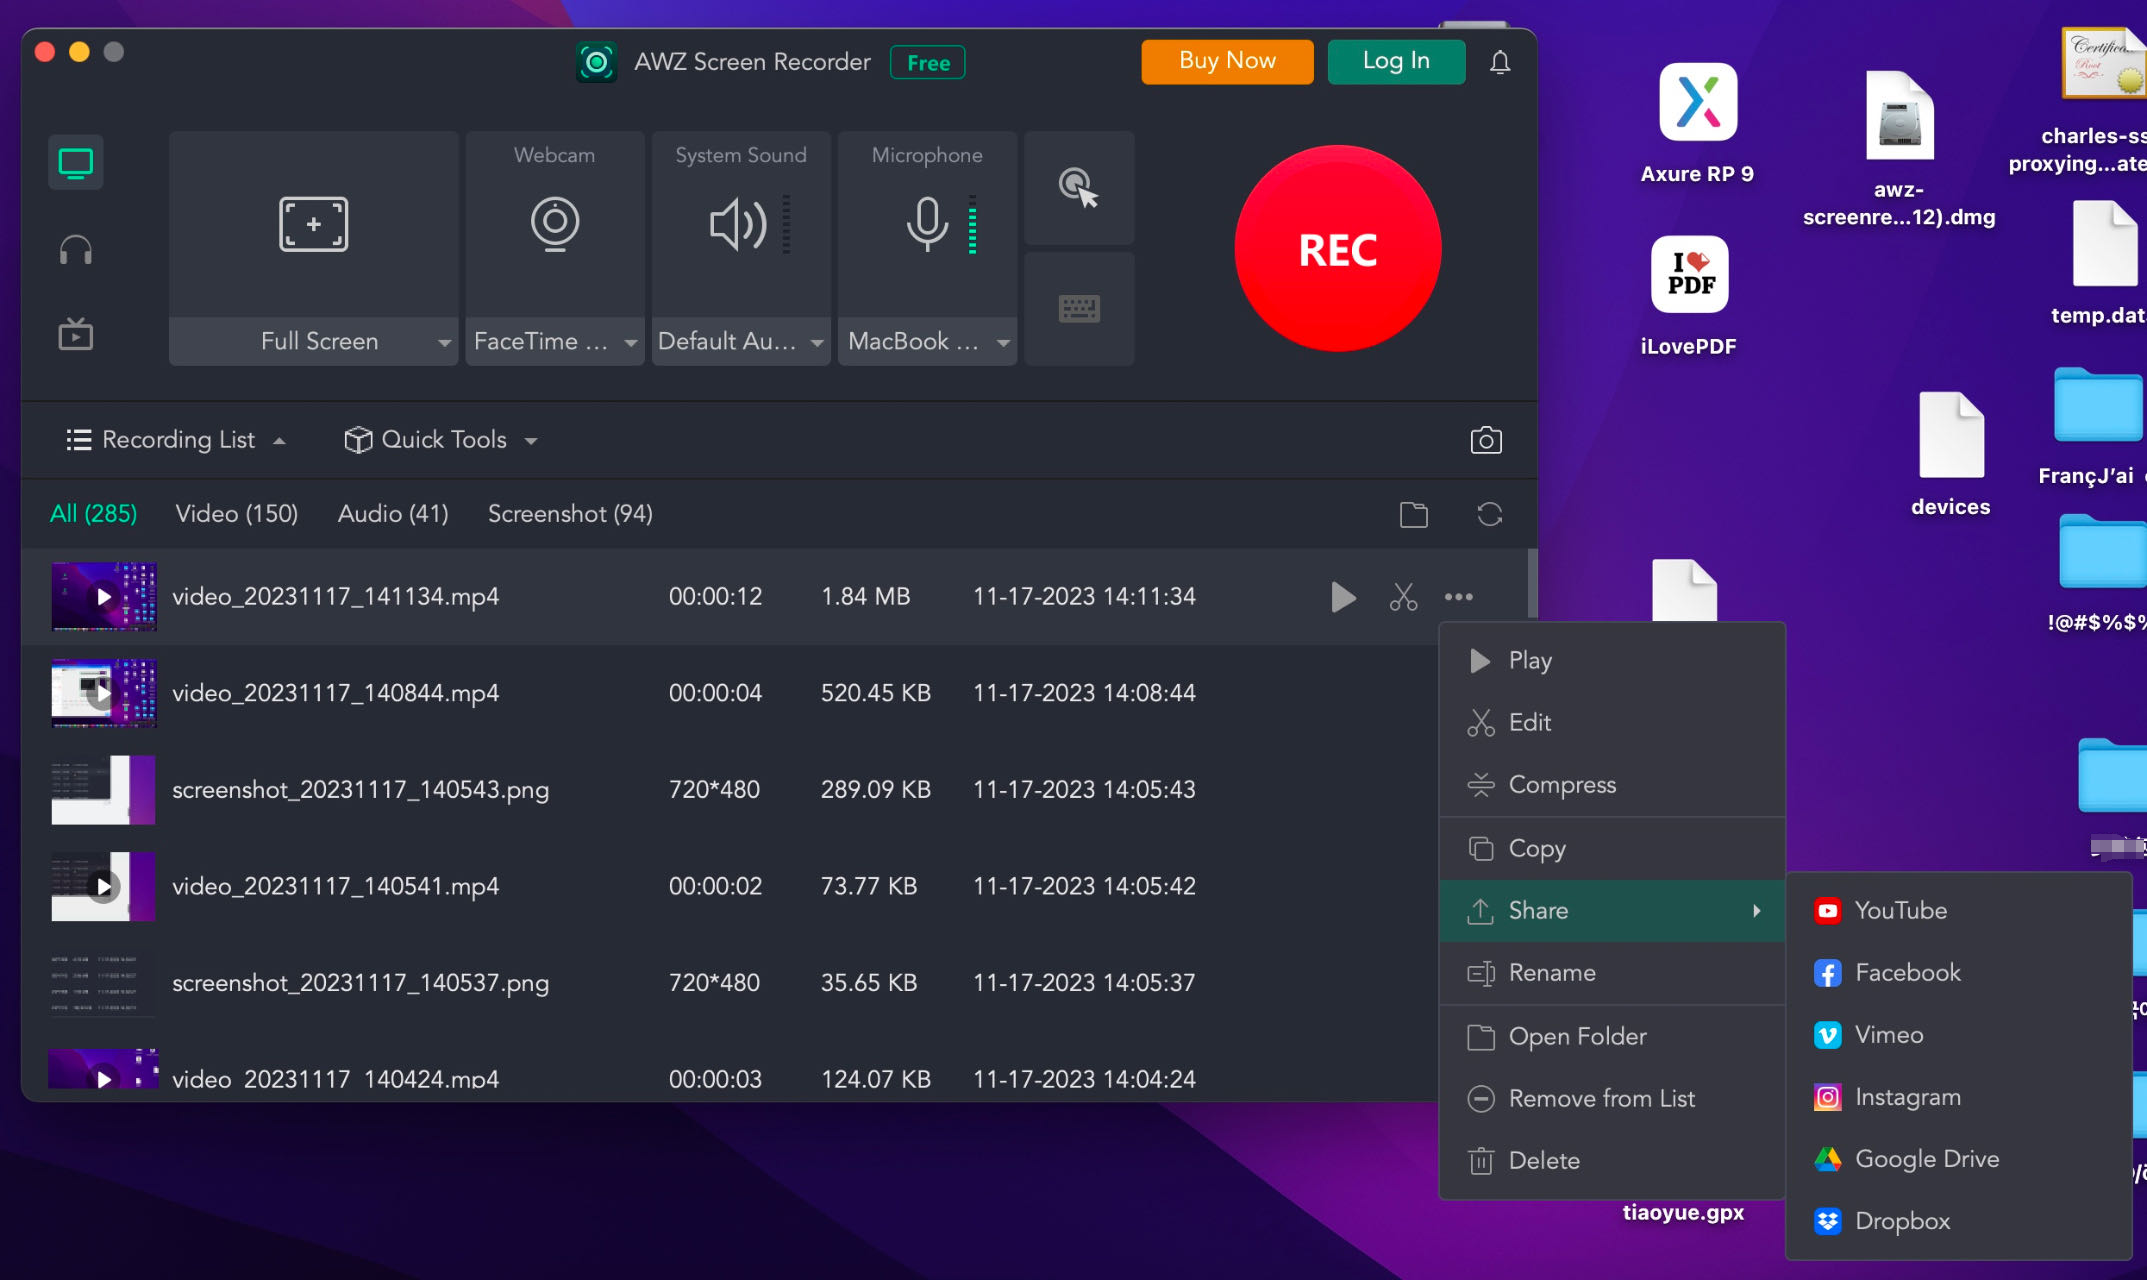
For instance, to stop AWZ Screen Recorder’s recording, two methods are available:
#1. Click on the red stop recording button in the toolbar (it won’t disappear even if you’re taking full-screen recording on your Mac, and it will remain invisible in your recordings).
#2. Press F3 on your keyboard to stop recording (Alternatively, you can modify all shortcuts in Settings > Shortcuts and select a preferred hotkey to start/stop recordings on your computer).
More Information About AWZ Screen Recorder
AWZ Screen Recorder is a free screencasting tool that offers one-stop solutions to screen recording and screenshots on a Windows PC and MacBook. This screen recorder boasts a lightweight file size and navigable interface, requiring minimum effort.
More importantly, compared to in-built screen recording tools, AWZ Screen Recorder performs more professionally. It offers three recording modes to meet various requirements: Record Screen, Record Audio, and Record Streaming Video. Each mode is designed for a different purpose, allowing you to record any program on your computer without a hassle.
Moreover, AWZ Screen Recorder also provides essential editing tools for you to edit and compress your recordings directly. In addition, this screen recorder allows you to share your recorded videos with social media platforms and cloud services, such as YouTube, Vimeo, Google Drive, Dropbox, etc., in one click.
Of course, AWZ Screen Recorder comes with more practical features for you to record your Mac/Windows screen like a pro. Just download and use it right now!
For Windows Users:
For Mac Users:
Conclusion
By learning how to stop screen recording on Mac, you’re compacted with comprehensive knowledge about Mac screen recording. In this article, we’ve listed all the possible situations for recording a MacBook and showed you how you can stop screen recording under different circumstances. Just jump into the proper section straightforwardly and be more efficient on your way to Mac recording.
Also, don’t forget to have a try on AWZ Screen Recorder. It does offer a more professional and convenient way to help you record your screen than built-in tools. Download AWZ Screen Recorder on your Mac by clicking the following button!