Can Audacity Record Streaming Audio?
When it comes to audio recording, many people mention Audacity, a free audio recording and editing software. A lot of podcasters use it to record audio for podcast. So can Audacity record streaming audio? The answer is Yes! Audacity can record any sound played on your computer's sound card, including streaming audio. It can help you record music, podcasts, audio/video live streaming, etc.
Is Audacity A Good Choice for Streaming Audio Recording?
Audacity is a good choice if you want to not only record but also edit audio. It even can help you remove background noise. Audacity has a rich toolkit, which is one of the reasons why it is so popular among professionals. But this also makes its interface complex, so novices may need to spend a little time learning how to use it.
If you are ready, then you can move to the next section to learn how to record streaming audio with Audacity.
If you want to start recording immediately, then you can click the button below to get another easy audio recorder. Once the installation is complete, you can start recording with just one click.
- User-friendly interface & Easy-to-use
- Record audio from computer & from you
- Automatically block extraneous sounds
Windows 11/10/8.1/8/7
How to Record Streaming Audio with Audacity
It's worth mentioning that Audacity will record all sounds from your computer. Therefore, you may need to turn off other sounds beforehand. Let’s start to see how to record streaming audio with Audacity.
Record Streaming Audio with Audacity on Windows
1. Launch Audacity and find Audio Setup tab. You can also click Edit > Choose Preferences to access the Audio Settings box.
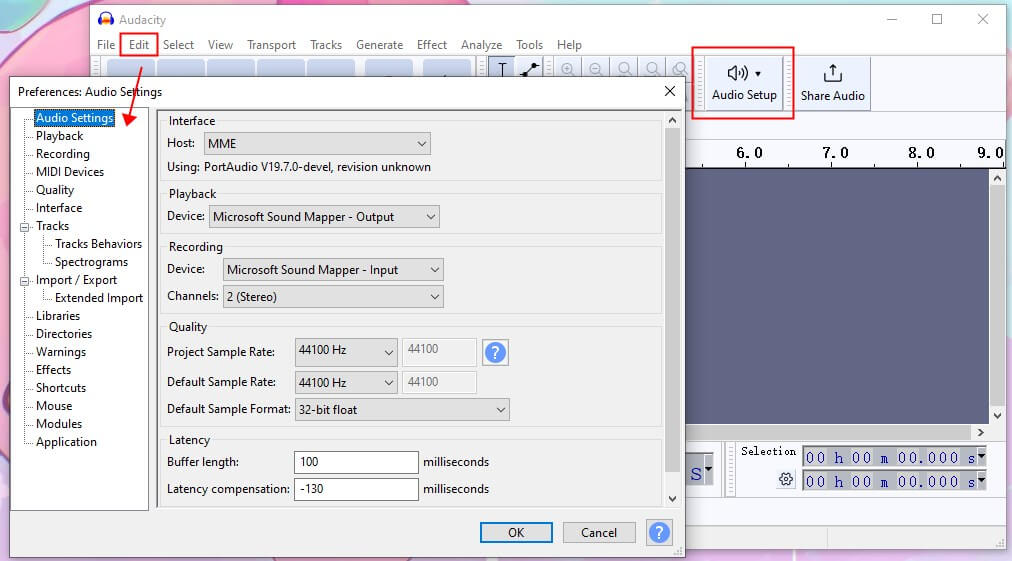
2. Click Audio Setup to set the recording device/playback device.
- Click Host and select Windows WASAPI.
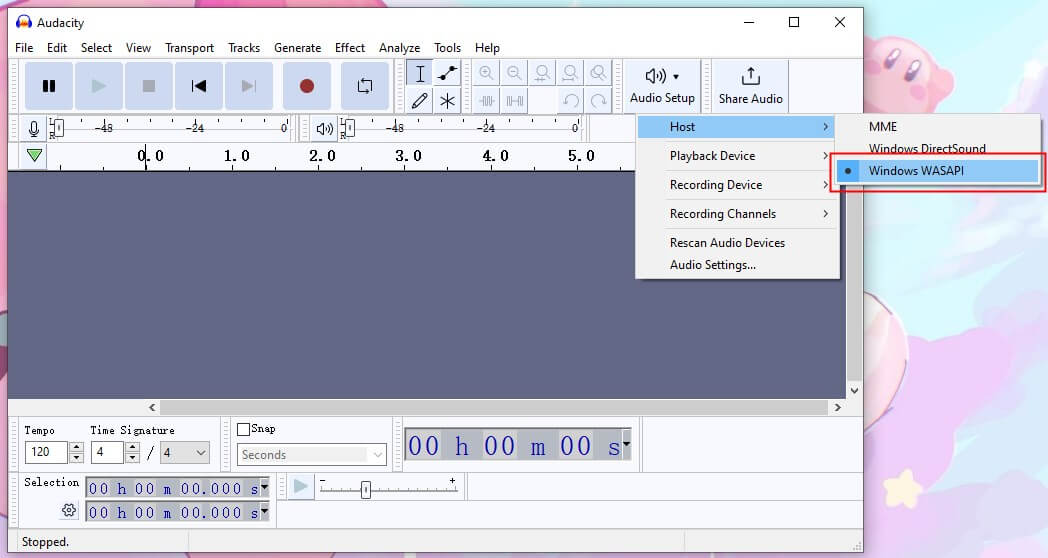
- Click Playback Device and select the device. The device you use to listen to the recorded audio.
- Click Recording Device and set the device with (loopback) displayed after its name. This depends on the device you are using, it can be computer speakers or headphones.
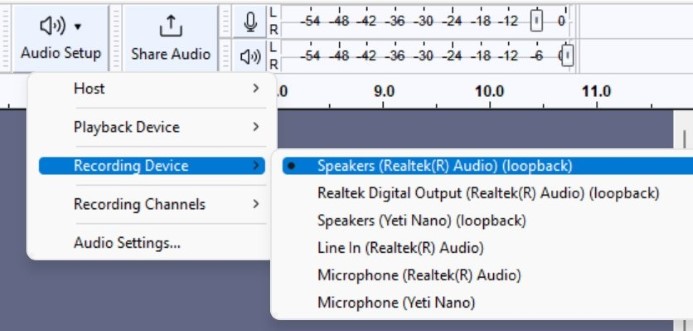
3. Now you can open the streaming service and click the red Record button to start recording.
4. You can pause the recording at any time > To end the recording, click the square Stop button.
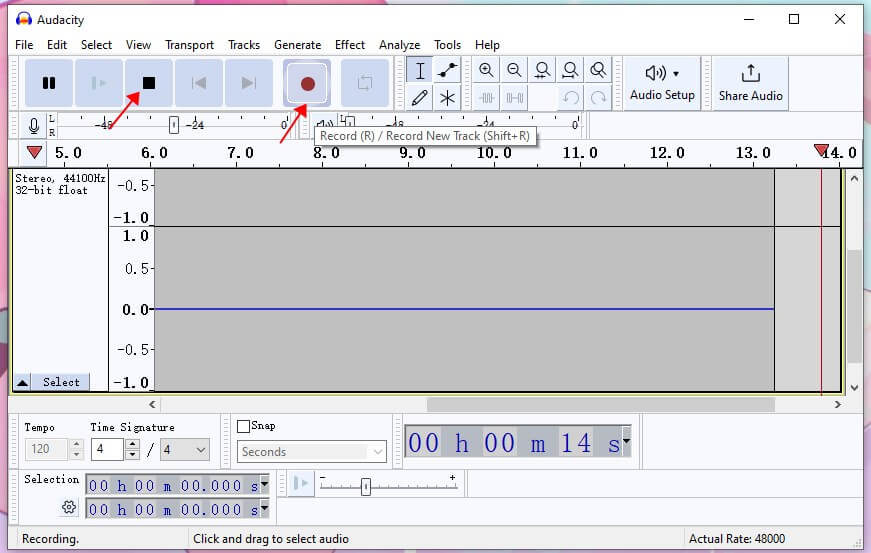
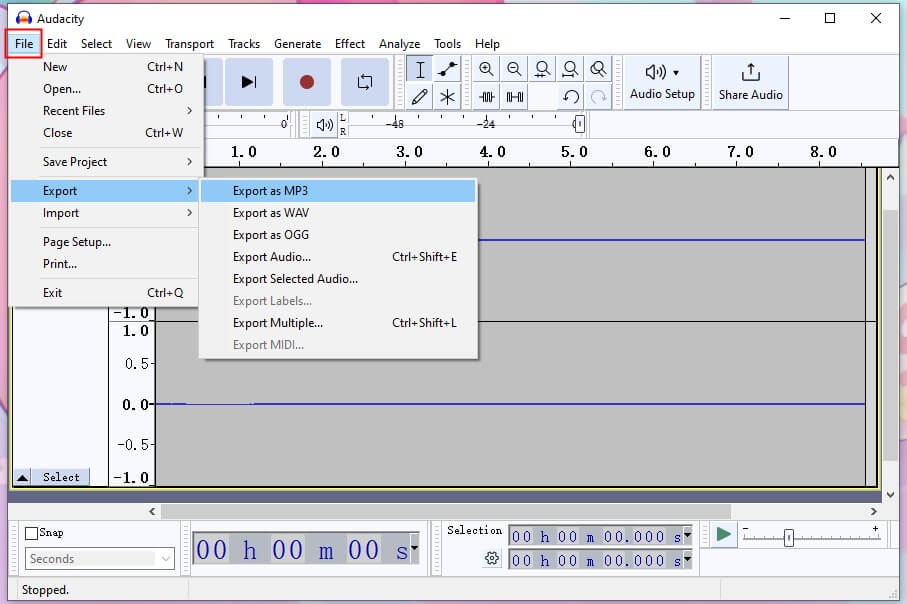
5. After that, you can listen to the recording. If you are satisfied with the recording, then you can click File and choose Export to save the recording.
Record Streaming Audio with Audacity on Mac
If you want to record streaming audio with Audacity on Mac, you'll need to install a plug-in called Soundflower. Only with this plugin installed, Audacity can capture the internal audio. You can go to https://github.com/mattingalls/Soundflower/releases/ to get Soundflower. However, M1 chip-based Macs are not yet supported.
1. After you have installed Soundflower, click Go from the menu bar > Go to Utilities and launch Audio MIDI Setup to set Soundflower for sound output.
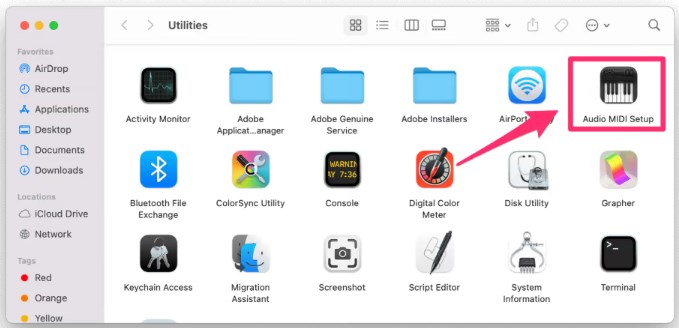
- From the lower left corner, click the + icon and choose Create Aggregate Device.
- Click Built-in Output option and select Soundflower (2ch) > Click the Gear button and select use this device for sound output.
2. Launch Audacity, go to Audio Setup and select Soundflower (2ch) as the recording device.

3. When it’s ready, click the red Record button to start.
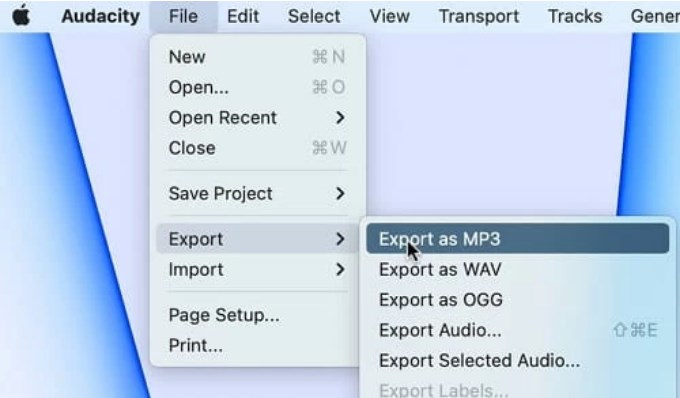
4. Click the square Stop button to end the recording > Click File from the menu bar and go to Export to save the recording.
Important!
⚠️ Audacity converts the original digital signal to analog and then back to digital again. This process can cause sound quality loss.
⚠️ Audacity can only record sound from one device or direction. That’s to say, you cannot record your voice while recording your computer's voice.
If you want a 100% lossless audio file or want to record from both sides, please move to the next section to get the method.
Another Easier Way to Record Streaming Audio
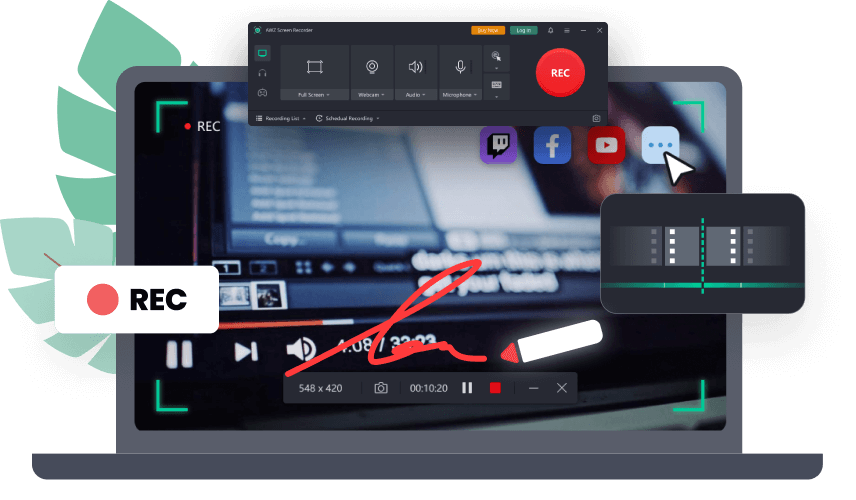
It’s possible to record streaming audio with Audacity but you may not like the way it works. In this case, you can turn to a professional recording software called AWZ Screen Recorder, which is available for both Windows and Mac.
Compared to Audacity, the interface is more user-friendly and the workflow is more intuitive. Anyone can complete the recording a a few clicks.
Main features:
⭐ Record any audio from computer and microphone
⭐ Supports multi-source recording
⭐ Preserves 100% lossless audio files
⭐ Save audio in MP3, WAV, AAC, WMA, M4A, etc.
You can click the download button to get the tool and follow the steps below to complete the recording.
For Win:
For macOS:
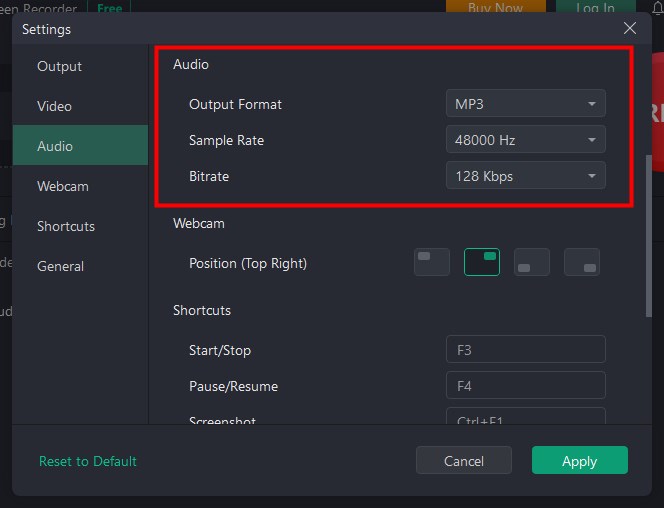
1. Launch AWZ Screen Recorder > Go to Settings to adjust the output format if needed.
2. Turn on the system sound recording option.
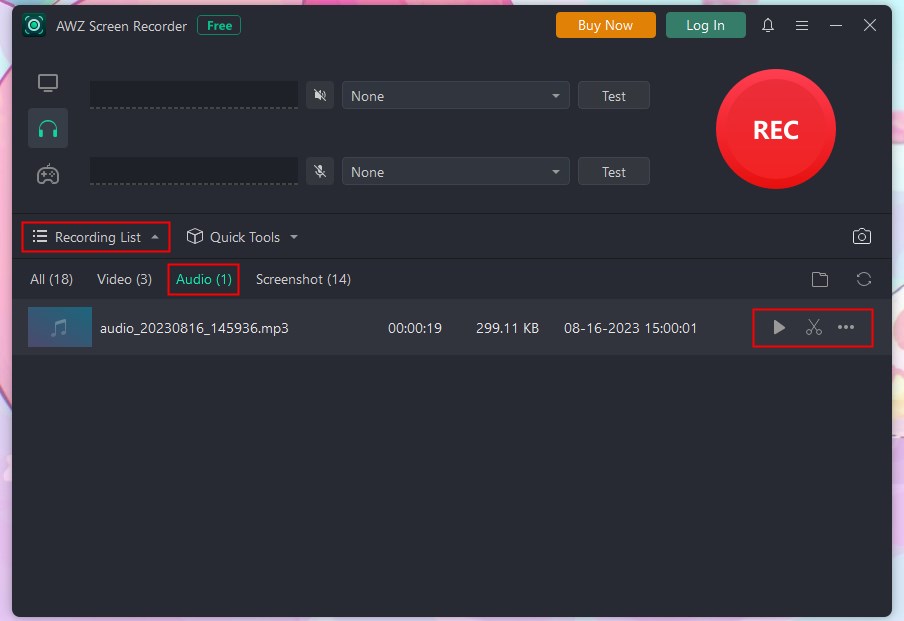
3. Play the streaming audio > Click the REC button to start recording.

4. When it’s OK, click the Stop button and you can go to Recording List to check the file. If needed, you can use the edit tool to cut the unwanted parts.
AWZ Screen Recorder is also excellent at video recording. It can help you record streaming video, video calls, online meetings and so on.
How to Record Audio from Website for Free | 4 Ways
This guide will show you how to record audio from website. You can use these methods to record online meetings, podcasts, music, audiobooks, etc.
READ MORE >Final Words
That’s all about how to record streaming audio with Audacity. There is no doubt that Audacity is an excellent audio recorder and editor. As long as it's set up correctly, then you'll get the audio you want. However, if you feel that it is not working as you expected, then you can use AWZ Screen Recorder instead. With this recorder, you can get high-quality audio in one click. Hope this guide provided by AWZware is helpful.


