Which Recorder Is Right for You?
Let's first see what tools can help you record screen and microphone simultaneously.
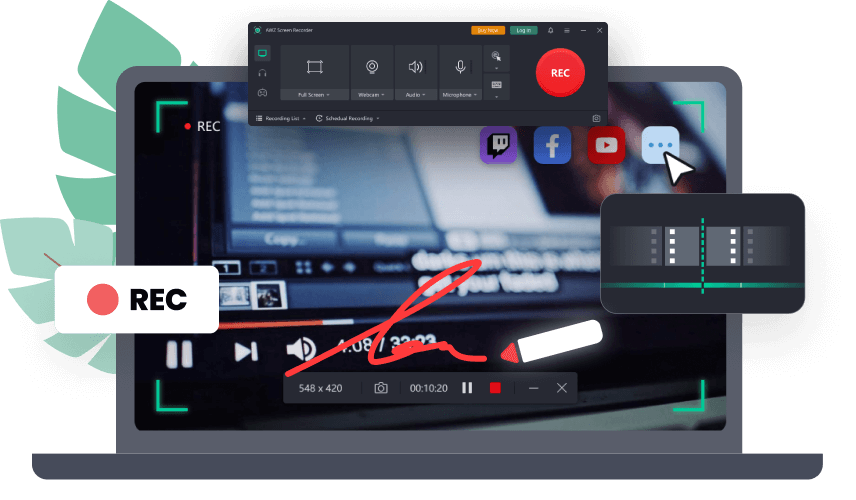
➡️ A professional screen recording tool can help you screen record with micorphone without effort. AWZ Screen Recorder supports recording any on-screen activity with a microphone.
➡️ You can use the built-in recorder if you don't want to download any tools. Xbox Game Bar for Windows and QuickTime Player for Mac. They provide basic recording features.
➡️ Want to screen record with microphone on iPhone or iPad? You can use the Screen Recording feature, which can be found in the Control Center.
For more information on how to use these recorders, please continue reading.
Part 1. Easiest Way to Screen Record with Microphone on PC & Mac
A professional recorder such as AWZ Screen Recorder can meet all your recording needs. With this recorder, you will be able to:
✅ screen record with microphone audio
✅ record any on-screen activity & any part of the screen
✅ show mouse click and keyboard key presses, add annotations
In addition, you can enable the Gain and Noise Reduction feature to improve audio quality of the recording. The former will make your voice more transparent, and the latter will automatically block out noise.
Here is how to use AWZ Screen Recorder to record screen with microphone on PC and Mac:
1. Download, install, and launch AWZ Screen Recorder.
2. Select a recording mode.
- Select Record Screen if you want to record the full screen, an app window, a selected area, or the webcam.
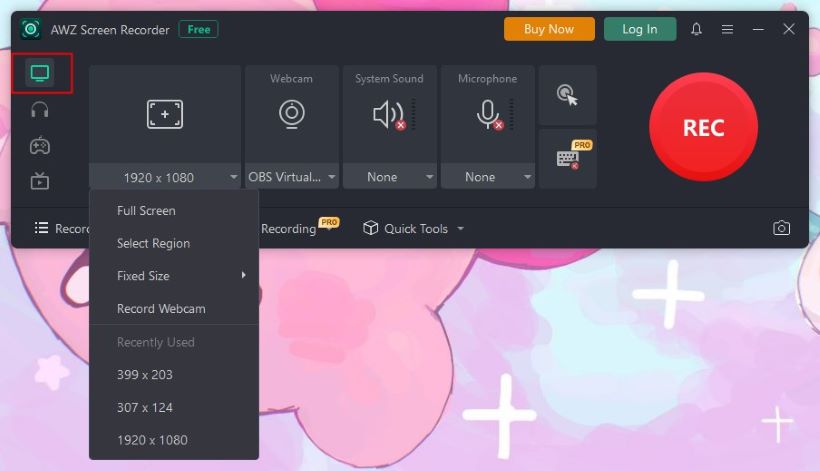
- Select Record Game if you want to record gameplay.
- Select Record Streaming Video if you want to record online video with audio.
3. Turn on the Microphone and select the device. If desired, you can also turn on Gain or Noise Reduction. If you want to record internal audio, don't forget to turn on System Sound.
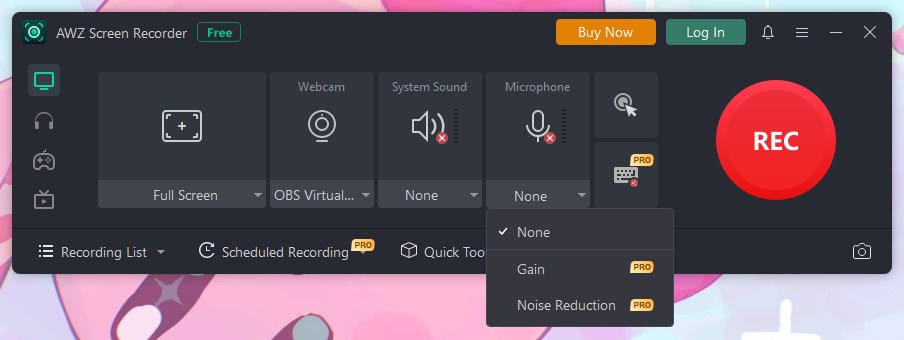
4. When ready, click the REC button to start.
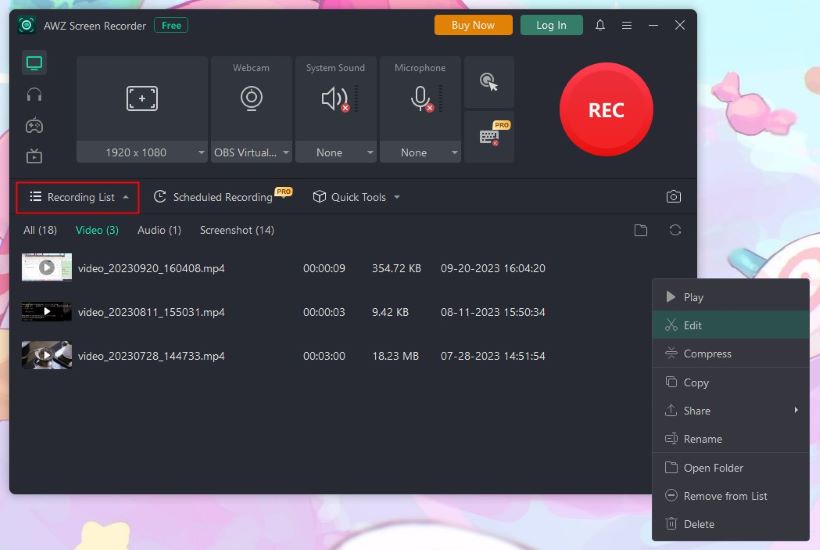
5. Click the Stop button and go to Recording List to check the recording.
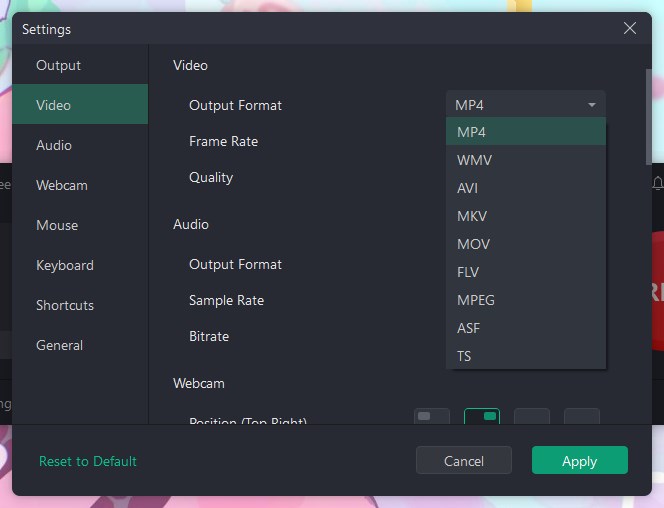
By default, the recorded video will be saved in MP4 format. If you prefer a different format, you can go to Settings and make adjustments before recording.
As you can see, AWZ Screen Recorder is feature-rich and has a simple workflow. With just a few clicks, you can record what you need! Why not give it a try?
You may also like:
How to Remove Background Noise from Audio | 2 Easy Ways
This guide will tell you how to remove background noise from audio, including the methods for eliminating noise in real-time.
READ MORE >Part 2. Screen Record with Microphone on Windows via Game Bar
If you use a Windows 10 or a Windows 11 computer, the Xbox Game Bar is a handy option for screen recording with a microphone. It is one built-in tool that can help you record gameplay and any app window except File Explorer. It's worth noting that it can only record one window at a time.
After you start recording, you can go to another application and the recording will not stop. However, it will only record the application you selected at the beginning. Check to learn how to use this recorder.
1. Open the game or app you want to record.
2. Press Windows + G to run Xbox Game Bar > When prompted, check "Yes, this is a game".
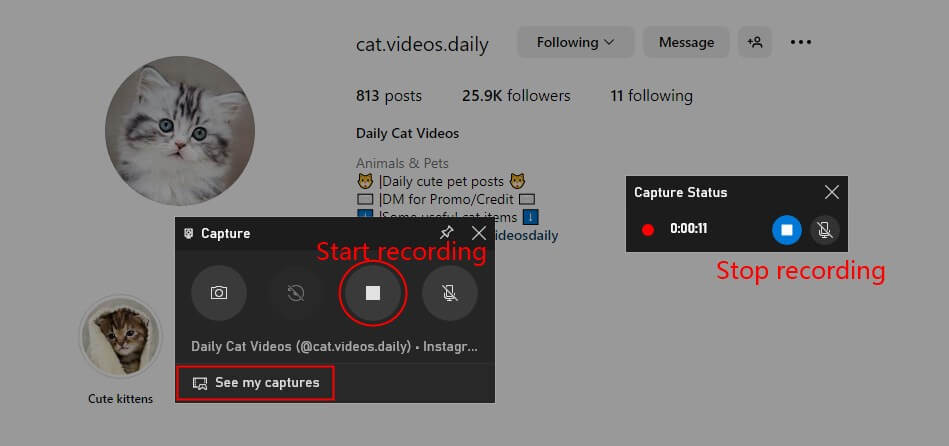
3. Click Capture, and you will see the recording panel.

4. Click Audio to turn on the microphone and select the device.
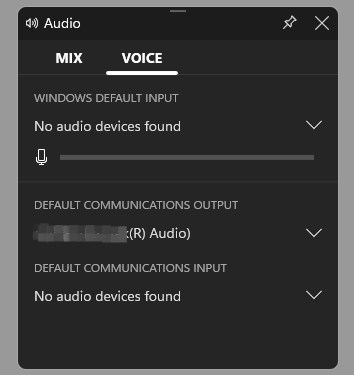
5. If everything is OK, click the Start Recording button.
6. To end the recording, click the Stop Recording button. Your recordings can be found under See my captures.
Part 3. Screen Record with Microphone on Mac via QuickTime Player
QuickTime Player is a pre-installed program on macOS, which supports playing, streaming, encoding, and transcoding digital media formats. It can help you record any part of the screen with or without voice.
However, please note that it does not support recording the system sound. To make it possible, you need to install a tool named Soundflower. This guide will show you the details: QuickTime Record Screen with Audio.
See how to record screen with microphone on Mac.
1. Launch QuickTime Player > Go to the menu bar, click File, and choose New Screen Recording.
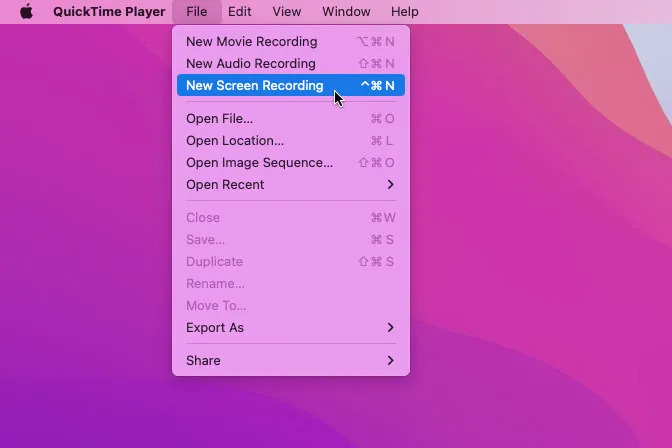
2. Select the recording area.
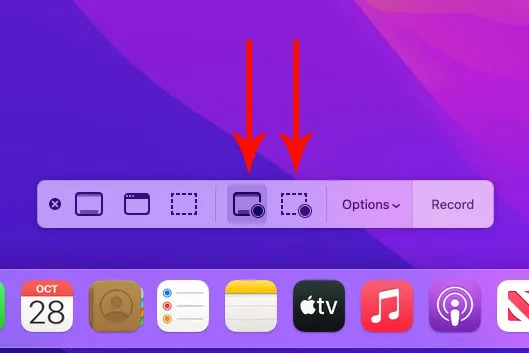
3. Click Options to select the microphone.
4. Click Record to start.
5. When you want to end the recording, click the Stop button. After that, you can click File > Export to save the video.
Part 4. Screen Record with Microphone on iPhone/iPad
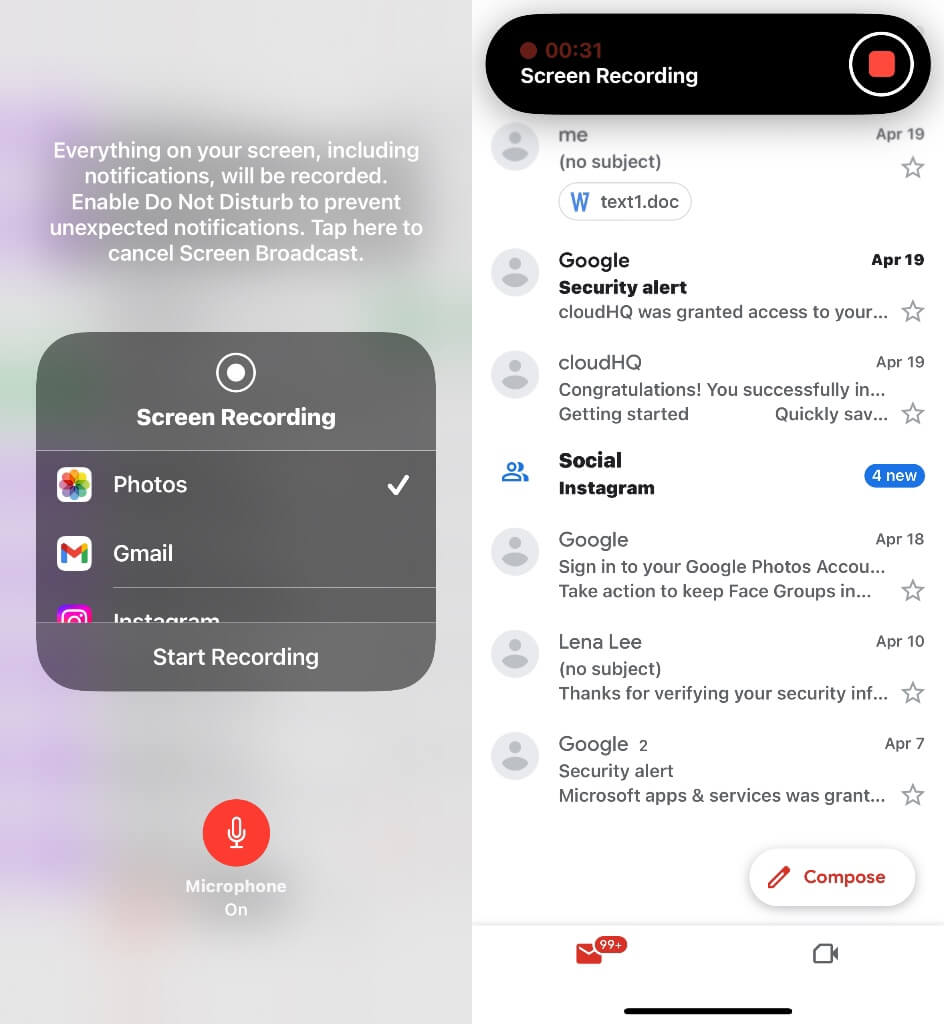
Since iOS 11, iPhones and iPads have a feature called Screen Recording. It can help users record the whole screen with or without microphone audio. The steps are as follows.
1. Swipe down from the screen's upper-right corner to open Control Center.
2. Long press the Screen Recording button > Turn on Microphone.
3. Tap Start Recording to begin.
4. To stop recording, tap the Stop button at the top or go to Control Center to tap Screen Recording button. Then, you can go to Photos app to check the recording.
Conclusion
That’s all about how to record screen with microphone. The built-in recorder is good for simple recordings. A third-party tool like AWZ Screen Recorder would be a better choice if you want to control the recording. It allows you to adjust every aspect of the recording!


