In this article, AWZware writes a quick guide on how to trim a video in Premiere Pro with precision and efficiency in this beginner's guide. Premiere offers advanced editing features, including precise tools for seamless transitions between edited segments, ensuring your video maintains its flow.
How to Cut Video in Premiere
Premiere is equipped with advanced features to edit a video as you want. Precise tools are offered to cut clips in Adobe’s Premiere Pro, ensuring accurate editing. It guarantees a seamless transition between edited segments, making it easier to maintain the video’s flow even if you make other edits to the trimmed clip. Widely compatible with Windows and macOS systems, you can trim video on Windows 10 and 11, and any Macbook with ease.
In addition to trimming a video in Premiere Pro, the capability to change the configuration of the edited video makes it stand out from other technologies. You can adjust the format, quality, output path, and encoding settings based on your needs.
Let’s show you how to cut videos in Premiere Pro:
Step 1: Create a new project
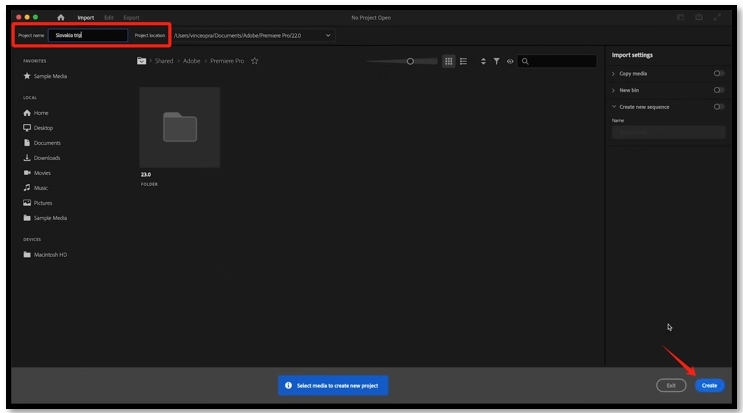
Run the video editing program on your computer. Click “New Project”, give the project a new name, and select the project location. Hit “Create” in the lower right corner.
Step 2: Import the video to the timeline
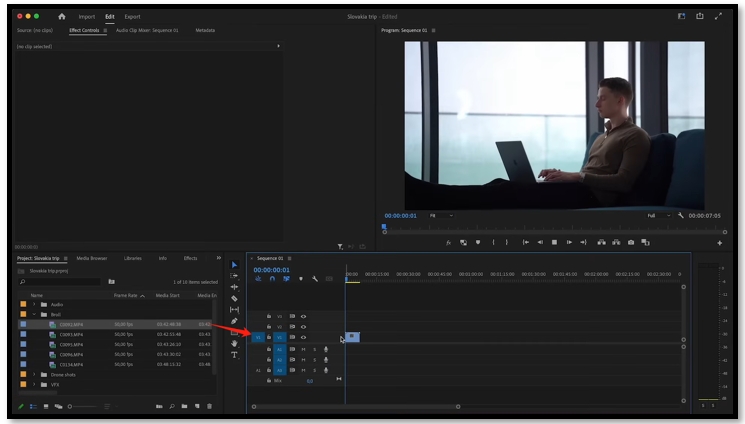
Go to the dialogue on the bottom left and right-click on it. Choose “New Bin” and change the default name of the folder. Drag and drop the video to the created folder. Select the video and drag and drop it onto the video track.
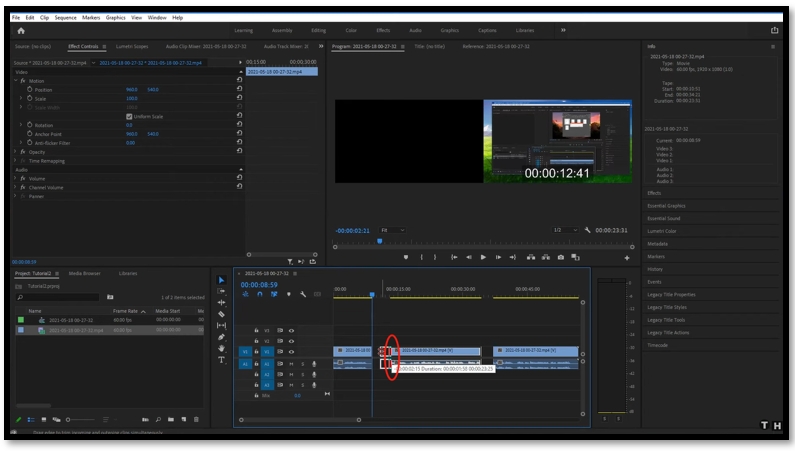
Step 3: Trim the clip in Premiere Pro
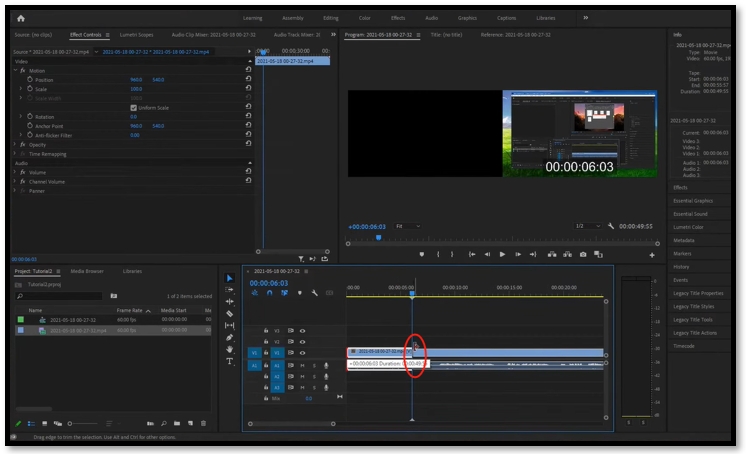
Hit the selection tool and move the time indicator to where you want to trim the video. Click and drag the start or end of the clip to cut the video in Premiere. Go to “File” > “Export” > “Media” > “Export” to save the video.
How to Cut out Parts of a Video in Premiere Pro
When it comes to cutting videos in Premiere, this video editor also has the capability to let you cut multiple clips for a single video. This feature allows you to split the video in Premiere Pro, remove the unwanted parts, and merge the rest clips as a new video. For example, after recording a streaming video for an online meeting, you can optimize the video more efficiently to eliminate unnecessary segments.
Find out how to cut out parts of a video in Premiere Pro:
Step 1: Add the video to the video track
Launch Premiere and tap “New Project”. Rename the file folder and hit “Create” in the bottom right. Drag and drop the clip to the window in the lower left. Then. Drag the clip to the timeline.
Step 2: Split the video in Premiere Pro
Tap “Razor Tool” from the toolbar on the left of the video track. Click on the desired place of the timeline to split the video into multiple parts. Move the playhead of the unwanted clip from the start to the end to remove it.
Step 3: Merge the rest clips and export the video
Drag one of the rest clips and let it connect with other ones to merge them. Tap “File” and choose “Export” from the list. Select “Media” and make adjustments to the video configurations. Press “Export” to save the changes.
Adobe’s Premiere Pro enables you to trim a video with ease. However, just like other Adobe products, this video editor is pricy, and its user interface is not user-friendly, making it difficult for beginners to navigate to the tool they need. If you only need to split a clip, why don’t you cut videos in a Premiere alternative for free?
How to Cut Video in Premiere Alternative
AWZ Screen Recorder is a proficient video-capturing solution packed with a free editing tool to cut clips without applying watermarks. The tool can cut the start and end of a video to remove unwanted clips without disrupting the original quality. You can take screenshots while editing to document the editing process for future edits and sharing. Another highlight is that AWZ Screen Recorder has a watermark remover to delete any logo you don’t like. You can upgrade to the pro and use it.
Major features:
- Free video editing tools;
- Record a video with a virtual background you like;
- Compatible with both Windows and Mac.
Follow the instructions on how to cut video in Premiere alternative:
Step 1: Open AWZ Screen Recorder and hit Quick Tools;
Step 2: Choose Video Editor. In the pop-up dialogue, drag and drop the video to the indicated area;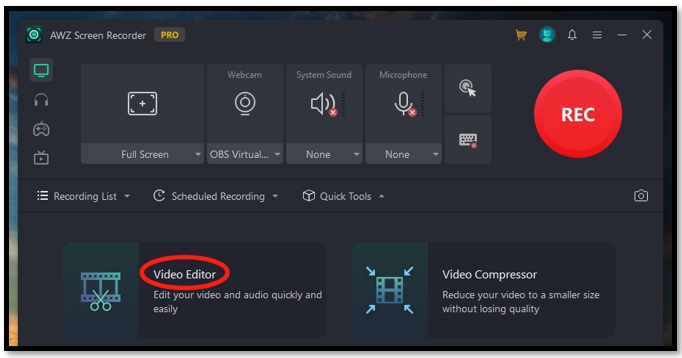
Step 3: Drag the pin and drop it to locate the specific timeline you want;
Step 4: Move the playhead at the start or end of the clip to where the pin is. Tap Export to trim the video in the Premiere Pro alternative.
Final Thoughts
Premier is one of the most popular video editors to polish a video. However, the complex user interface requires a learning curve for beginners to master its features. This article helps you know how to cut a video in Premier with easy steps. If you only need simple edits to remove unwanted clips from a video, the best Premier alternative, AWZ Screen Recorder, is recommended to get the work done in seconds with quality.