As a free screen recorder, OBS provides powerful tools, flexible sources, and support for advanced plugins. Learning how to use OBS to record browser tabs is useful for tutorials, demos, and more. This advantage is heightened when utilizing options like schedule recording in OBS.
Here’s why you may want to record browser tabs.
- Record tutorials, demos, or website walkthroughs clearly and professionally.
- Save streaming content for later viewing or reference.
- Record web-based meetings, lectures, or online courses.
- Stick to a single tab during recording to avoid distractions or privacy risks.
How to Record Browser with OBS
Knowing how to record a browser tab with OBS helps you create clear and professional web recordings for tutorials, demos, or streaming. OBS can record any browser efficiently and with professional quality by making a few simple adjustments. This section breaks down the updated steps so beginners can follow along easily and choose the capture method that best fits their needs.
Step 1. Install and Launch OBS Studio
Head to the OBS official site. After downloading, install the software and open it. If the wizard appears, follow its instructions to optimize OBS performance.
Step 2. Create a New Scene
Go to the Scenes panel, hit the + button, and assign a name to your scene. This keeps your browser-recording setup clean and organized.
Step 3. Add a Capture Source
You can capture your browser in OBS through three separate approaches. Choose the method that best fits your workflow and recording needs.
- Windows capture
- Browser source
- Display capture
Method 1. Window Capture (recommended for most users)
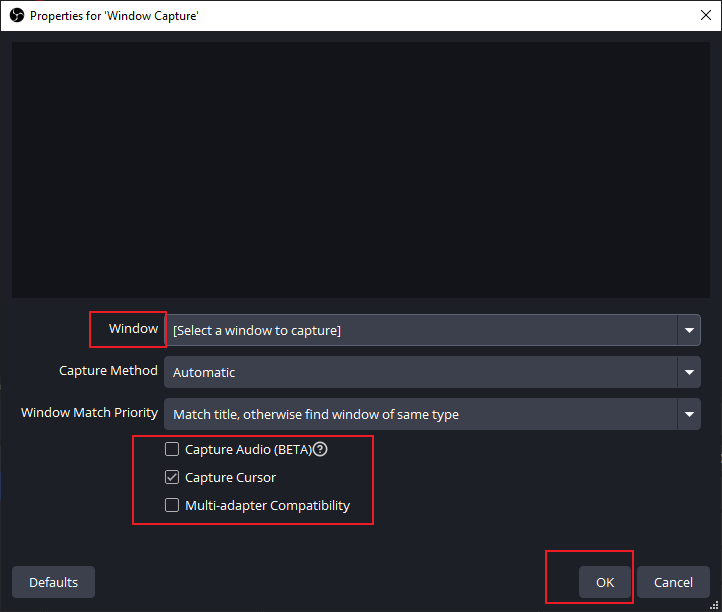
a. Navigate to Sources and hit the + button. Select Window Capture.
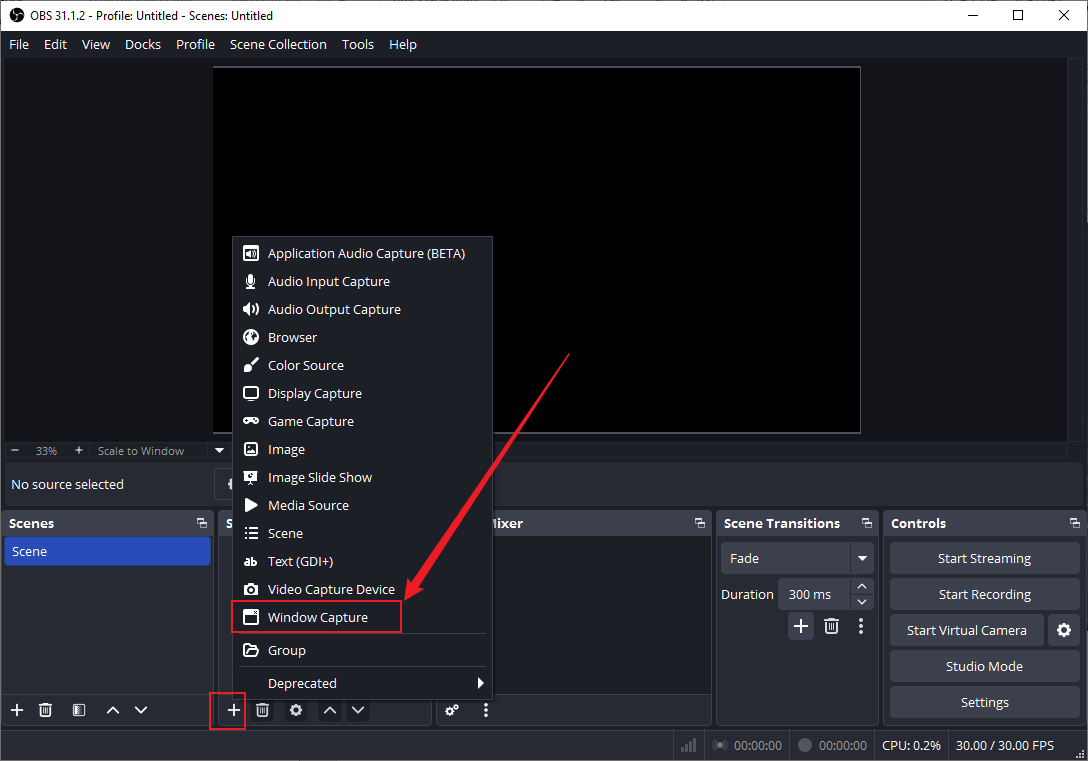
b. Pick your browser window from the available options in the dropdown.
c. Resize or crop the frame to show only the tab you want.
d. Enable or disable capturing the cursor as required.
Method 2. Browser Source (for automated or web-embedded recording)
a. In the Sources panel, select the + button. Select Browser Source.
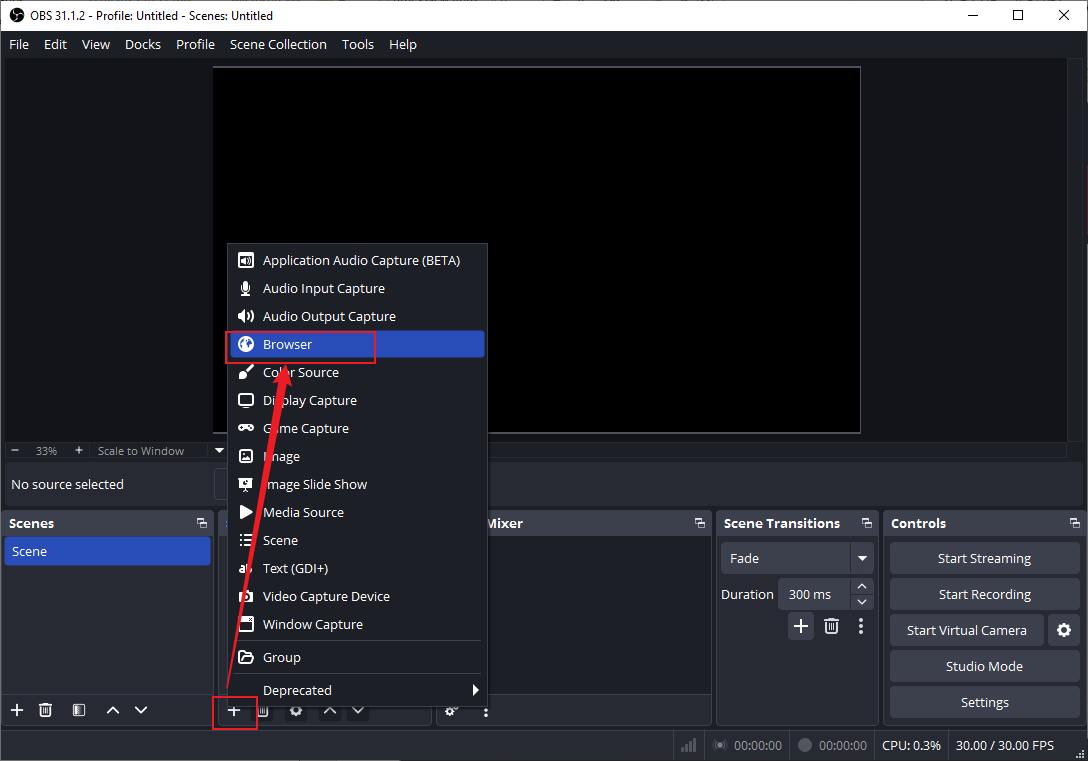
b. Add the webpage URL so OBS can load the page directly.
c. Modify the width, height, and FPS settings to improve playback.
d. Use this method for web widgets, dashboards, or auto-playing pages.

Method 3. Display Capture (capture the entire screen)
a. In Sources, select the + icon to add a new source. Select Display Capture.
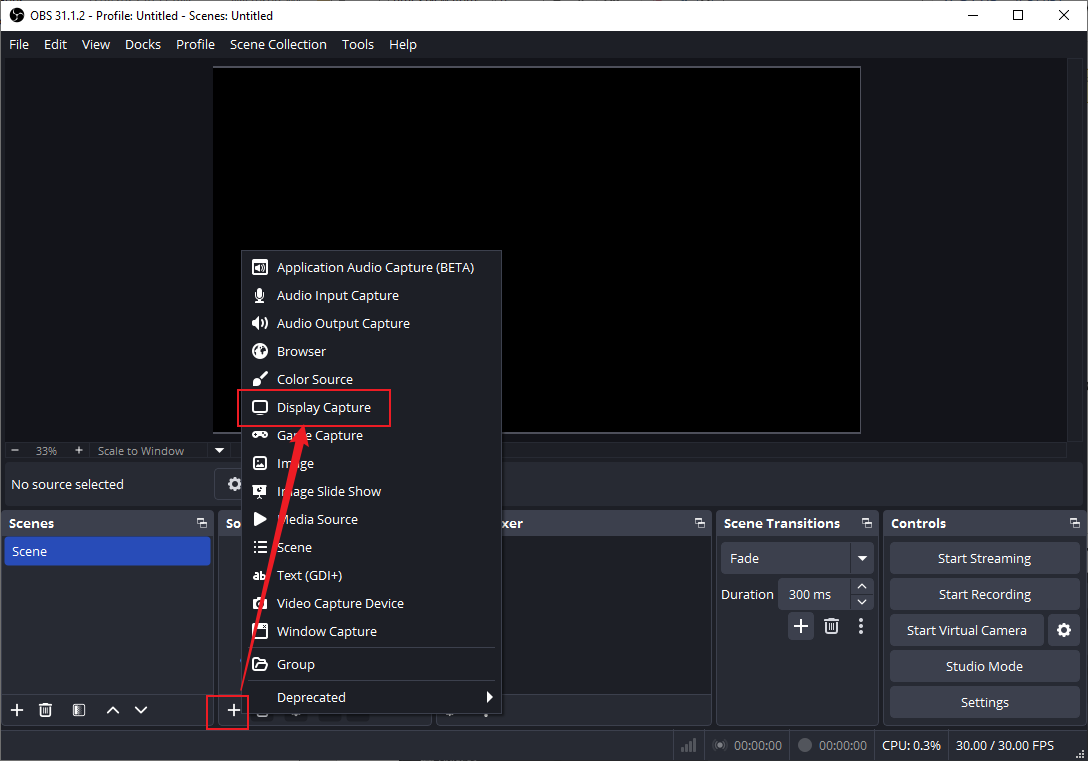
b. Pick your monitor and confirm the preview.
c. Use this only when other methods fail, since it records everything on screen.
Step 4. Configure Audio
Turn on Desktop Audio to capture browser audio while using Mic/Aux for your voice. Adjust input levels to avoid distortion or overly quiet audio.
Step 5. Choose the Best Recording Settings
Go to Settings. Click Output and select Recording.
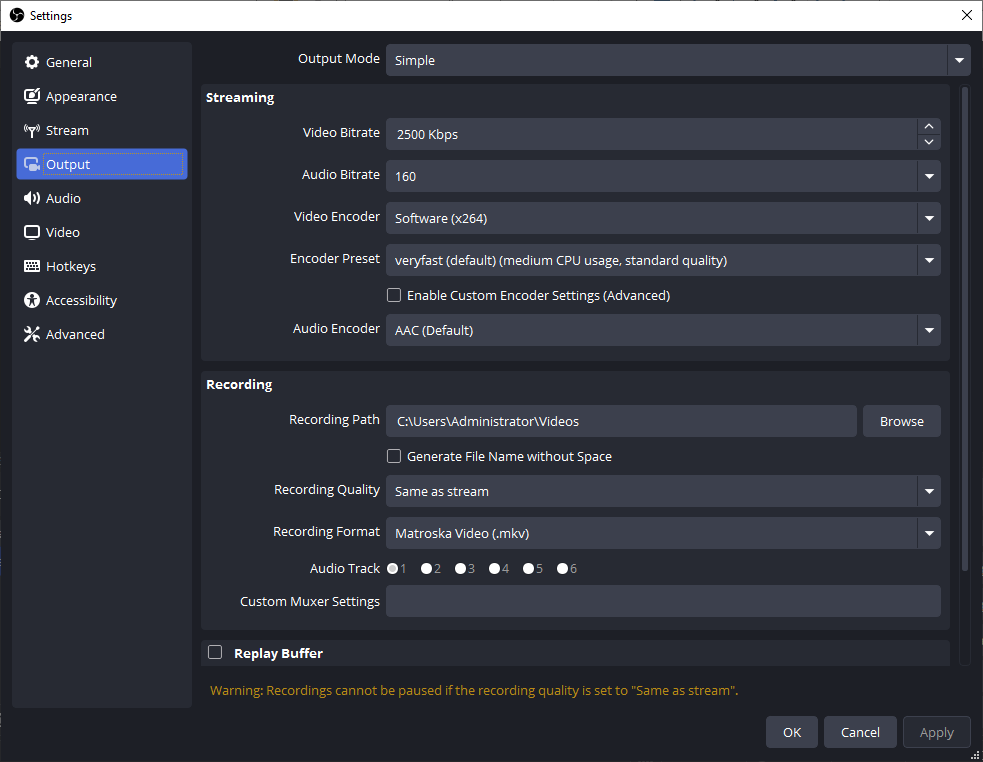
Select MP4 or MKV and choose a high-quality bitrate. Next, set a convenient save path.
Adjust the FPS to 30 or 60 under Settings > Video as needed.
Step 6. Start Recording
a. Press Start Recording and immediately go to your browser to begin.
b. When finished, return to OBS and click Stop Recording.
c. The file will be stored immediately in your chosen folder.
Alternative Way to Record Browser Tabs Effectively
Choosing an OBS alternative can simplify capturing a single browser tab without complex setups or heavy system use. When you need quick, stable, and clear recordings, an efficient tool makes all the difference. Having said that, AWZ Screen Recorder offers a streamlined way to record browser activity with ease today effortlessly.
AWZ Screen Recorder empowers users to record videos from websites with crisp quality and smooth performance. Being a free screen recorder with no watermark, it provides professional-quality results without any limitations. You can easily record browser tabs, capture specific actions, and save content for tutorials, reviews, or study. Its intuitive interface, flexible formats, and lightweight design make AWZ Screen Recorder a dependable choice for recording tasks.
Learn the steps to record a browser tab using AWZ Screen Recorder with ease.
Step 1. Download, install, and launch AWZ Screen Recorder on your Windows machine.
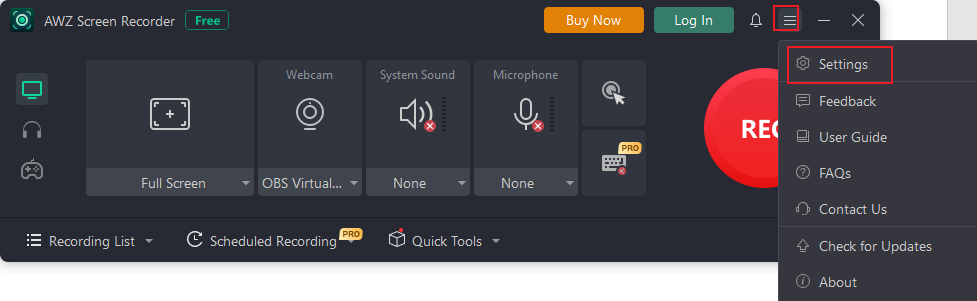
Step 2. Adjust the necessary system settings for customized recording. Recorded videos are usually saved in MP4 format. If necessary, click the hamburger icon and access Settings to adjust the output format.
Step 3. Open the website you wish to record. Modify the capture area and select the desired audio input.

Step 4. Click the red REC button to initiate recording.
Step 5. When the recording is done, press Stop. You can go to the Recording List section to find the recorded video.
Play back your recording now, however you wish. Alternatively, edit and compress the video as required.
Bottom Line
With its flexibility and professional tools, the OBS screen recorder remains a powerful option for capturing web content of any kind. Once you know the three key capture methods, learning how to record a browser tab with OBS is simpler. That said, OBS can feel complicated, demanding on your computer, and overwhelming for beginners. For a simpler, lighter, and beginner-friendly option, AWZ Screen Recorder provides an easy way to record browser tabs with intuitive controls.