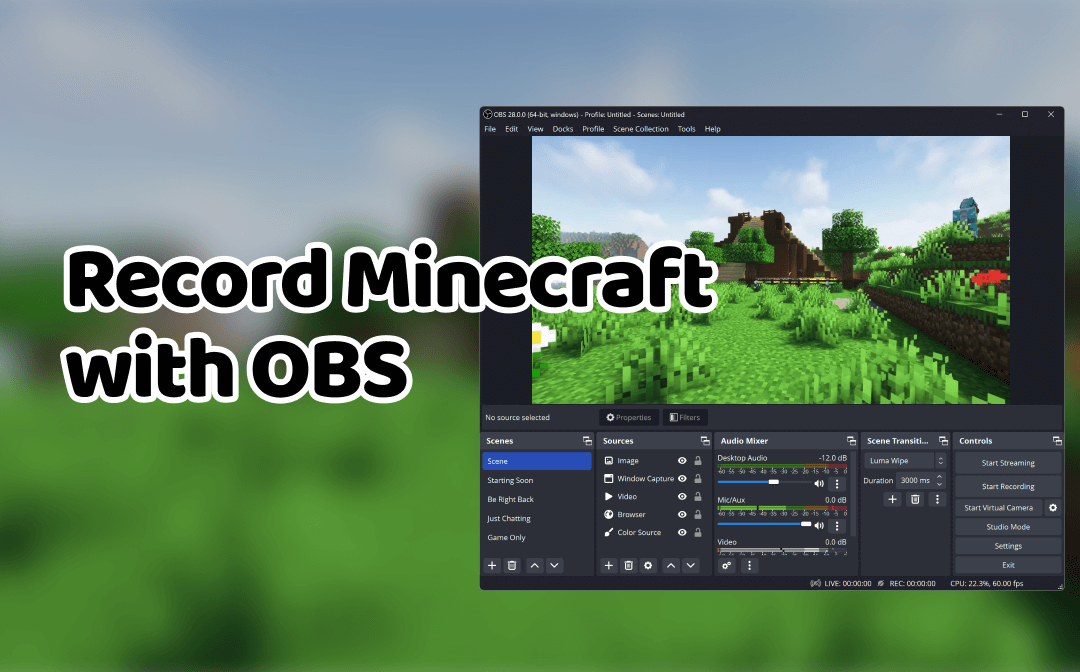
Minecraft isn't just popular—it's a global phenomenon. Due to its open-ended sandbox gameplay, it is popular with various age groups, from young children to adults. As you can imagine, recording and sharing your creative walkthroughs will get much attention.
Is OBS Studio a good choice for Minecraft recording?
If you want to record gameplay for YouTube or any other social media, you have to focus on video quality. After all, everyone just wants to watch a clear video without delays. Luckily, OBS Studio, an open-source software, can do the job for you.
OBS Studio supports high-quality output formats with flexible settings. With the right settings, you can get high-quality videos. However, OBS is a bit complicated and requires a learning curve. If you want to start recording immediately, we recommend AWZ Screen Recorder, a professional and easy-to-use game recording tool.
Anyhow, before you make a decision, you can check to learn how to capture Minecraft using OBS.
Part 1. Steps to Record Minecraft with OBS Studio
Here is how to record Minecraft with OBS:
1. Download and Install OBS Studio
- Visit the official OBS Studio website to download the software. Follow the on-screen instructions to complete the installation.
2. Launch OBS Studio and Create a New Scene
- In the Scenes panel, click the + button to add a new scene and give it a name (e.g., "Minecraft Recording").
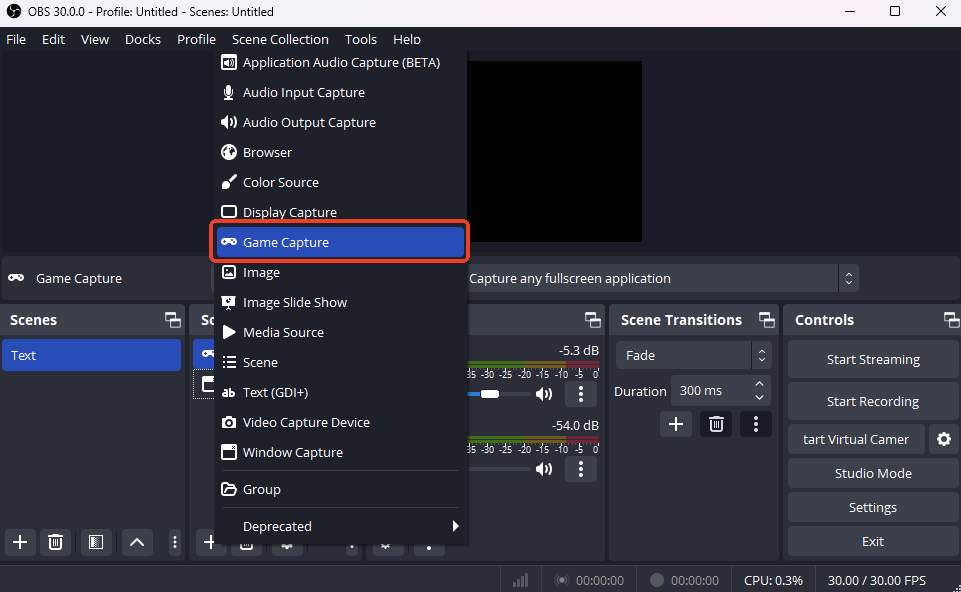
3. Adjust the Recording Source
- In the Sources panel, click the + button and select Game Capture. Then, name the source (e.g., "Minecraft Capture") and click OK.
- In the properties window, adjust the Capture Mode. You can make it capture any fullscreen app or specific window > select Minecraft as the software (please make sure the game is open in the background).
- Click OK to confirm.
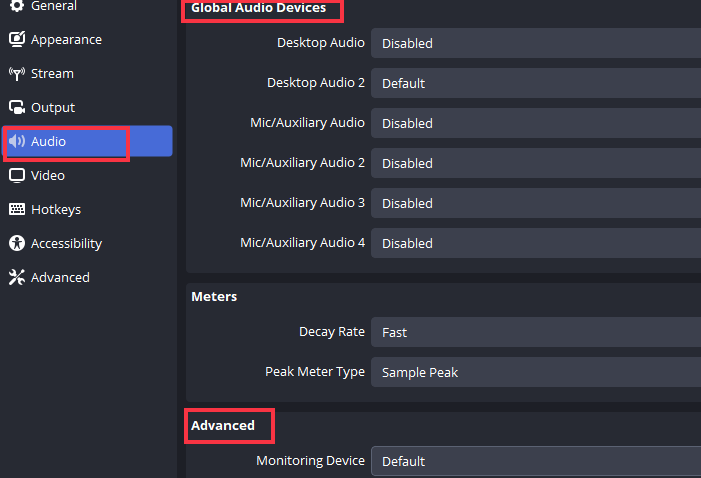
4. Configure Audio Settings
- Go to Settings and choose Audio.
- Under Global Audio Devices, choose Desktop Audio as your system's audio output (e.g., speakers or headphones) and select Mic/Auxiliary Audio as your microphone.
- Click Apply and then OK.
5. Adjust Other Settings
- Navigate to Settings > Video.
- If needed, you can adjust output, format, Encoder, and more. For specific settings, refer to Part 2.
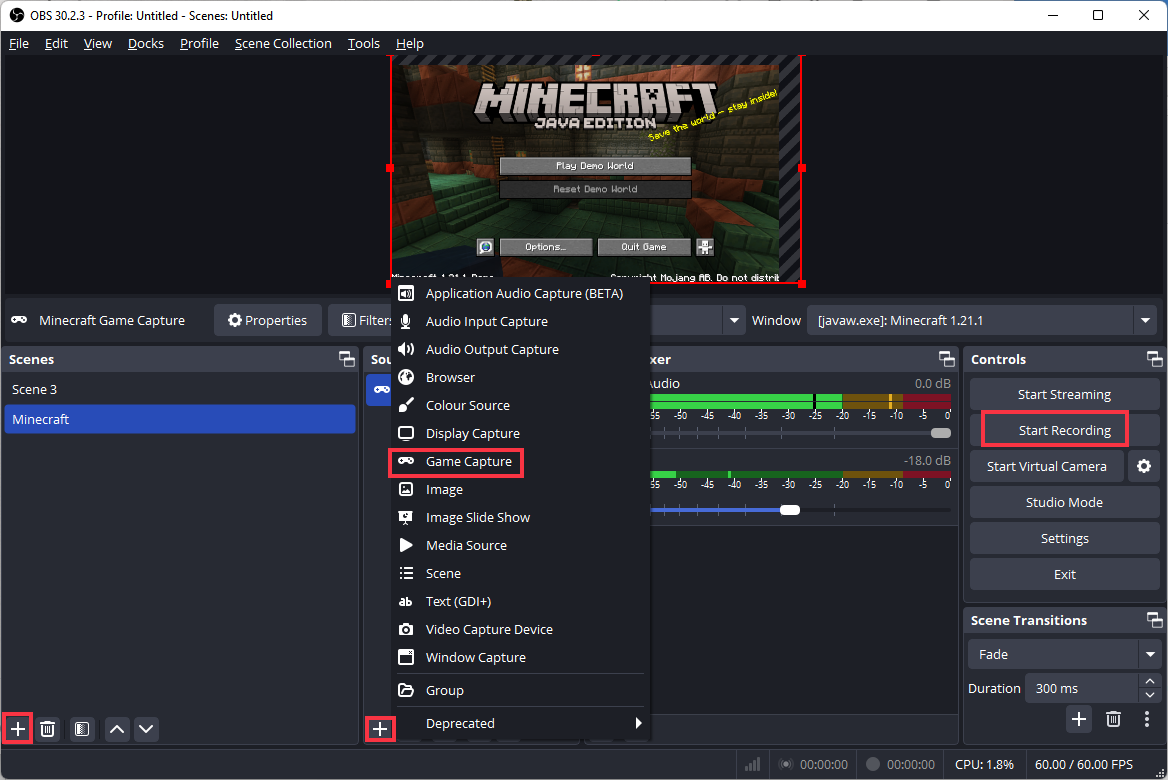
6. Start Recording
- Run Minecraft.
- In OBS Studio, click Start Recording under Controls when ready.
- To stop recording, click Stop Recording.
Part 2. Best OBS and Minecraft Settings to Avoid Lag
From the above, you already know how to record Minecraft with OBS. However, if you want high-quality videos, you'll need to spend some time tweaking the settings. Check to learn the best OBS settings for recording Minecraft.
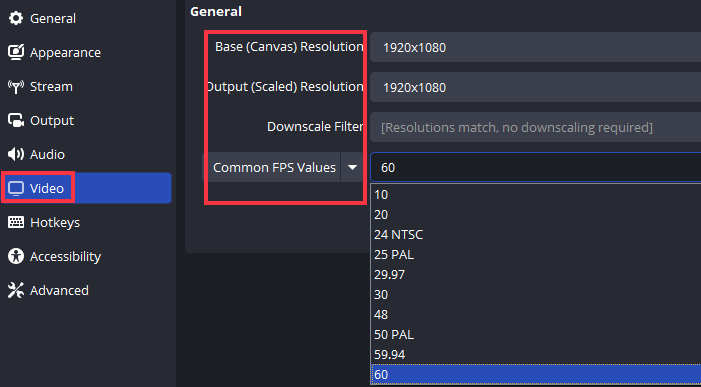
#Video Settings
- Base (Canvas) Resolution: Set to your monitor's native resolution, typically 1920x1080.
- Output (Scaled) Resolution: Match the base resolution for full-quality recordings.
- Common FPS Values: 60 FPS for smooth gameplay capture.
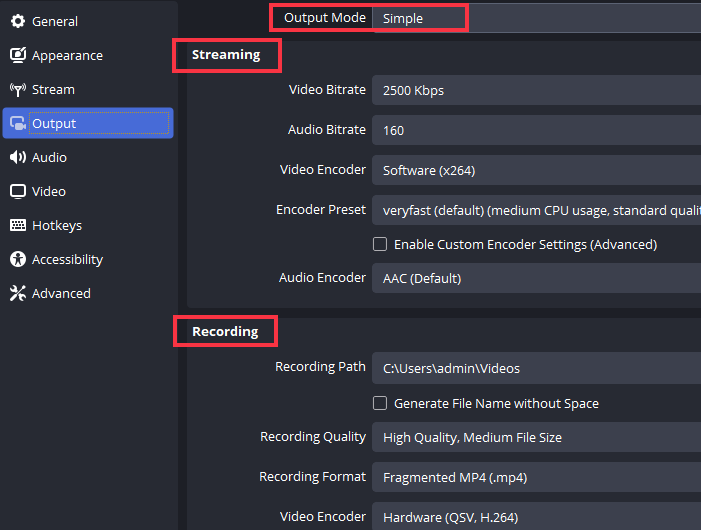
#Output Settings
- Output Mode: Switch to Advanced for more control.
- Recording Format: Use MKV to prevent data loss in case of crashes.
- Audio Tracks: Enable multiple tracks if you wish to separate game and microphone audio.
#Encoder Settings
Encoder:
- High-End PCs: Use Hardware (NVENC) or AMD encoder for better performance.
- Low-End PCs: Stick with the Software (x264) encoder.
Rate Control: Set to CBR (Constant Bitrate).
Bitrate:
- High-End PCs: Set between 25,000–50,000 Kbps for 1080p at 60 FPS.
- Low-End PCs: Set between 10,000–15,000 Kbps to balance quality and performance.
Keyframe Interval: Set to 2.
Preset:
- High-End PCs: Use Quality or Max Quality.
- Low-End PCs: Use Performance or Max Performance.
Profile: Set to High.
#Audio Settings
- Sample Rate: Set to 44.1 kHz.
- Channels: Choose Stereo.
- Desktop Audio: Select your primary audio output device.
- Mic/Auxiliary Audio: Select your microphone.
Don’t forget to adjust Minecraft's video settings to improve recording performance:
Graphics:
- High-End PCs: Set to Fancy or Fabulous.
- Low-End PCs: Set to Fast.
Render Distance:
- High-End PCs: 12–16 chunks.
- Low-End PCs: 6–8 chunks.
Simulation Distance: Match render distance or lower for performance.
Smooth Lighting:
- High-End PCs: Set to Maximum.
- Low-End PCs: Set to Off or Minimum.
Max Framerate: Cap at 60 FPS to match recording settings.
VSync: Enable to prevent screen tearing.
See also:

How to Record Gameplay on PC without Lagging | 4 Free Ways
Want to record gameplay on PC but don’t know how? This blog shows you simple methods for recording gameplay highlights without lagging.
READ MORE >Part 3. Easier Way to Record Minecraft Without Lag
As we mentioned before, while OBS is a great tool for recording games, it has a complicated workflow. Adjusting it takes a lot of time to get a high-quality video. For beginners and non-technical people, professional software like AWZ Screen Recorder may save time!
AWZ Screen Recorder is one of the popular OBS alternatives. It has a more intuitive interface and simpler workflow than OBS. With just a few clicks, you can set the recording source, audio settings, framerate, quality, etc., and start the recording.
Don't worry about quality—AWZ Screen Recorder can capture 4K videos with no lag! Click the download button to get the tool and try it!
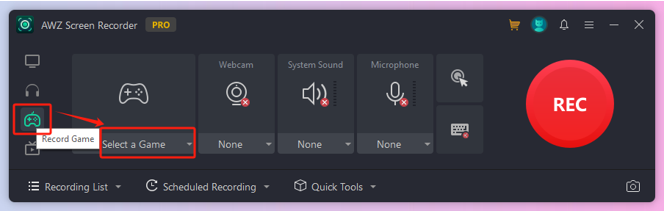
1. In the home interface, select Record Game. Then, click Select a Game to select Minecraft.
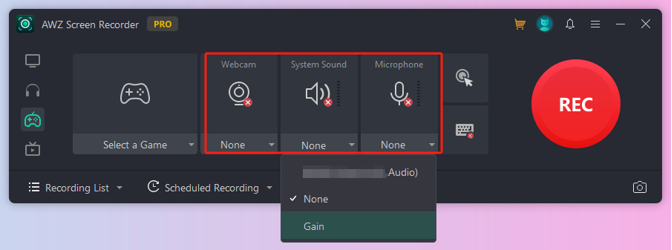
2. Adjust the webcam and audio device to set the right device.
3. If needed, click the hamburger icon and select Settings to adjust the frame rate, output format, and more.
4. Finally, click the REC button to start.
Conclusion
That’s how to record Minecraft with OBS Studio. To ensure that the recording does not delay, you will need to adjust the settings.
If that's too much trouble, you can try AWZ Screen Recorder. You can get high-quality video without complicated steps. In addition to game recording, the recorder can help you capture any on-screen activity. If you want to be a master of recording, then look no further than AWZ Screen Recorder!