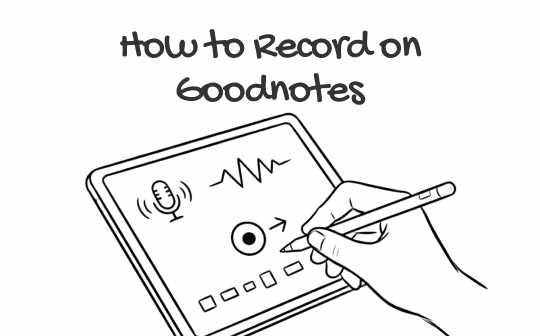
Native Way to Record Audio on Goodnotes
Some of you have found that Goodnotes, especially from Goodnotes 6, now includes a recording feature that enables you to capture audio notes directly within your documents. With this feature, you can record lectures, meetings, and other brainstorming sessions while writing notes and then replay them later. How can you record audio in Goodnotes?
Before getting to learn the exact steps, you need to make full preparations. Ensure that you are using Goodnotes 6 or later versions first. Then, you need to make sure that your device has a built-in mic or an external microphone. Next, give Goodnotes permissions to access the microphone and storage space. Now, let’s get started to learn the exact steps to record audio on Goodnotes.
Step 1. Open the Goodnotes on your device and open the notebook where you want to record.
Step 2. On the top toolbar, find and click the Microphone icon. Then, the audio recording will be initiated.
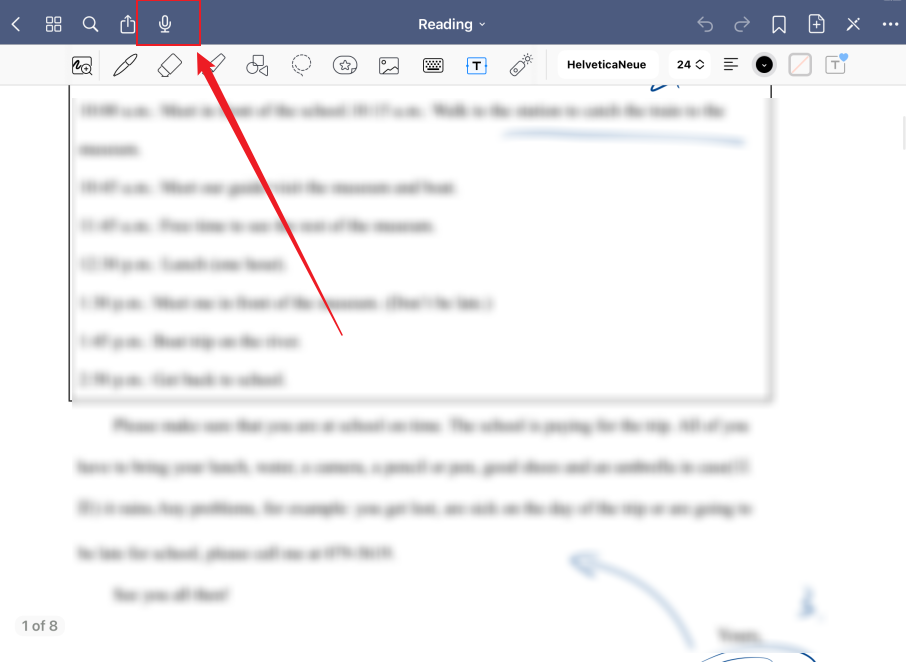
Step 3. You can write, draw, or type notes as usual. Goodnotes can synchronize your writing timeline with the audio recording so that you can know exactly when you write each stroke relative to the recording. Once you want to finish the recording, click the Microphone icon again. Then, the recorded audio will be directly saved in the notebook.
Can You Record Lectures on Goodnotes?
Can you record on Goodnotes? Of course, you can! With the built-in feature of Goodnotes, you can easily capture audio while writing notes. However, there is no built-in screen recording feature in Goodnotes. Sometimes, you may need to screen record certain notebooks in Goodnotes and share them with others. If you are a teacher, you may need to use Goodnotes and a screen recorder to make an instructional video. In that case, you need to use a third-party screen recorder. Please read on!
How to Record on Goodnotes?
If you want to screen record on Goodnotes and make some instructional, educational, or training videos, a reliable and useful screen recorder is essential. In the following content, I’ll show you a comprehensive guide on how to screen record on Goodnotes on both PCs and phones. Now, let’s have a look.
#Screen Record Goodnotes on PCs
Here, I strongly recommend AWZ Screen Recorder, which is available on both Windows and Mac. It is an excellent screen recorder that supports recording the screen and webcam with the audio from the microphone and system according to your needs. You can use it to screen record on Goodnotes with your voiceover from the microphone. Working as a 4K screen recorder, it can record and make high-quality videos.
What’s more, AWZ Screen Recorder is one of the best game recorders, which can record 2D/3D games. You can use it to record Sims 4 gameplay, LOL, PUBG, and other games. Here, let’s learn how to screen record Goodnotes using AWZ Screen Recorder.
Step 1. Download and install AWZ Screen Recorder.
Click the corresponding button below to download and install AWZ Screen Recorder on your Windows or Mac PC. Then launch it.
For Windows:
For Mac:
Step 2. Set up AWZ Screen Recorder for Goodnotes.
By default, AWZ Screen Recorder records the whole screen. If you need to customize the recording region, open the Full Screen list, click the Select Region option, and drag the cursor to choose the recording area.

Then, open the System Sound and Microphone list to choose the audio source you need to record.
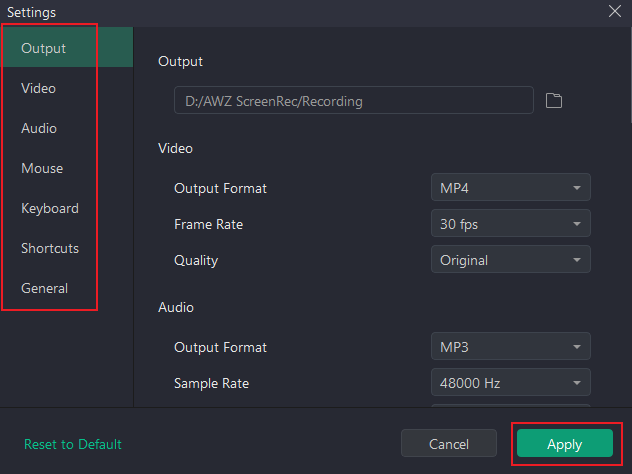
Additionally, you can click the three-line icon in the top right and click the Settings option to adjust other recording settings. For instance, select the output video format, quality, and frame rate. Meanwhile, you can set it to record with or without a mouse. Later, click the Apply button to save the changes.
Step 3. Start Screen Recording on Goodnotes.
Open the notebook in your Goodnotes and press the default F3 hotkey to start recording. When you want to end the recording, press F3 again. Moreover, in the recording process, you can press F4 to pause and resume recording.
#Screen Record Goodnotes on Phones
Both Android and iPhone offer built-in screen recording features to capture activities happening on the screen. Let’s learn how to screen record on iPhone and Android with their built-in features.
For iPhone:
Step 1. Open the notebook in the Goodnotes app that you want to record first.
Step 2. Swipe from the top right corner to access the Control Center and tap the Screen Recording option. Then the recording will start after a 3-second countdown.
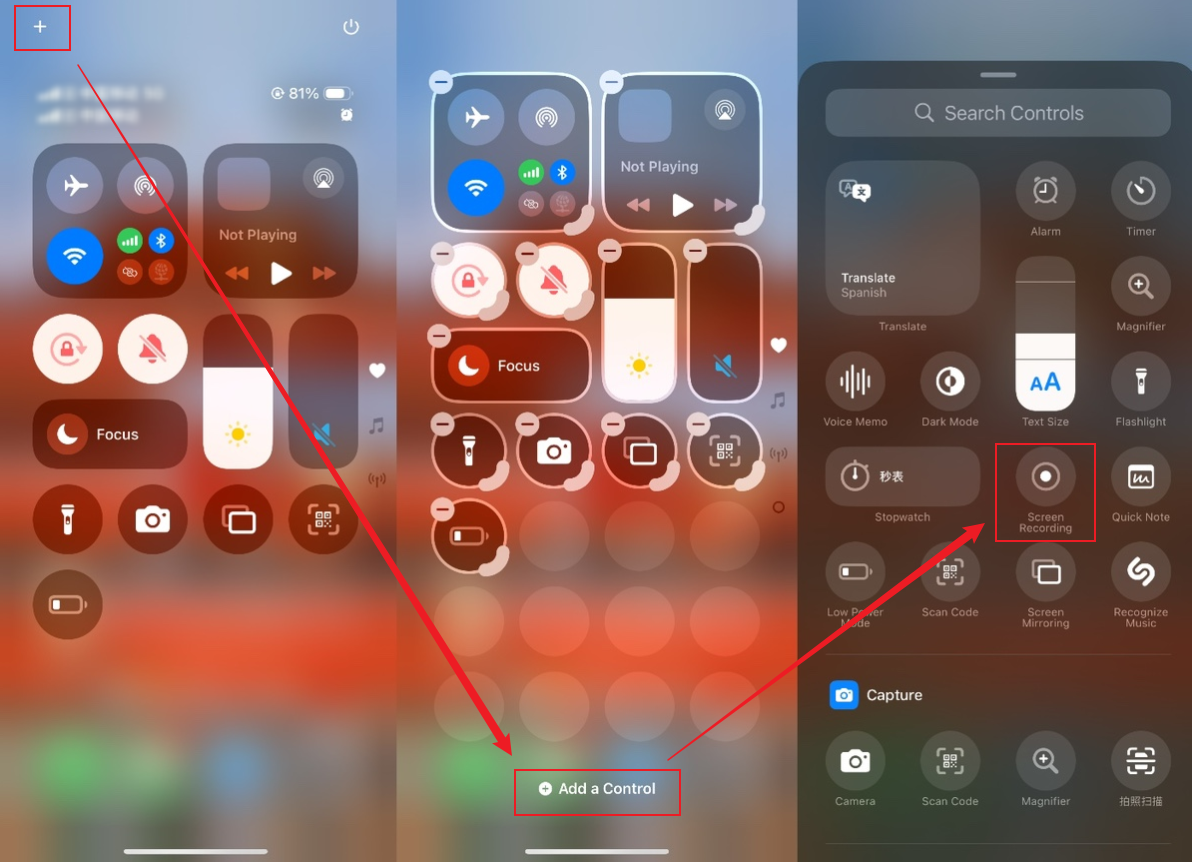
Step 3. Once you want to end the recording, tap on the top status bar and select the Stop icon. Then the recording will be automatically saved in the Photos app.
For Android:
Given the wide variety of Android phone brands, I will only outline the general process here.
Step 1. Swipe down from the top of your screen to open the notification panel.
Step 2. Tap on the Screen Record option to start recording.
Step 3. Finally, tap the Stop button to end the recording.
Final Words
With the built-in audio recording feature, you can easily record audio for notebooks in Goodnotes. What can you do if you want to screen record lectures or notebooks in Goodnotes? You need to use other third-party screen recorders. AWZ Screen Recorder is a worthwhile choice for PC users. For phone users, consider the built-in recording features of the iPhone and Android. Finally, I hope this post can be helpful to you.