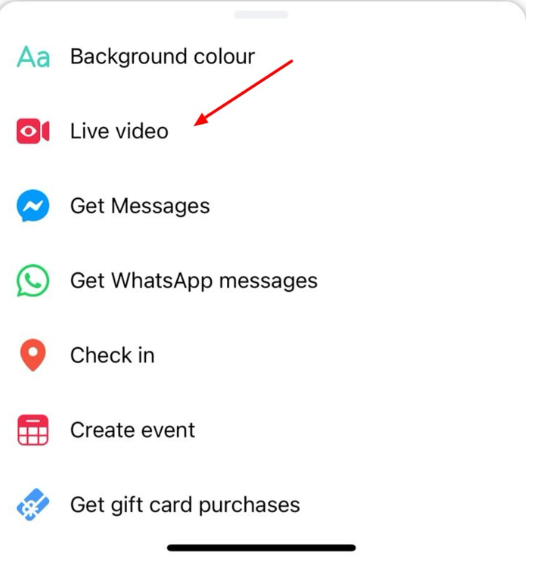
Can You Record Facebook Live
Yes. You can record Facebook Live, though the method differs depending on whether you are the host or just a viewer. When you start a Facebook Live, the platform automatically saves the video after it ends, enabling the host to download it for later use. This built-in feature makes it simple for content creators to preserve their live streams without the need for any additional software or tools.
For users wishing to save a Facebook Live they didn’t host, Facebook unfortunately does not include a direct download option. In such situations, relying on trustworthy screen recording software or apps is the most effective solution. Screen recorders capture live video in real time, ensuring you don’t miss any part of the broadcast and can watch or share it later.
How to Record Facebook Live for Free with AWZ Screen Recorder
AWZ Screen Recorder is a straightforward and powerful tool that makes it simple to record Facebook videos. As a professional streaming video recorder, it captures high-quality video and audio, making it perfect for webinars, tutorials, or live events. It also enables you to capture Discord stream sessions and other live content, giving a versatile way to save any valuable or fun broadcasts on your devices. Best of all, it’s completely free and watermark-free, making professional-quality recording accessible to everyone.
Let us see how to record Facebook Live for free with AWZ Screen Recorder in just a handful of clicks.
Step 1. Obtain AWZ Screen Recorder and follow the prompts to install it on your computer. Once the program is open, set your recording preferences for recording Facebook Live.
Record Facebook Live with AWZ Screen Recorder for Mac
Step 2. In the left sidebar, go to the Record Screen tab and press the + icon (Select Region) to choose your recording area. Choose Full Screen, Select Region, or Fixed Size.
Then choose the target audio sources to record. You can record both the system and the microphone audio.
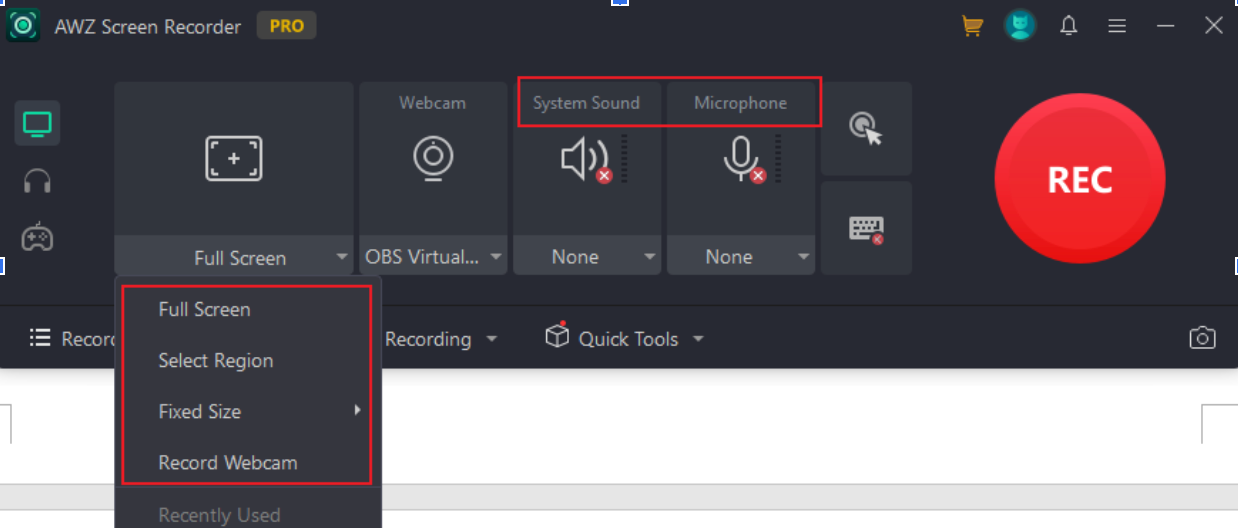
Note. If you want to record Facebook Live with both on-screen content and webcam, you can open the Webcam to select your external camera.
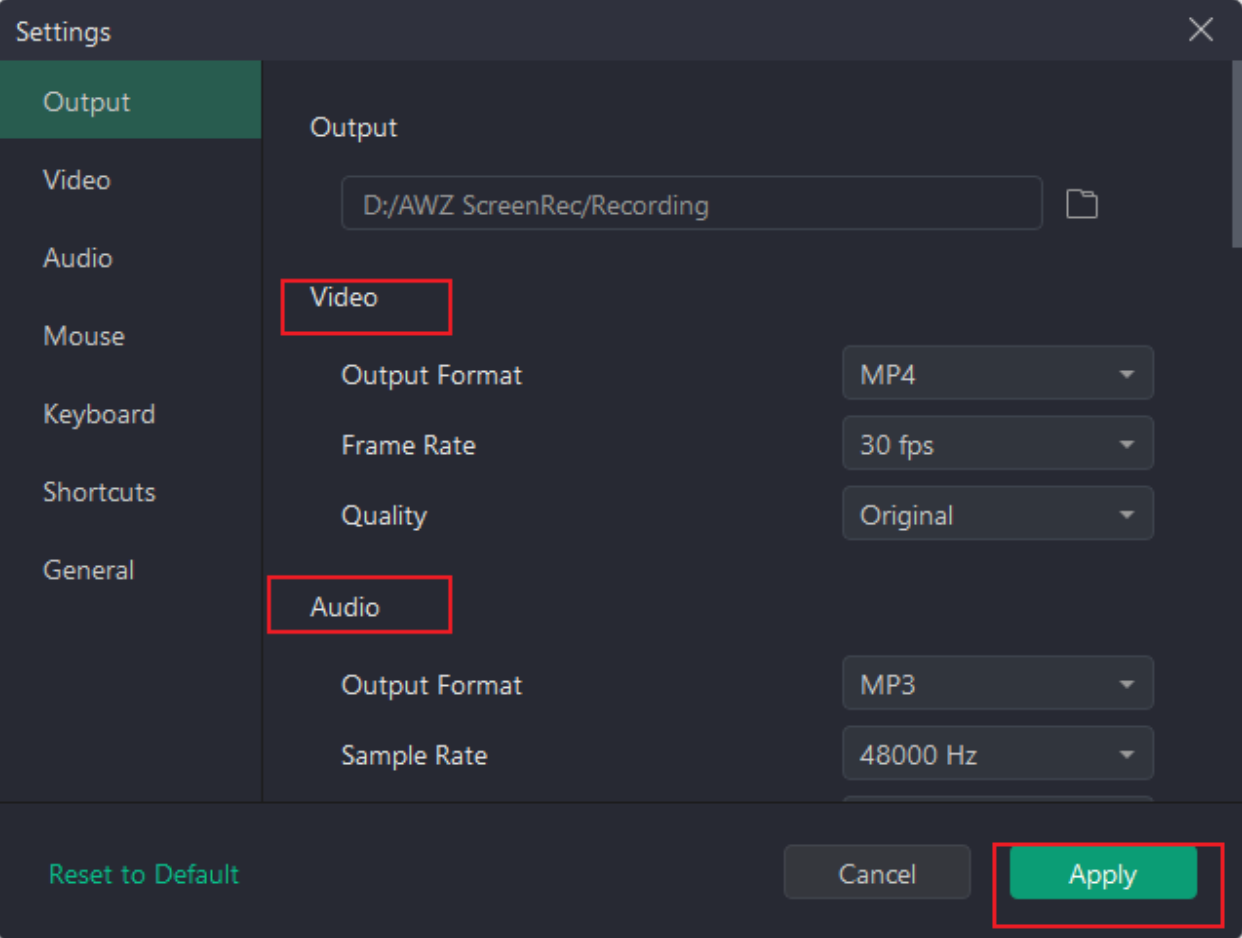
Optionally. You can hit the three-line icon in the top-right corner of the AWZ Screen Recorder panel, then select Settings to adjust other recording options.
In the Settings window, you can pick a new save path, select the Video and Audio settings, customize the recording hotkeys, and more. Once made any changes, click Apply.
Step 3. After you have finished setting up the recording settings, press F3 to start the Facebook Live session and begin recording.
Alternatively, go back to AWZ Screen Recorder and click REC.
Step 4. When the Facebook Live stream is over, press F3 again to complete the recording.
Later, the recording will appear under the Recording List. You can click the Play icon to review it or hit the Scissors icon to edit it.
Meanwhile, click the three-dot icon to make more choices, such as Compress, Denoiser, and Share (to YouTube, Vimeo, etc.).
How to Record Facebook Live Using Xbox Game Bar
Xbox Game Bar is another convenient tool for Windows users to record Facebook Live videos effortlessly. As a free screen recorder without watermarks, it captures high-quality footage at no extra cost. You can also record online videos with audio, including system sounds and microphone input, making it perfect for live streams, tutorials, or gaming sessions.
Let us learn how to record a Facebook Live stream using the Xbox Game Bar.
Step 1. Open the Xbox Game Bar app on Windows PC. Once opened, press Windows logo key + G (Win+G) to launch the Game Bar overlay.
Now, a new window will pop up if you are accessing the game bar for the first time.
It will prompt you to open the game bar; click "Yes, this is a game," even though you need to record Facebook Live.
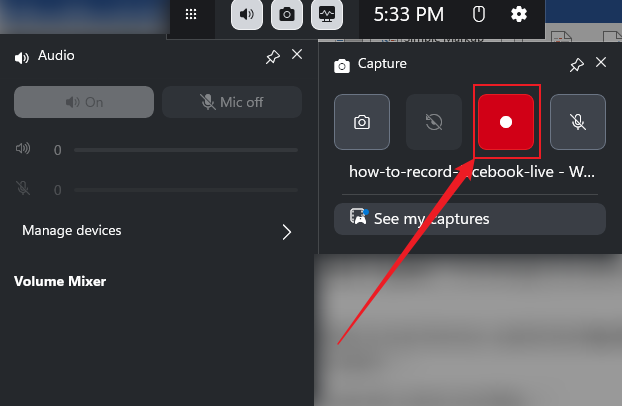
Step 2. To start recording, open the Facebook Live video in your browser. And hit the Start Recording (round red) button visible on the game bar in the Capture window.
Alternatively, press the Windows Key + Alt + R to start the screen recording.
Note. Ensure that the microphone and system audio are enabled in the Capture settings if you want both to be recorded.
A small recording timer will appear on your screen, indicating that the recording is active.
Step 3. Press Win + G to open the Game Bar again and stop the recording. Then, select the Stop button (square icon) on the recording timer overlay to stop recording.
Or press Windows Key + Alt + R again to stop the recording.
Step 4. Once the recording stops, a notification will appear saying "Game clip recorded".
Click the notification or go to the "Capture" widget and click "See my captures" to view your video.
Files are saved by default in Videos > Captures as MP4 files.
How to Record Facebook Live with QuickTime Player
QuickTime Player is a reliable, easy-to-use tool for Mac users who want to screen record on Mac with audio for free. It lets you capture Facebook Live videos with both system sound and microphone input, making it ideal for tutorials, webinars, and live events. With its intuitive interface, QuickTime Player makes it easy to record, save, and share your favorite streams.
Let us learn how to record Facebook Live with QuickTime Player.
Step 1. Launch QuickTime Player by opening it from the Applications folder on your Mac. And navigate to File in the menu bar and select New Screen Recording.
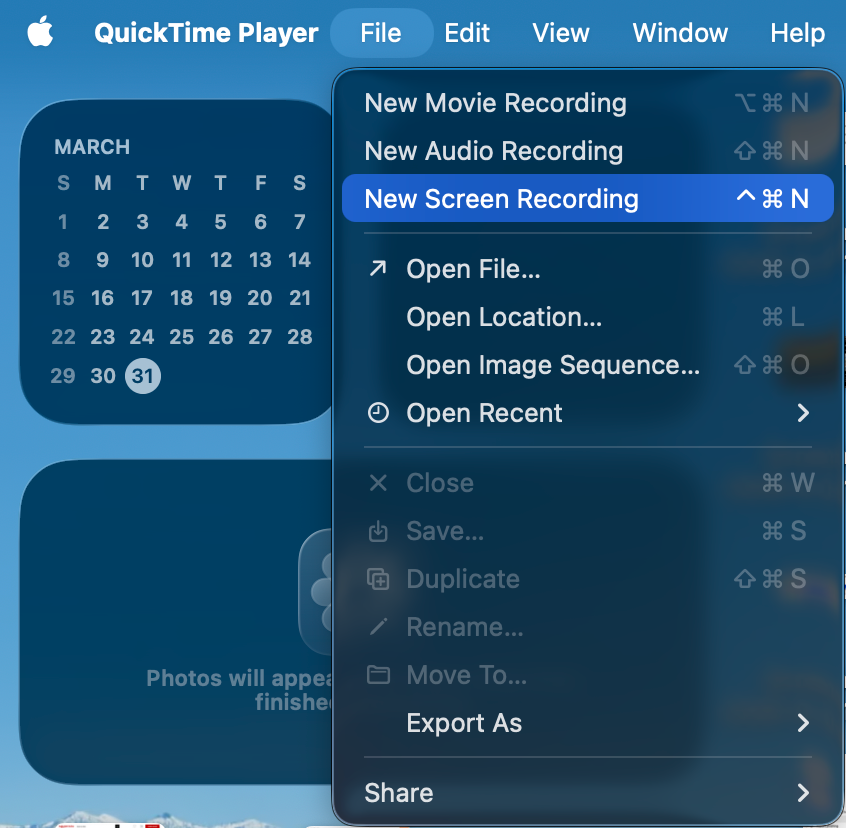
Alternatively, press Control + Command + N keys. A recording menu or the Screenshot toolbar will appear.
Note. On newer macOS, press Shift-Command-5.
Step 2. Click Options to configure settings.
- Microphone. Select your audio driver to record the live stream's sound.
- Save to. Choose where to save your recording.
Note. By default, QuickTime can’t record your Mac’s audio. In such a case, you’ll need to download and install BlackHole, a free virtual audio driver that routes your Mac’s system sound to QuickTime or other apps.
Once installed, go to Finder > Applications > Utilities and open Audio MIDI Setup on your Mac. After that, make a new Multi-Output Device including your headphones/speakers and BlackHole to monitor audio while capturing video.
Step 3. Now, open the Facebook Live video in your web browser.
In QuickTime, click Record Entire Screen or Record Selected Portion (and drag over the video player). Then, click the Record button to start capturing.
Play the Facebook Live video in full-screen mode if desired.
Step 4. Once the stream ends, click the Stop button in the menu bar. Or press Command + Control + Escape keys.
A window will appear showing the recording. Go to File > Save, name your video, and save it as MOV.
Record Facebook Live on iPhone or Android
Recording Facebook Live on mobile devices is simple thanks to built-in tools that let you screen record on iPhone or Android without installing extra apps. These native features allow you to capture live video and audio directly from your screen, making it easy to save, rewatch, or share important moments at any time.
#Record Facebook Live on iPhone
- Open the Facebook Live stream you want to record.
- Open the Control Center and look for the Screen Recorder icon (a gray circle-in-a-circle) on your iPhone.

As soon as you tap it, after a quick 3-second countdown, your phone starts recording whatever’s on screen—including the Facebook Live stream.
- To stop recording, open Control Center again, tap the red Screen Recording icon, and hit Stop.
The video will automatically save.
- Now, head over to your Photos app. And you’ll find the recording in your Library, just like any other video.
#Record Facebook Live on Android
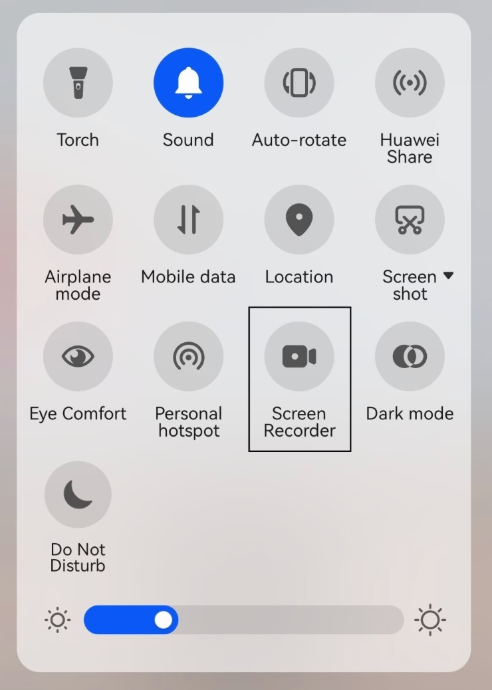
- Pull down from the top edge of your Android screen to open notifications and Quick Settings. Then, find the Screen Recorder icon, which may appear as a camera or a circle with a dot inside.
- After spotting it, click Start and wait for a few seconds until the countdown begins.
- Open the Facebook app (or browser) and let the live stream play — it’ll all be captured.
- To finish recording, tap the Stop button or swipe down and press Stop in the notification panel.
Your video gets saved automatically, usually in the Gallery or Photos app. You can rename it or edit it from there.
Note. To get the sharpest video, pick 1080p at 60 fps and raise the bitrate to the maximum your phone can handle. Be sure to turn on Do Not Disturb beforehand for a seamless recording experience.
How to Save Facebook Live Using Facebook’s Built-in Feature
Facebook makes it easy for hosts to keep their live broadcasts without relying on third-party tools. Once a stream finishes, Facebook automatically saves the video, letting you download the Facebook Live replay straight to your device. This integrated feature ensures your content is protected and easily available for sharing or repurposing. This method offers a practical and dependable way for creators to quickly access their live recordings.
Let us find out how to save Facebook Live through Facebook’s built-in feature.
- Log in to your Facebook account. Then, search within the Videos (or Live) tab or your feed to locate the video.
- Then, click on the Facebook Live video you wish to save.
- On the upper right side of the screen, you’ll find three dots (...). Click on them.
A pop-up window will display multiple options for your video.
- Hit the “Download Video” button to save the video file to your device.
Note. When a video is on a Page, the Meta Business Suite under “Content” allows you to download it in SD or HD.
Final Wrap Up
Understanding how to record Facebook Live guarantees you won’t miss any important moments as a creator or viewer. With suitable tools and native features on your devices, storing live videos is quick and easy. Choose the method that fits your needs and start recording with ease.