Way 1. Record Overwatch on PC with AWZ Screen Recorder
AWZ Screen Recorder is a brilliant tool to record gameplay on PC, and while recording the gameplay, AWZ Screen Recorder tends to maintain the original video quality. Thus, using the AWZ Screen Recorder to clip Overwatch replays is highly recommended. Apart from recording your favorite gaming clips, it also lets you customize the numerous parameters of the Overwatch video.
Features
- Allows you to record Overwatch replays quickly
- Offers a simple user interface
- Record screen and webcam simultaneously
- Allows you to record the Overwatch gameplay in prolific video quality
- Export the recorded Overwatch videos in various video formats
- Offers the stunning free trial version
Here is how to record Overwatch on PC through AWZ Screen Recorder. Download the software and have a try.
Step 1: Start the AWZ Screen Recorder on the computer after installing it. Next, you'll need to launch the Overwatch game on your computer. Tap the Record Game icon in the AWZ Screen Recorder and hit the Select a Game icon to choose the game you want to record.

Step 2: After enabling microphone recording, system audio, and webcam, hit the Hamburg button to select Settings before changing the output settings per requirements.
Step 3: Click the REC button to start the recording procedure and then hit the F12 key to stop the video recording.
Way 2. Record Overwatch on PC via Xbox Game Bar
Xbox Bar is the built-in feature of Windows 10/11 that helps you record the gameplay without additional installation and downloads. With the simple user interface and the minimal impact on the system performance, the Xbox bar is a good choice for capturing the Overwatch gameplay.
Check to learn how to record Overwatch gameplay through the Xbox Game bar.
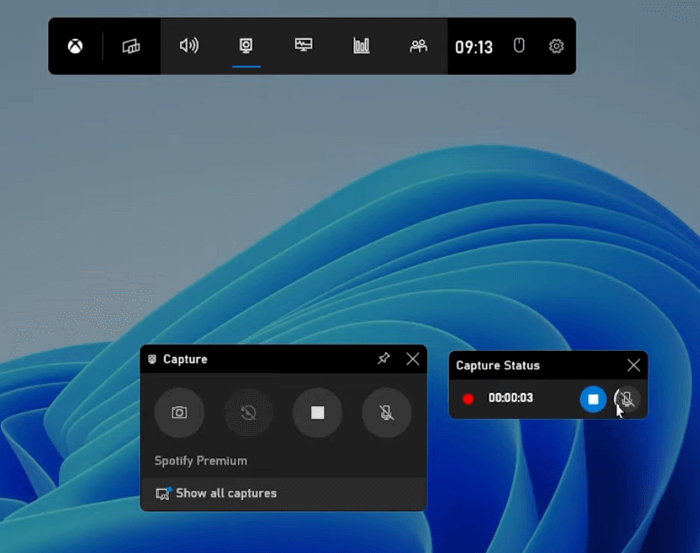
Step 1: Tap the Start button and click the Settings icon before hitting the Gaming button to launch the settings dialogue. Proceed by turning on the Game Bar.
Step 2: Click the Press+G button to launch the Game Bar before confirming that the Overwatch is detected as a game.
Step 3: After starting OverWatch, press the red circle button to initiate the recording proceedings. Now, you can see the timer on the game window. If you want to stop the recording, please hit the Stop icon. Now, you can access all the recordings from the Captures Folder.
![Xbox Game Bar Not Working on Windows 11/10 [7 Fixes]](https://img.swifdoo.com/image/xbox-game-bar-not-working.png)
Xbox Game Bar Not Working on Windows 11/10 [7 Fixes]
This post solves the Xbox Game Bar not working error with 7 fixes. Find the right solution to resolve the problem when it cannot record your screen or be opened
READ MORE >Way 3. Record Overwatch on PC via OBS Studio
OBS Studio is the abbreviation of the Open Broadcaster Software Studio, an open-source and reliable live-streaming program that supports recording the gameplay of Overwatch quickly. It offers plenty of recording modes, including gameplay capture, video devices, and Window displays, to fulfill all the game's requirements. Moreover, you can also access various custom settings, including the resolution, hotkey, aspect ratio, and more.
Step 1: Launch the OBS and navigate to the Sources, + icon, and Gameplay button.
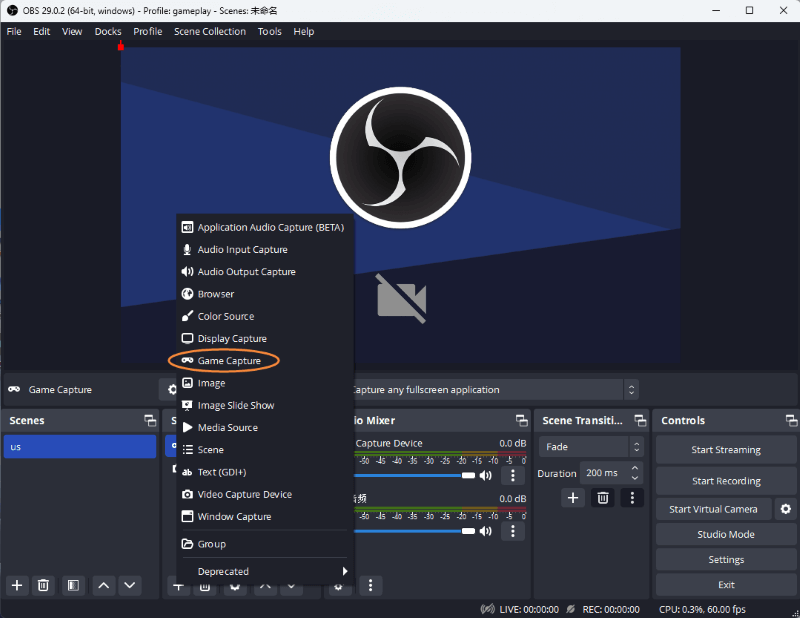
Step 2: After naming the project, press the OK icon. Next, choose the source representing the Overwatch game and click the OK icon afterward.
Step 3: Navigate to the Audio Mixer and determine the audio before hitting the Start icon.
Step 4: Click the Stop Recording button to end the recording and save it to the set or default directory. If you want to see the recording, visit the File and choose the Show your recording button.
Way 4. Record Overwatch on PC via Nvidia Shadow Play
If the computer uses GeForce GPU from Nvidia, you can also use the GeForce Experience, a built-in gameplay recorder. This gameplay recorder comes with NVIDIA Shadowplay, which enables you to record the last 15 seconds to 20 minutes on the computer through the Instant Replay feature. NVIDIA Shadow Play helps you create gaming videos at multiple quality levels.
Steps to clip Overwatch replays:
Step 1: Launch the GeForce Experience on the PC and log in with the GeForce Experience. Next, ensure the app detects the game you want to record. You can press the Scan for Games & Alls button to add the game to the GeForce Experience if it doesn't.
Step 2: If you're playing the game, press Alt-Z to launch the GeForce Experience Overlay. Next, tap the Settings icon and choose Video Capture to select the resolution, quality, and length.
Step 3: Press the Back icon and hit the Instant Replay icon before selecting the Turn on icon.
When playing the game, click the Alt-F10 to save the past gameplay to the computer. You can then visit the Gallary in the GeForce Experience to check the game clip.


How to Record Last 5 Minutes on PC | 4 Ways
This guide will show you how to record last 5 minutes on PC. You can choose from built-in or third-party tools to accomplish the task as needed.
READ MORE >Bottom Line
If you want to know how to record Overwatch on pc, this post could be a game-changer. We've listed some breathtaking ways to record the Overwatch gameplay on a computer. All the options listed in this guide will help you record the gameplay in magnificent video quality, and you can try each option one by one to access the most reliable options.
AWZ Recorder remains the best option for recording the Overwatch gameplay; while recording the Overwatch gameplay, this tool retains excellent video quality. Hope this AWZware guide is helpful.