Use a Professional Desktop Program
There are many screen recording programs. They are great if you want to make high-quality videos or record for a long time. Below are two recommended ones.
Tool 1. Free AWZ Screen Recorder
Free AWZ Screen Recorder is a very powerful program for both Windows and Mac computers. The best part is that it is completely free. When you save your video, there will be no ugly watermarks on your screen. With this tool, you can easily record screen and webcam at the same time.
✅ It is a screen recorder with no time limit, meaning you can record a video that is as long as you need.
✅ It also lets you choose what part of your screen to record. You can record the whole screen, just one open window, or a small custom box that you draw yourself.
Let’s see how to record yourself and screen at the same time using AWZ Screen Recorder.
- Download, install, and launch AWZ Screen Recorder.
- Choose what you want to record. Click Full Screen or choose a custom region.
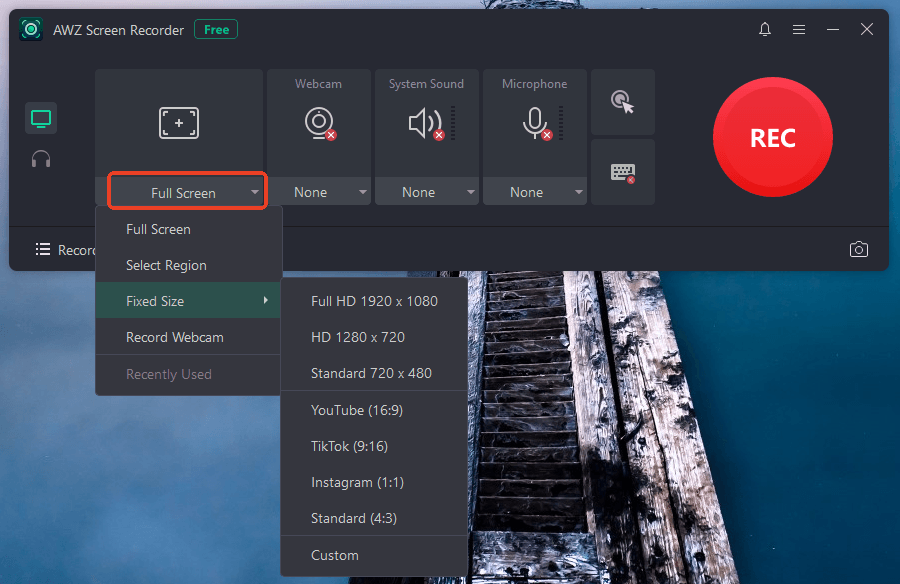
- Turn on the Webcam, and System Sound switch. Also, turn on the Microphone switch so people can hear you.
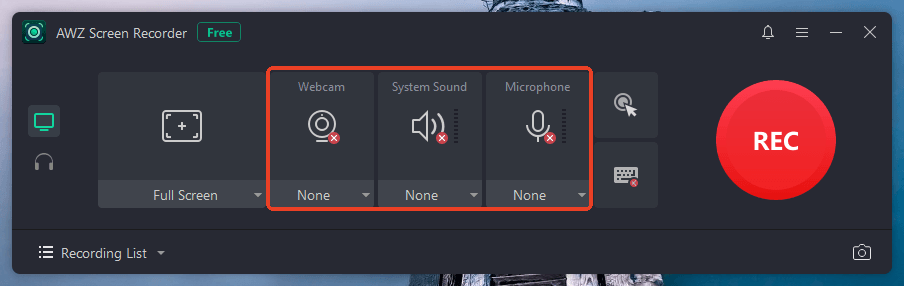
- Click the big REC button. Now you are recording your screen and your face!
- When you are done talking, click the red Stop square. Your video will be saved automatically.
Tool 2. OBS Studio
OBS Studio is another free desktop program. It is open-source, which means it is free forever. Many professional video makers use this program. It lets you put different videos and pictures on top of each other. It is a wonderful choice if you want to record yourself presenting a PowerPoint for school or work.
Steps to use OBS Studio:
- Download and open OBS Studio.
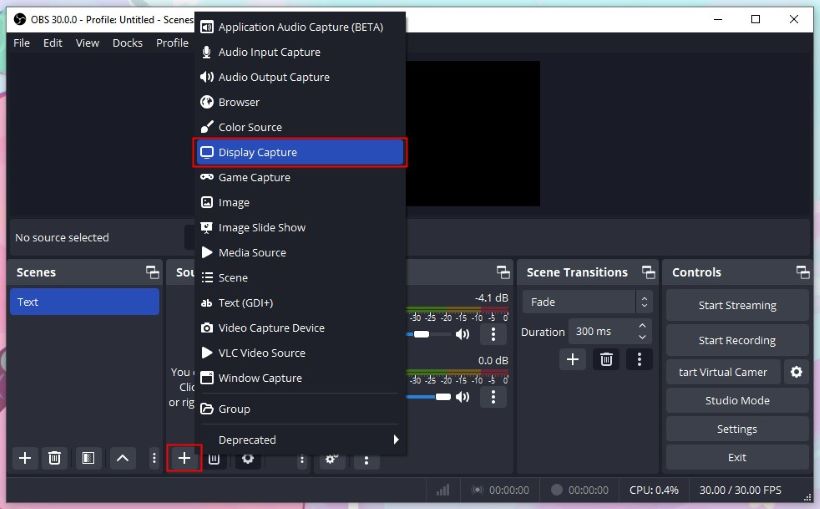
- Look at the bottom for a box named Sources. Click the + icon and click Display Capture. This puts your screen into the video.
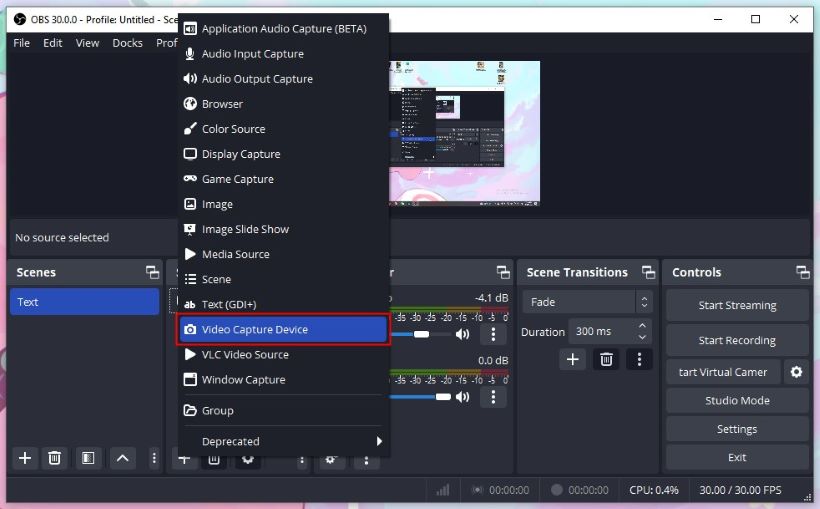
- Click the + icon again and click Video Capture Device. This turns on your webcam.
- You will see a box showing your face. Use your mouse to click the corners of that box. Make it smaller and drag it to the corner of your screen.
- Click the Start Recording button on the right side of the screen to begin. Click Stop Recording when you are finished.
![5 Best OBS Alternatives for Recording and Streaming [2024 Latest]](https://img.swifdoo.com/image/obs-alternative.png)
5 Best OBS Alternatives for Recording and Streaming [2024 Latest]
Are you looking for an OBS alternative to stream videos or record your screen? This post introduces the 5 best OBS Studio alternatives that are easy to use.
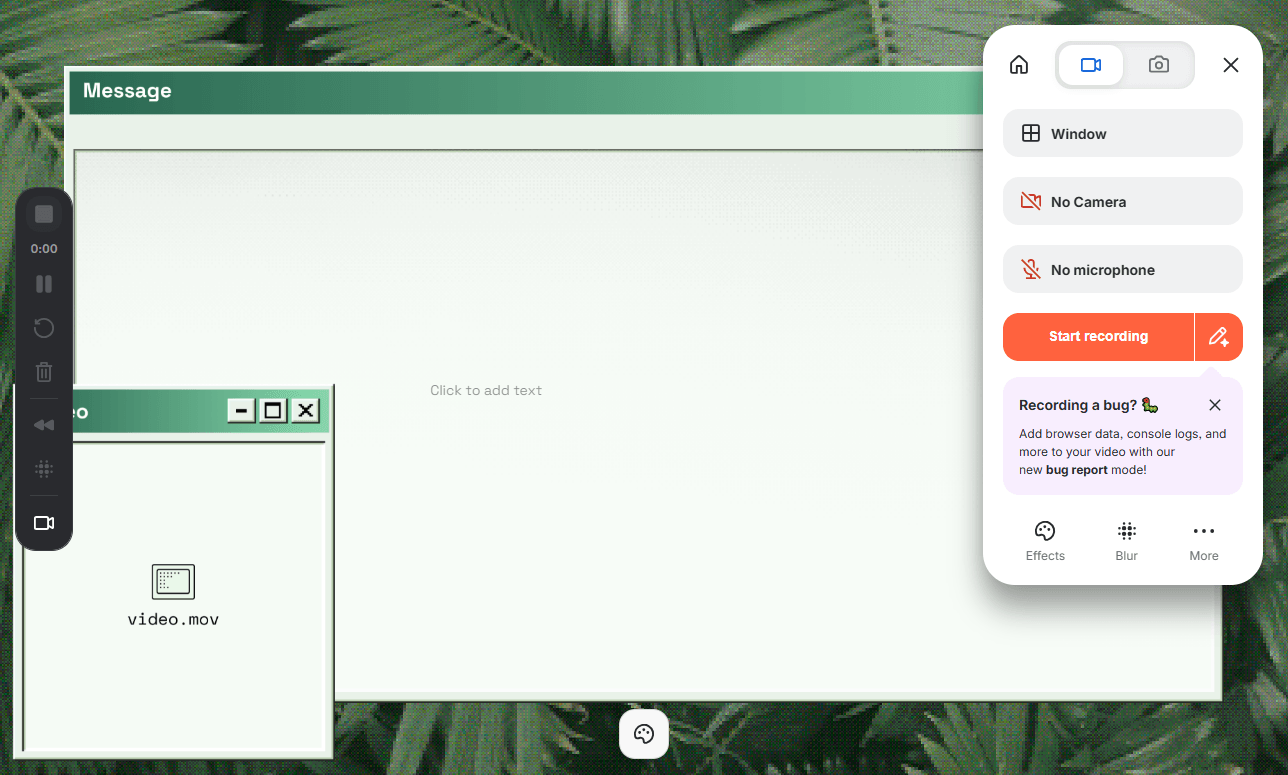
READ MORE >Use a Browser Extension
A browser extension is a small tool you add to your web browser, like Google Chrome. These are perfect because you do not need to download heavy programs. They are very fast and simple to use.
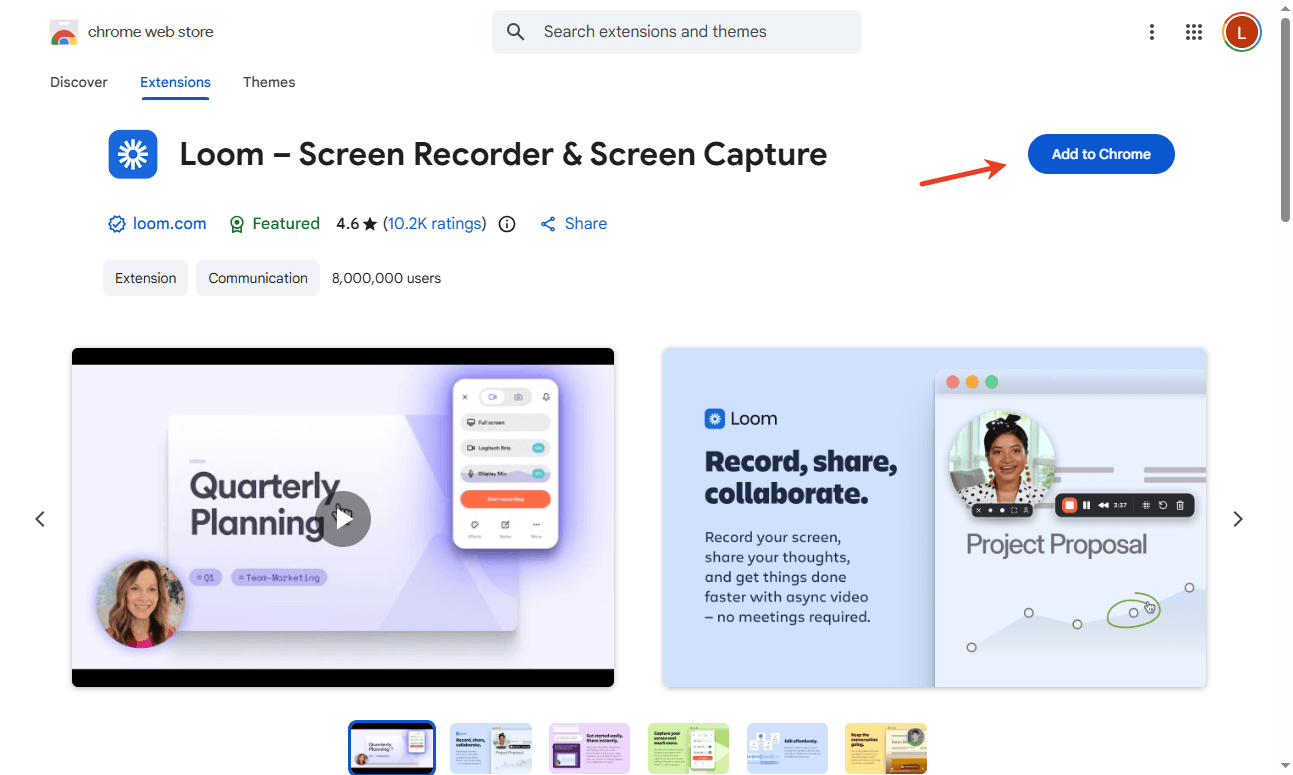
Tool 1. Loom
Loom is one of the most famous tools for making quick videos. People love Loom because it saves your video to the internet right away. You do not have to wait for the video to process. If you want to know how to record screen and yourself at the same time and share it in seconds, Loom is the best choice.
How to use Loom:
- Go to the browser web store, find Loom, and add it. Follow the prompts to create an account.
- To start a recording, click the small Loom icon at the top of your browser.
- Click the option that says Screen and Camera.
- Check that it is using the correct camera and microphone.
- Click Start recording. A small bubble with your face will appear on the screen.
- Click the green checkmark to finish. Loom will give you a link to your video right away. You can send this link to anyone.
Tool 2. Screencastify
Screencastify is another great extension, especially if you use Google Chrome. Its best feature is that it connects directly to your Google Drive. When you record yourself and your screen at the same time, the video is automatically saved to your Google Drive folder.
Steps to record with Screencastify:
- Add the Screencastify extension to Google Chrome.
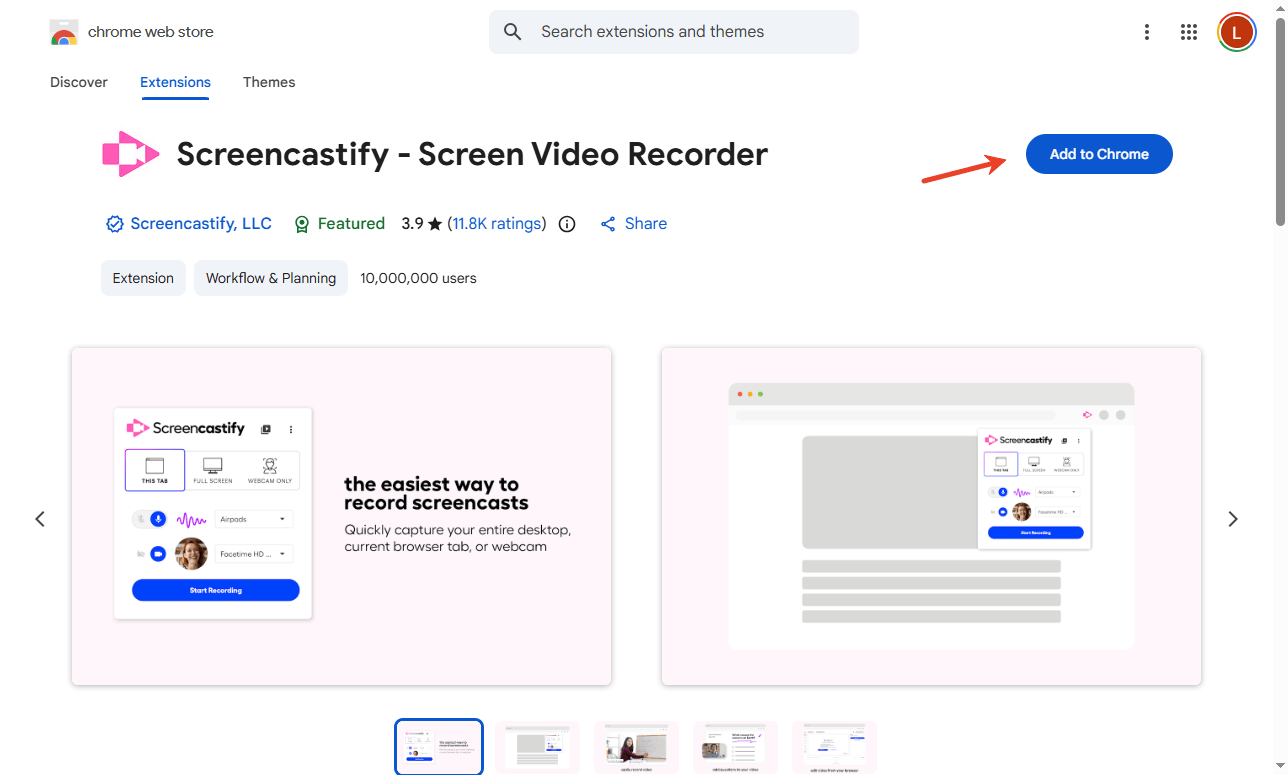
- Click the Screencastify icon at the top of the browser.
- Choose if you want to record your whole Desktop or just one Browser tab.
- Turn on the switch that says Embed Webcam. Make sure your microphone is on, too.
- Click the Record button.
- Click the stop button when you are done. The video is now safely in your Google Drive.
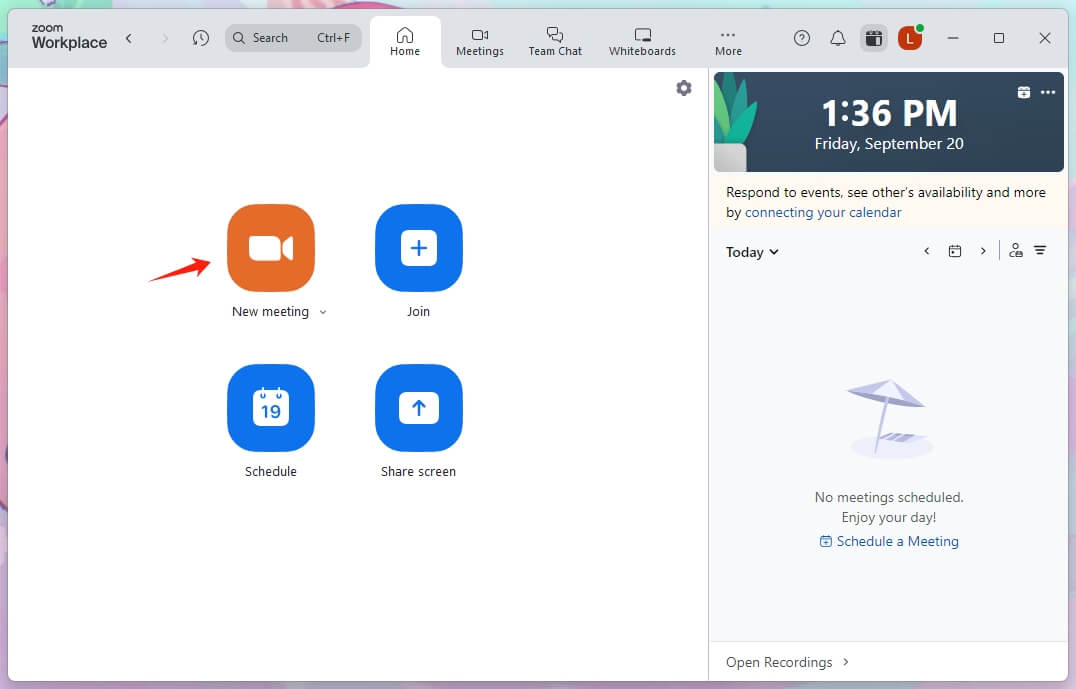
4. Use Zoom App
You might already know Zoom from online meetings with your friends or coworkers. But did you know you can use it to record videos on your own? It is a very easy way to record a presentation on Zoom without downloading any new tools.
Steps to record:
- Open the Zoom app on your computer.
- Click the orange New Meeting button. You will be the only person in this meeting.
- Turn on your video camera and unmute your microphone.
- Click the green Share Screen button at the bottom. Choose the screen or the presentation you want to show.
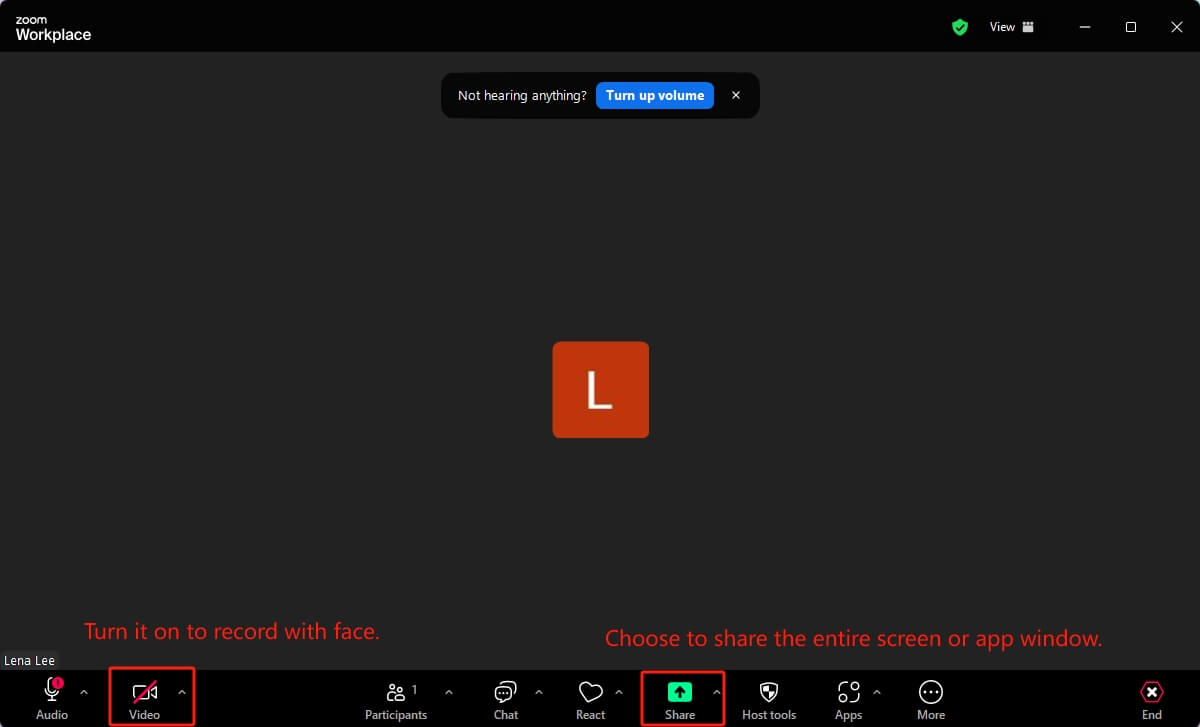
- Look at the Zoom menu. Click the Record button.
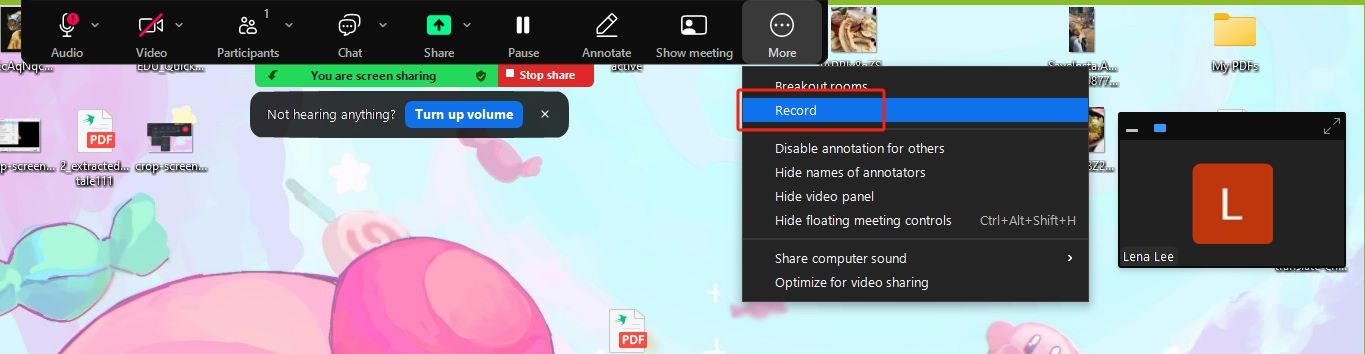
- Start talking and showing your screen. When you are done, click Stop Recording and then click End Meeting. Zoom will save a video file to your computer.
Conclusion
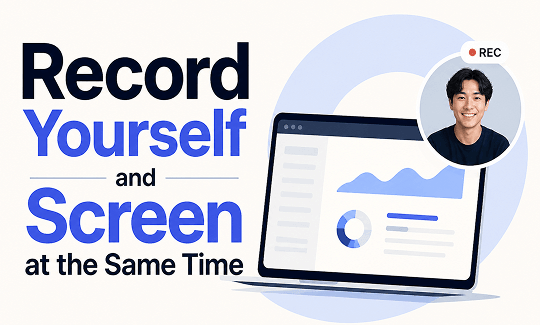
That’s all about how to record yourself and screen at the same time. Making a video with your face and your screen is easier than ever. It helps people connect with you while they learn.
The best tool just depends on what you need. If you want a clear, free video with lots of options, try Free AWZ Screen Recorder. If you need to share a video fast, use a tool like Loom. Pick a tool from this list and try making your first video today!